
nugget
I Love My Toyota.
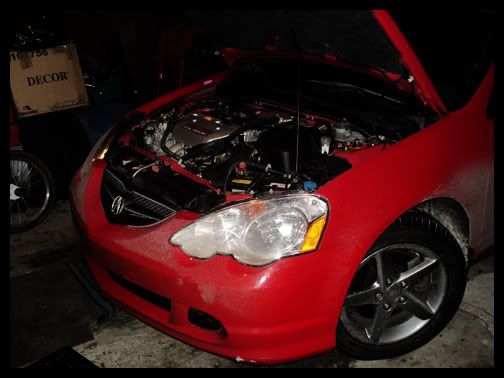
DIY for a friends 2002 RSX Type-S. its not an integra, well ya it is but ya whatever... you get the picture.. ")
Approx Time: 3hrs.
Materials:
Phillips & Flat head screw drivers
Heat Gun
Silicone Glue
Scotch Bright
Flat Black Paint
10mm socket
paper towel & windex
masking tape
remove plastic screw clips located at the top of the grill and remove the top
10mm bolts (4 in total) that hold the headlights in place.
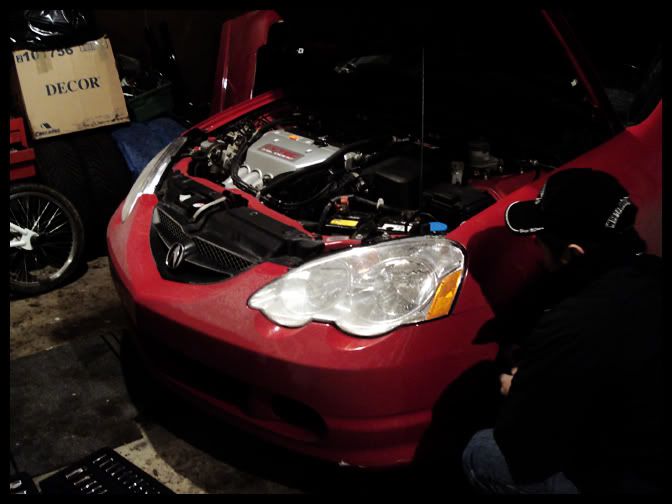
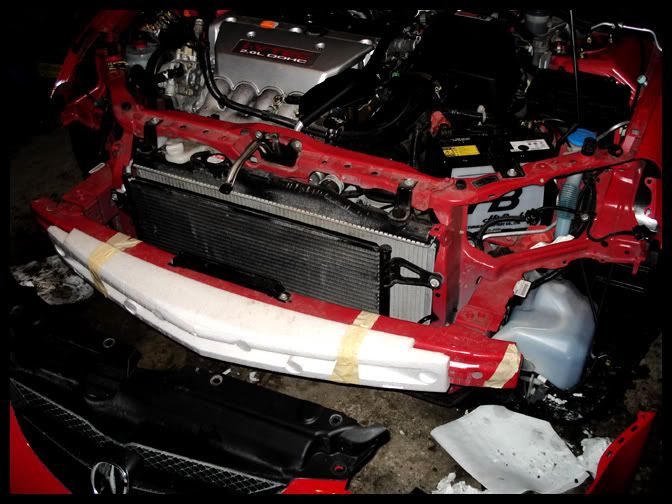
Remove the front bumper by using the phillips to unscrew the two screws that
are located in the front of the wheel wells and the four plastic screw clips under the bumper.
Remove the headlights by unscrewing the 10mm bolts that are located on the lower brackets below the headlights. 4 in total and very difficult to get to.
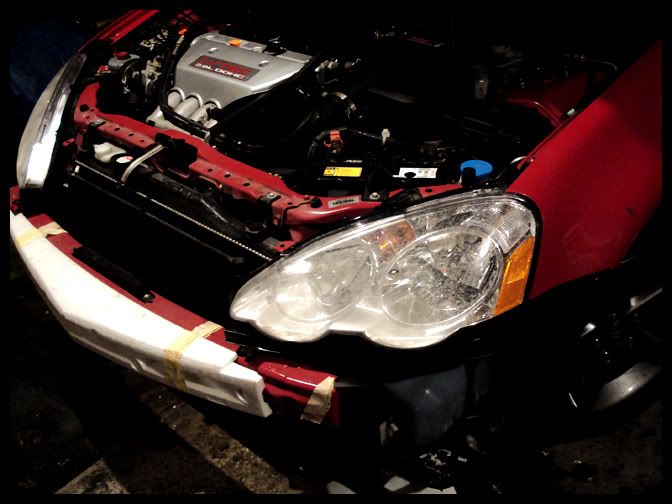
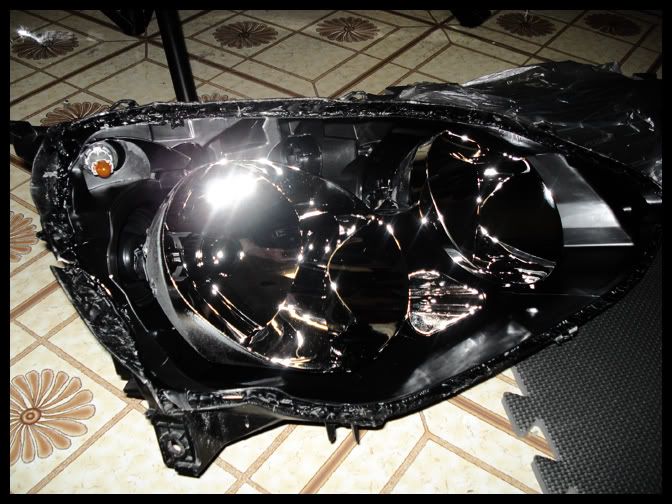
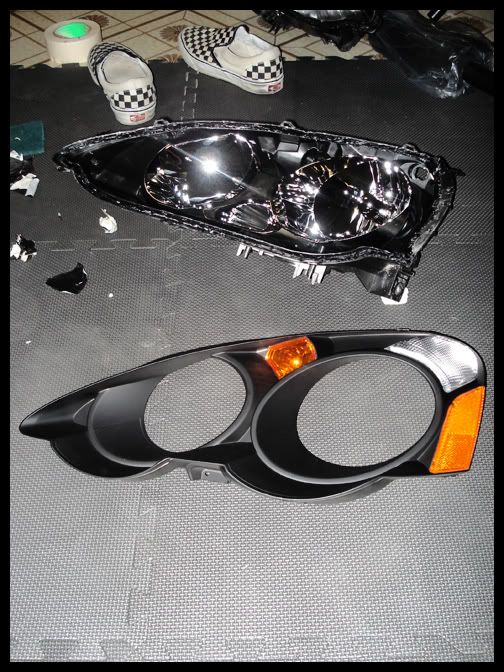
using the heat gun, gradually heat the edges of the headlights. carefully pry the front lense from the back housing with a flat screw driver. make sure you heat the glue very well to make it easier to pry the housing from the lense.
their should then be a small phillips screw to remove in order to take the chrome housing apart from the lense.
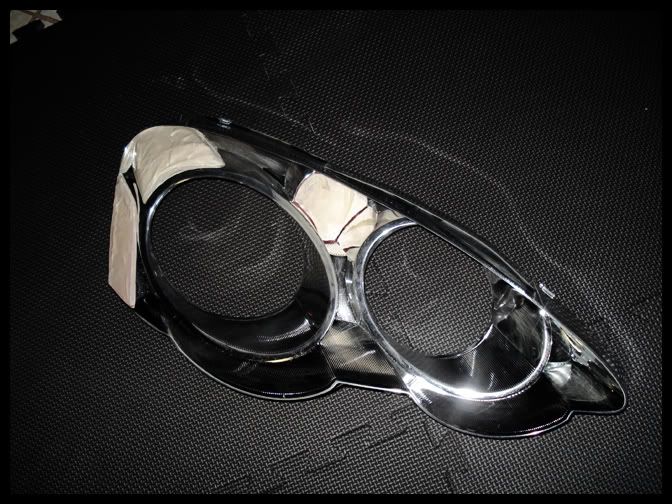
once you have the headlight apart, carefully mask the reflectors off with masking tape then using the scotch bright and lightly score the chrome housing. now clean the housing from dust and once that is done, you should be ready for paint.
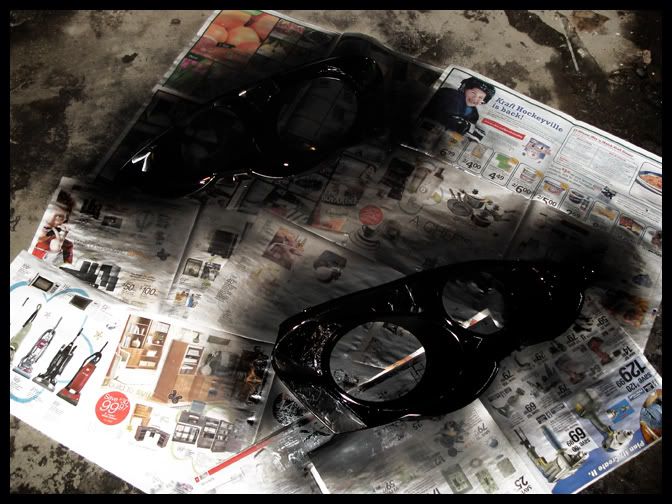
using a flat black paint, start spraying even coats of paint to the housing. i basicly sprayed as much as i thought was needed so it may vary from personal preferance. let the paint sit for roughly 10 -15mins.
once the paint has dried, this is basicly what you should get.
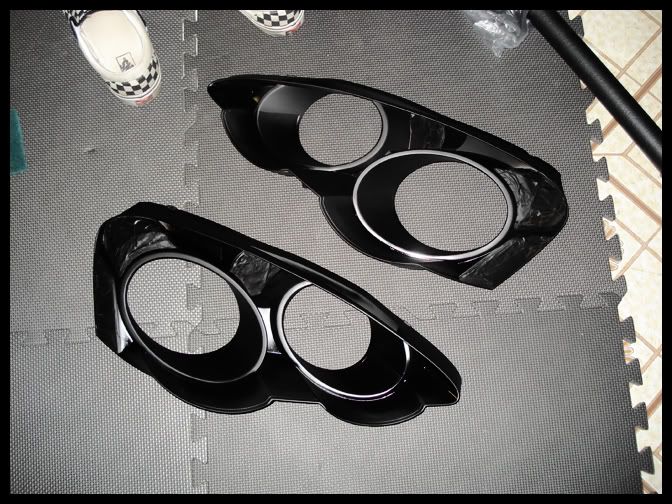
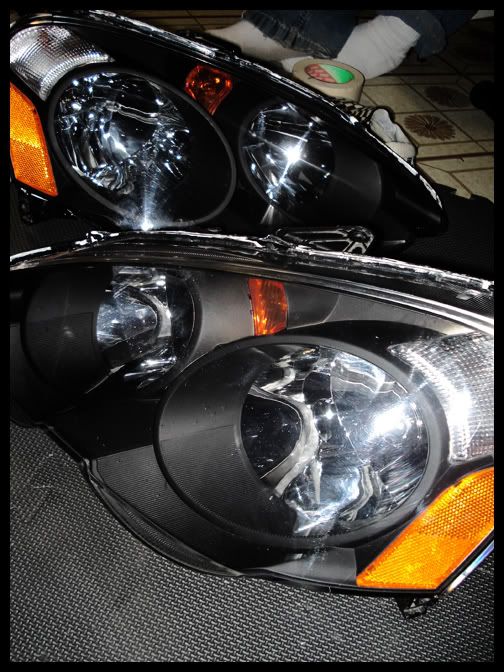
carefully unmask the reflectors
reasemble the headlights with the small phillips to the housing to the lense and reheat the existing glue and firmly press the housing to the lense together. once that is done, apply the silicone glue around the edges to make sure no moisture gets inside of the headlight.
here are the results:
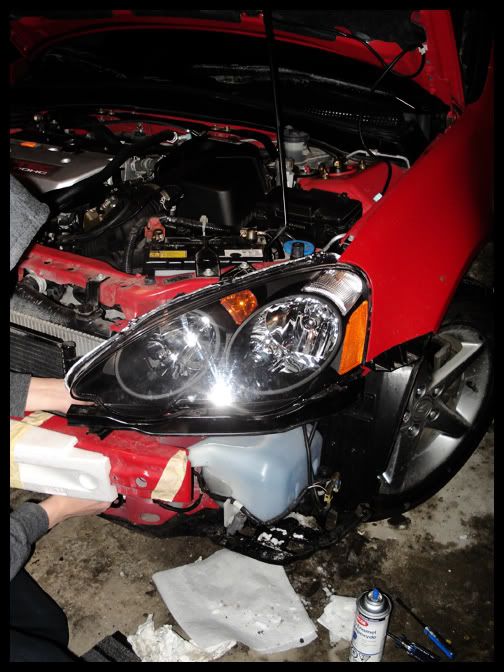
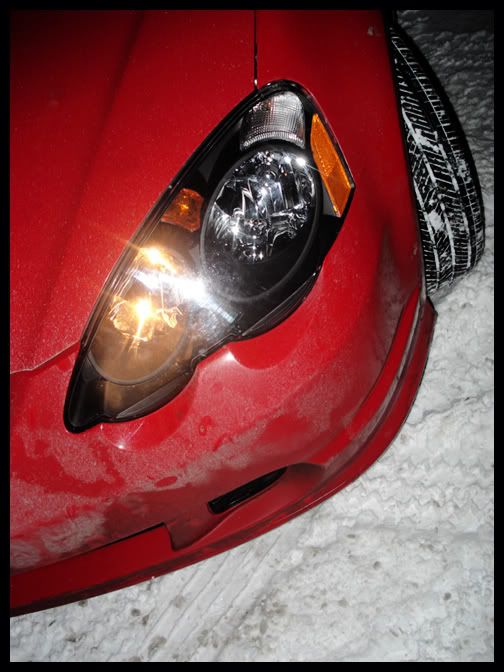
carefully apply the headlights back into the vehicle then followed by the bumper.
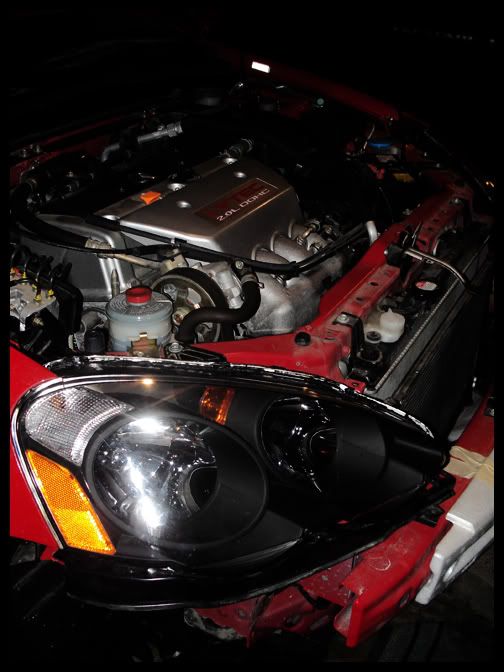
the finished product
this DIY was done in my garage and took approx 3hrs. to do in -5 degree weather. i do suggest you do this in a more warmer climate but my buddy was too excited to wait so i offered to do it for him. i hope this will help someone who is looking to do DIY on their RSX or a friends. the process is pretty much the same as any DIY headlight job so this i a rough idea on what you will be getting yourself into. enjoy. :smrt:
-Kemp
Approx Time: 3hrs.
Materials:
Phillips & Flat head screw drivers
Heat Gun
Silicone Glue
Scotch Bright
Flat Black Paint
10mm socket
paper towel & windex
masking tape
remove plastic screw clips located at the top of the grill and remove the top
10mm bolts (4 in total) that hold the headlights in place.
Remove the front bumper by using the phillips to unscrew the two screws that
are located in the front of the wheel wells and the four plastic screw clips under the bumper.
Remove the headlights by unscrewing the 10mm bolts that are located on the lower brackets below the headlights. 4 in total and very difficult to get to.
using the heat gun, gradually heat the edges of the headlights. carefully pry the front lense from the back housing with a flat screw driver. make sure you heat the glue very well to make it easier to pry the housing from the lense.
their should then be a small phillips screw to remove in order to take the chrome housing apart from the lense.
once you have the headlight apart, carefully mask the reflectors off with masking tape then using the scotch bright and lightly score the chrome housing. now clean the housing from dust and once that is done, you should be ready for paint.
using a flat black paint, start spraying even coats of paint to the housing. i basicly sprayed as much as i thought was needed so it may vary from personal preferance. let the paint sit for roughly 10 -15mins.
once the paint has dried, this is basicly what you should get.
carefully unmask the reflectors
reasemble the headlights with the small phillips to the housing to the lense and reheat the existing glue and firmly press the housing to the lense together. once that is done, apply the silicone glue around the edges to make sure no moisture gets inside of the headlight.
here are the results:
carefully apply the headlights back into the vehicle then followed by the bumper.
the finished product
this DIY was done in my garage and took approx 3hrs. to do in -5 degree weather. i do suggest you do this in a more warmer climate but my buddy was too excited to wait so i offered to do it for him. i hope this will help someone who is looking to do DIY on their RSX or a friends. the process is pretty much the same as any DIY headlight job so this i a rough idea on what you will be getting yourself into. enjoy. :smrt:
-Kemp
