jeepers94
93 Integra GS
This write-up can be used to either give your 90 and 91 taillights a more clear looking reverse and turn signal lens. If you have a 92 or 93 integra you can do what I did and buy a set of 90 or 91 taillights and follow these steps to give your car a cleaner look. I know it may seem like I am over explaining things, but I want to make it as clear as possible so some people that are unsure of working on cars can see how easy it is. Yes it looks long, but its fairly simple. just keep your cool even when things aren't working exactly right.
TIME: depends on how well you keep your cool and how car savvy you are. I did this in 6 hours only because I allowed the lights to air dry for like 5 hours while I did other stuff. otherwise it only took me like an hour to do remove my taillights and white them out.
TOOLS AND MATERIALS:
-Big Philips head screw driver
-Small philips head screw driver
-Small flat head screw driver
-1/4" ratchet with 5/16" deep well socket and extension
-pliers
-a scraper or other tool good for prying (may need if some of the screw lock setups are broke)
-Super clean, mean green, or purple power, or other industrial strength degreaser.
-a hose or sink to rinse out the taillights
I-'m not sure what to call them but you may want to buy some more of the plastic screws inside an expanding plastic piece. I will refer to these as screw brackets.
-towels
-blow dryer
-weather stripping foam with a sticky side (optional if the gasket seals are broke or messed up on the taillights)
*IMPORTANT* if you are clearing out your old lights you won't need new bulbs, but if your switching from 92 or 93 lights to the 90 or 91 lights you need to get a new turnsignal bulb that is the same size as the old one but in amber. it is illegal to have clear bulbs in a turn signal.
DIRECTIONS:
Before:

step#1: take out everything in your trunk and fold down the back seats. then take out the cargo cover, fold the carpeting onto the back seats and take out to base flooring in the trunk.
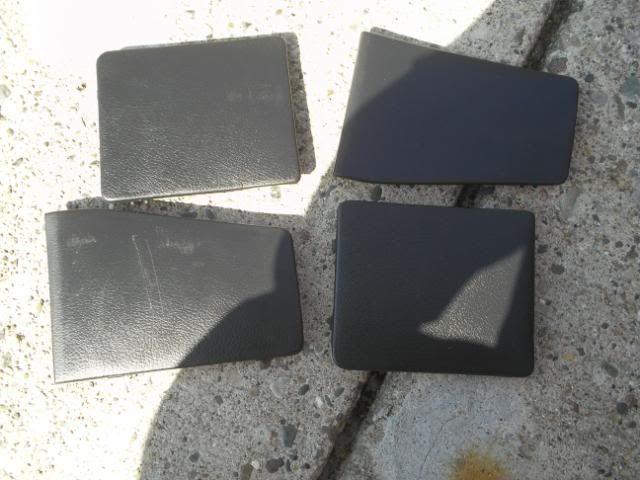
step#2: take off the covers that access the taillight bulbs and set aside and remeber where they go. there are four total.
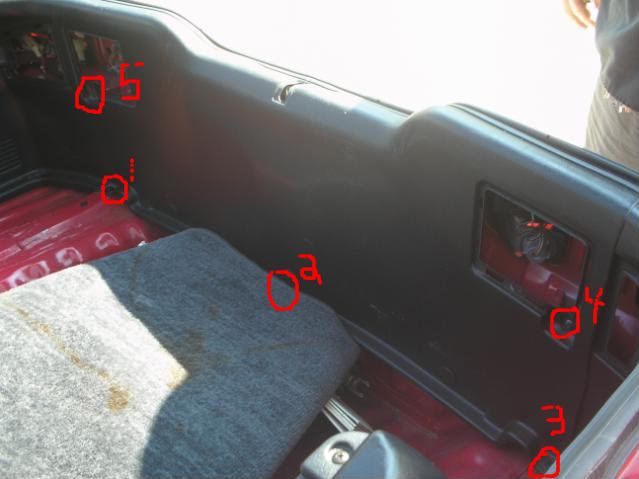
step#3: now remove the 5 screws holding on the back panel. there are three along the bottom and two where the covers were. you may need to pry up the bottom ones if they are old or broken. just use a screw driver or scraper. then with the small flat head screwdriver at the top of the panel pry up on the panel between the rubber trunk seal and plastic panel. Don't be afraid to pry to much as the little brackets holding the panel in place are a little tight. Just don't do it to hard or you will bend the plastic.
step#4: next you will need to do this step to both of the side panels. remove the two lower screw bracket and again you may need to pry or break them loose. you only need to remove the two because in the end it will allow you to just bend the panel back enough to work around it. its not necessary to remove the entire thing.
step#5: now you need to remove the speaker covers from both side. there are three screws total holding this on. I forgot to take a picture but there are two that are simple to find and then another one that was covered by the back seat. you may need to get in the back seat to see it. this is what it should look like after the cover is off.
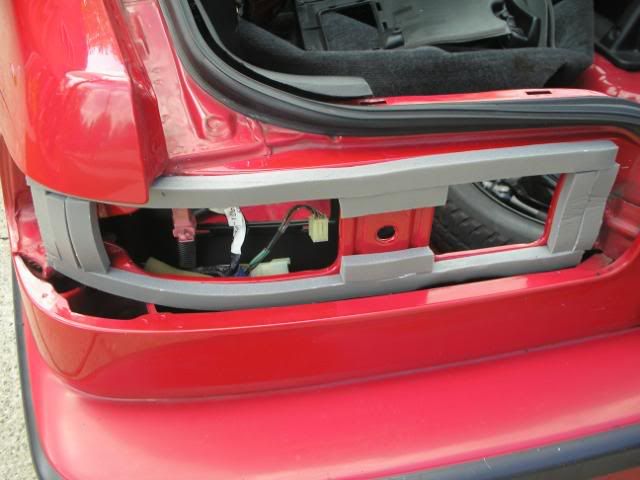
step#6: take out the big screw that is now visible and then pry up on the panel to remove it from the brackets.
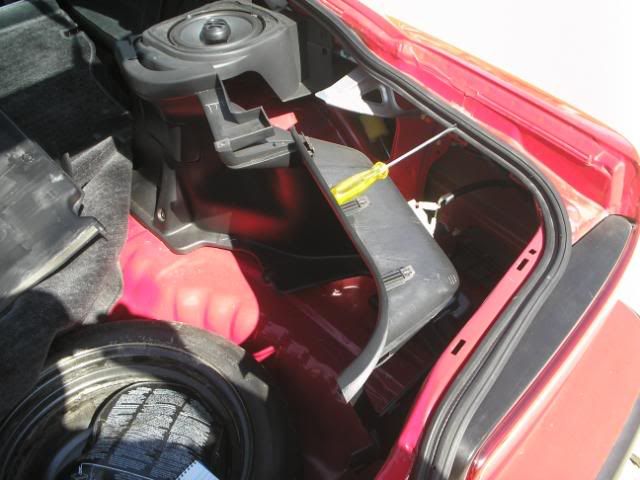
step#6: if this is done properly then you should now have something that looks like this
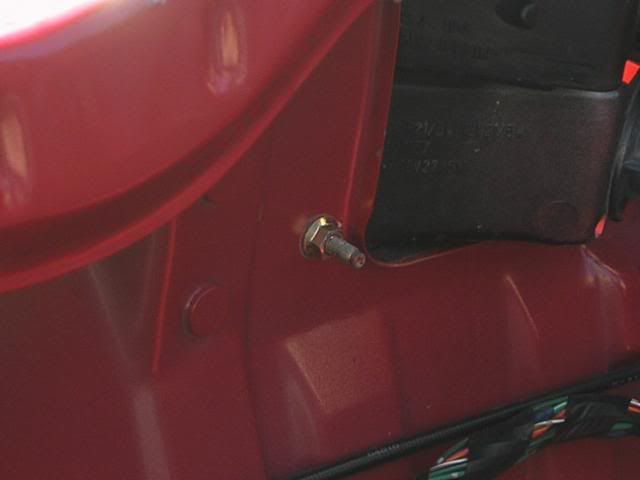
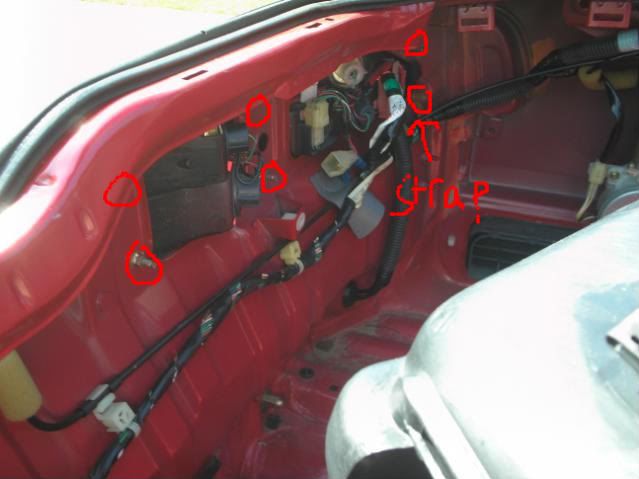
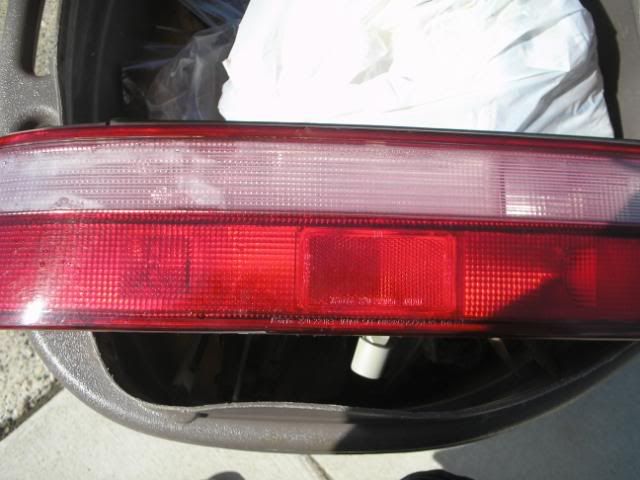
step#7: remeber to do this step to both sides of the car. you will have to use the ratchet to remove six nuts from the studs holding the taillight onto the car. they look like the one in the first pic. and you may need to remove the little strap that holds the wires in place on one of them inoreder to take it off.
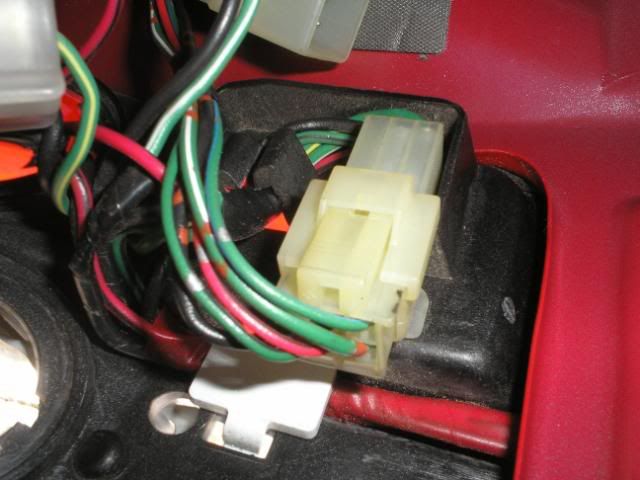
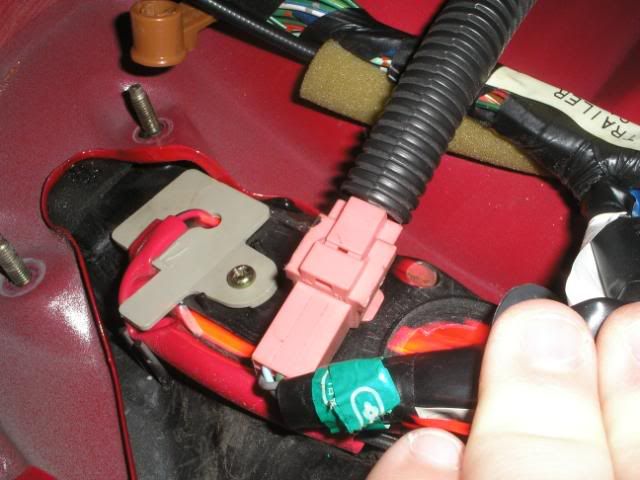
step#8: before removing the taillights you have to disconnect one plug and take anpther one out to remove the taillight assembly.
unplug
use pliers to pull out completely
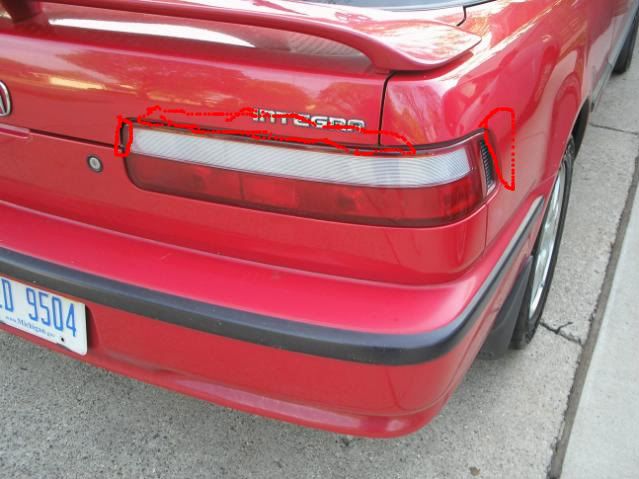
step#9: now it is time to remove the taillight. it may feel snug so you may need to use a screw driver to pry it free. the pics show possible places to pry from, but be careful not to pry against the paint on the outside or to hard to break the taillight itself. just look for a spot on the inside to pry on the plastic part of the taillight and a part of the metal on the car. the pic show places to pry when the hatch is open.
step#10: I just wanted to thank Ominous G2 for giving me the tip on clearing out the taillights. now its time to white out the 90-91 taillights. this means to either white out the ones already on your car or white out the ones you bought. take out all the sockets to expose the holes. next pour about 1/2 cup of whatever industrial degreaser you have into the taillight and slosh it around for about 30 seconds, but make sure you keep it moving or it may leave a pink spot where it sits. next just dump out the degreaser and immediatly use the hose or sink to rinse out the taillights. make sure all of the degreaser is out. then shake out the excess water and use a towel to dry the outside of the light. then either let the taillight air dry or use a blow dryer to make sure all of the water is gone. I let mine sit for about 5 hours in the sun and then used the dryer to get the rest dried up. this is what the tailioght will look like if done correct.
Before
After
step#11: This next step is only necessary if your old gasket is brittle or broken. you may go and buy the new seals at the dealership for 28 each, but seeing as I only paid 30 for the taillights I decided to make my own. I used a weatherstripping that was sticky on one side and put the sticky side to the metal on the car like in the picture making sure to get clean edges that don't allow any water into the taillights.
step #12: now line up the taillight and push the studs on the taillight into the slots on the car. then put the nuts on the stud and tighten them down in a crossing and clockwise pattern. DO NOT over tighten or you may end up breaking off the stud. Then just make sure to put the bulbs back in and attach the two wire connectors back to the taillight assembly you just installed. Then put everything back in reverse order and the job is almost done.
step#13: after getting everything back into the car including the base floor and cargo cover, have another person help check to make sure the running lights, brake lights, reverse lights, turn signals, and hazard lights all work. Then you are finally done with the project.
**********VERY IMPORTANT************************************************************************************************
when switching from the 92 and 93 taillights with an amber lense you will need to buy a new light bulb for the turn signal. It is against the law to have a clear bulb in the turn siganl slot. Just go to an auto parts store and whatever bulb you had in your old taillight for the turn signal, get the same size bulb but in an amber colored bulb.
********************************************************************************************************************************
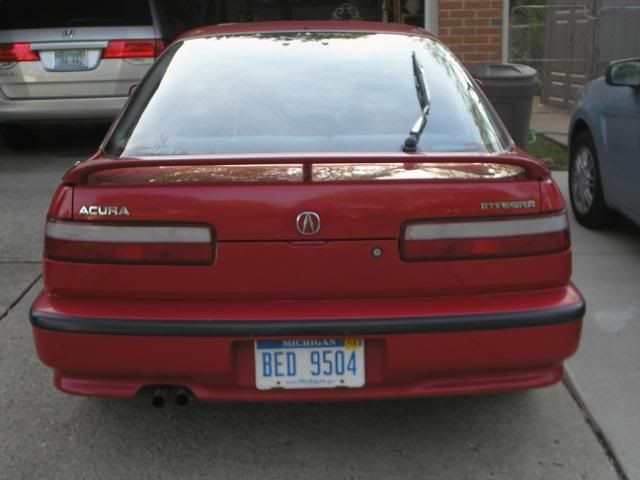
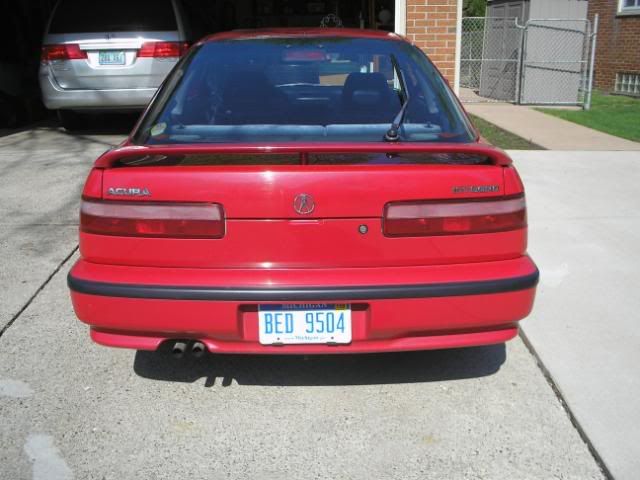
This is what the lights look like before and after. like I said this can either be used to clean up the current taillights on a 90 or 91 or used to switch the 92 and 93 taillights to the 90 or 91 ones for a cleaner look.
Before:
After:
TIME: depends on how well you keep your cool and how car savvy you are. I did this in 6 hours only because I allowed the lights to air dry for like 5 hours while I did other stuff. otherwise it only took me like an hour to do remove my taillights and white them out.
TOOLS AND MATERIALS:
-Big Philips head screw driver
-Small philips head screw driver
-Small flat head screw driver
-1/4" ratchet with 5/16" deep well socket and extension
-pliers
-a scraper or other tool good for prying (may need if some of the screw lock setups are broke)
-Super clean, mean green, or purple power, or other industrial strength degreaser.
-a hose or sink to rinse out the taillights
I-'m not sure what to call them but you may want to buy some more of the plastic screws inside an expanding plastic piece. I will refer to these as screw brackets.
-towels
-blow dryer
-weather stripping foam with a sticky side (optional if the gasket seals are broke or messed up on the taillights)
*IMPORTANT* if you are clearing out your old lights you won't need new bulbs, but if your switching from 92 or 93 lights to the 90 or 91 lights you need to get a new turnsignal bulb that is the same size as the old one but in amber. it is illegal to have clear bulbs in a turn signal.
DIRECTIONS:
Before:
step#1: take out everything in your trunk and fold down the back seats. then take out the cargo cover, fold the carpeting onto the back seats and take out to base flooring in the trunk.
step#2: take off the covers that access the taillight bulbs and set aside and remeber where they go. there are four total.

step#3: now remove the 5 screws holding on the back panel. there are three along the bottom and two where the covers were. you may need to pry up the bottom ones if they are old or broken. just use a screw driver or scraper. then with the small flat head screwdriver at the top of the panel pry up on the panel between the rubber trunk seal and plastic panel. Don't be afraid to pry to much as the little brackets holding the panel in place are a little tight. Just don't do it to hard or you will bend the plastic.
step#4: next you will need to do this step to both of the side panels. remove the two lower screw bracket and again you may need to pry or break them loose. you only need to remove the two because in the end it will allow you to just bend the panel back enough to work around it. its not necessary to remove the entire thing.
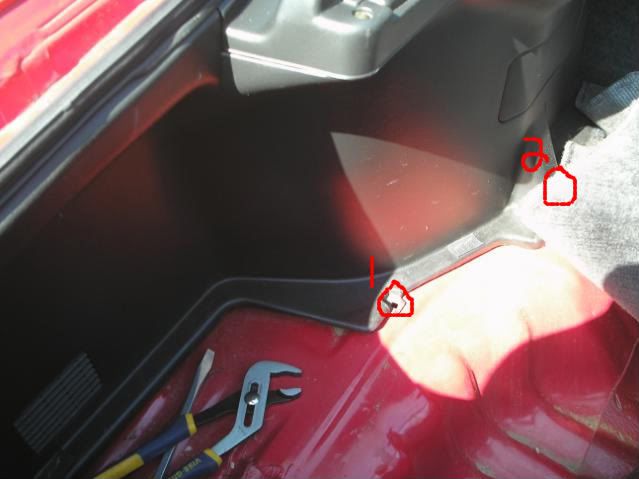
step#5: now you need to remove the speaker covers from both side. there are three screws total holding this on. I forgot to take a picture but there are two that are simple to find and then another one that was covered by the back seat. you may need to get in the back seat to see it. this is what it should look like after the cover is off.
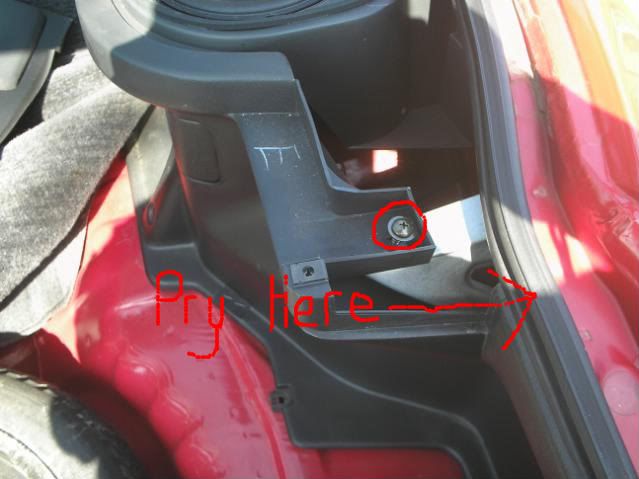
step#6: take out the big screw that is now visible and then pry up on the panel to remove it from the brackets.
step#6: if this is done properly then you should now have something that looks like this
step#7: remeber to do this step to both sides of the car. you will have to use the ratchet to remove six nuts from the studs holding the taillight onto the car. they look like the one in the first pic. and you may need to remove the little strap that holds the wires in place on one of them inoreder to take it off.
step#8: before removing the taillights you have to disconnect one plug and take anpther one out to remove the taillight assembly.
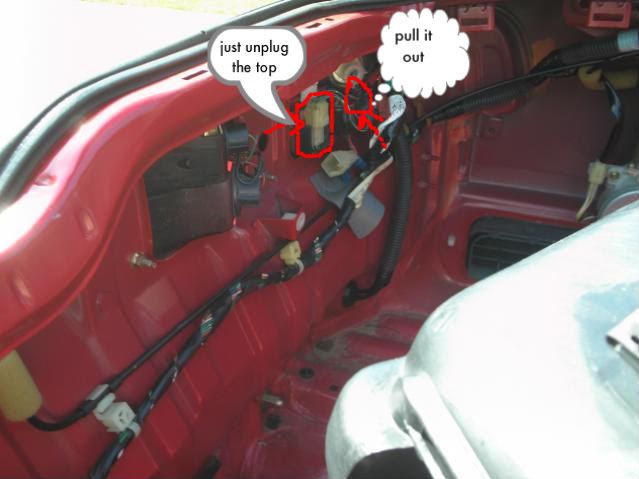
unplug
use pliers to pull out completely
step#9: now it is time to remove the taillight. it may feel snug so you may need to use a screw driver to pry it free. the pics show possible places to pry from, but be careful not to pry against the paint on the outside or to hard to break the taillight itself. just look for a spot on the inside to pry on the plastic part of the taillight and a part of the metal on the car. the pic show places to pry when the hatch is open.

step#10: I just wanted to thank Ominous G2 for giving me the tip on clearing out the taillights. now its time to white out the 90-91 taillights. this means to either white out the ones already on your car or white out the ones you bought. take out all the sockets to expose the holes. next pour about 1/2 cup of whatever industrial degreaser you have into the taillight and slosh it around for about 30 seconds, but make sure you keep it moving or it may leave a pink spot where it sits. next just dump out the degreaser and immediatly use the hose or sink to rinse out the taillights. make sure all of the degreaser is out. then shake out the excess water and use a towel to dry the outside of the light. then either let the taillight air dry or use a blow dryer to make sure all of the water is gone. I let mine sit for about 5 hours in the sun and then used the dryer to get the rest dried up. this is what the tailioght will look like if done correct.
Before
After
step#11: This next step is only necessary if your old gasket is brittle or broken. you may go and buy the new seals at the dealership for 28 each, but seeing as I only paid 30 for the taillights I decided to make my own. I used a weatherstripping that was sticky on one side and put the sticky side to the metal on the car like in the picture making sure to get clean edges that don't allow any water into the taillights.
step #12: now line up the taillight and push the studs on the taillight into the slots on the car. then put the nuts on the stud and tighten them down in a crossing and clockwise pattern. DO NOT over tighten or you may end up breaking off the stud. Then just make sure to put the bulbs back in and attach the two wire connectors back to the taillight assembly you just installed. Then put everything back in reverse order and the job is almost done.
step#13: after getting everything back into the car including the base floor and cargo cover, have another person help check to make sure the running lights, brake lights, reverse lights, turn signals, and hazard lights all work. Then you are finally done with the project.
**********VERY IMPORTANT************************************************************************************************
when switching from the 92 and 93 taillights with an amber lense you will need to buy a new light bulb for the turn signal. It is against the law to have a clear bulb in the turn siganl slot. Just go to an auto parts store and whatever bulb you had in your old taillight for the turn signal, get the same size bulb but in an amber colored bulb.
********************************************************************************************************************************
This is what the lights look like before and after. like I said this can either be used to clean up the current taillights on a 90 or 91 or used to switch the 92 and 93 taillights to the 90 or 91 ones for a cleaner look.
Before:
After: