So I got a couple requests to show how I did my computer system in my DA. It's a little hard to do since everything is basically done a bolted on already, but I took some of the dash and seats apart today to show as best I can how to do it. Here goes....
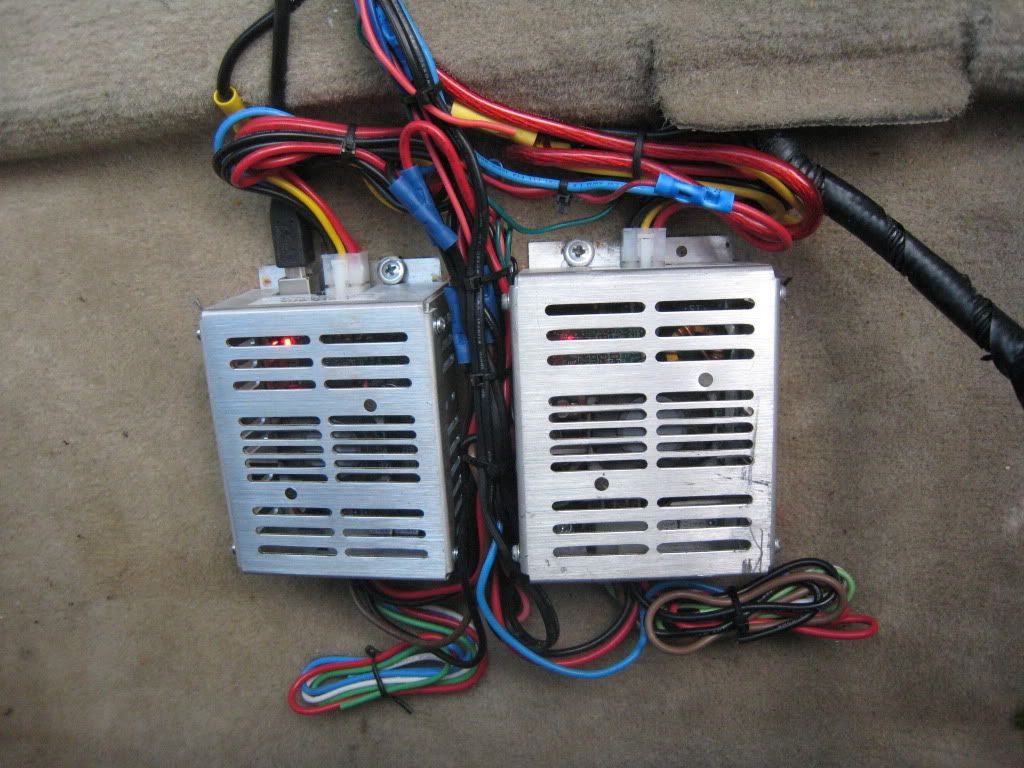
So the first thing you need for this bulid is a parts list #1 being the speacialized for a car power supply because they're specific to certain miniPC's you can get to run your system. In my car I have two of these, but you only really need one:
Which is compatible with MacMinis and Aopen Pandora Mini PCs.
I got an older version
or..
There are other type of power supplies compatible with different setups, but you'll need to do some some research and look into them here. www.mp3car.com
So once you got your power supply, you'll need to get your PC. These will run you anywhere from $300-$1100 depending on how powerful you want it. A litttle pricey, but, hey, it's a laptop basically. MacMinis come as an already setup system, the Aopen's are a base system that you'll need to choose and install your own CPU , operating system and HDD. At least mine did. You may be able to find them already built if you don't want to bother with that or don't know much about computers. Plus side is that they're already put together, downside is you gotta pay for that and you don't get full choice into the guts of you machine. Your choice.
Next thing on the checklist is something to display your PC on. www.MP3car.com has a nice selection of car compatible displays that range from $300-$800. There are alot different qualities and options, so pay attention to that when you're picking one out. Getting a transreflective screen is recommended, as it will still be readable in sunlight, which is key. One I went with is this one, which comes in a case that I had to modify out myself.
Also very, very important you get a powered USB hub, as this will allow you to expand your system with anything you want. They can be found pretty cheap, like $25-$40, but pay attention to size when selecting yours, as it is at a premium where it's going to be placed. This is the one I purchased:
First step is installing your power supplies. First thing you need to do is customize the pwer output of you power supply to match what you PC Needs. The thing can be set to 12v,18.5v or 20v as its primray output voltage. My Aopen needs 19v, so I opened my power supply up by a few side screws and switched a few jumpers to make its output 19v. The compay that makes them had a guide online that shows you where to set the jumpers to get the desired voltage. Here:
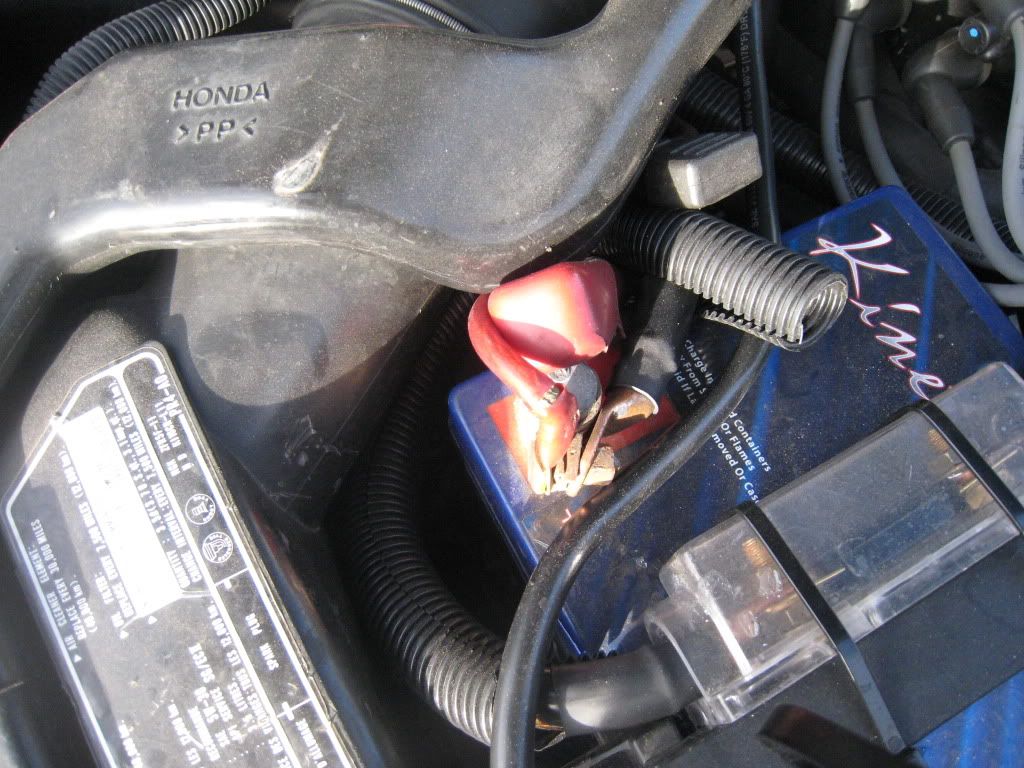
Now that it is set for your PC, it needs a direct to battery connection to work propery, so the first thing you need to do is run a fused(20 Amp I think) power cable from your battery to under you passenger seat. Start at your battery...
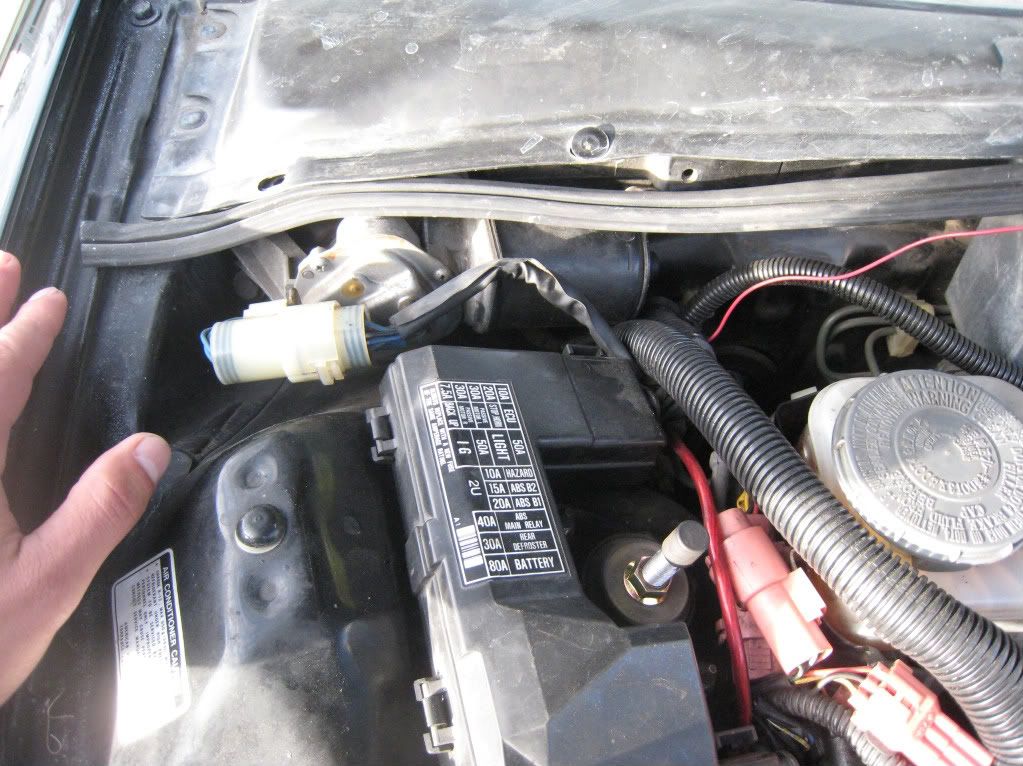
....run it through a weather boot on the engine wall behind your glove box(which can be a PAIN IN THE ASS to get through the first time)
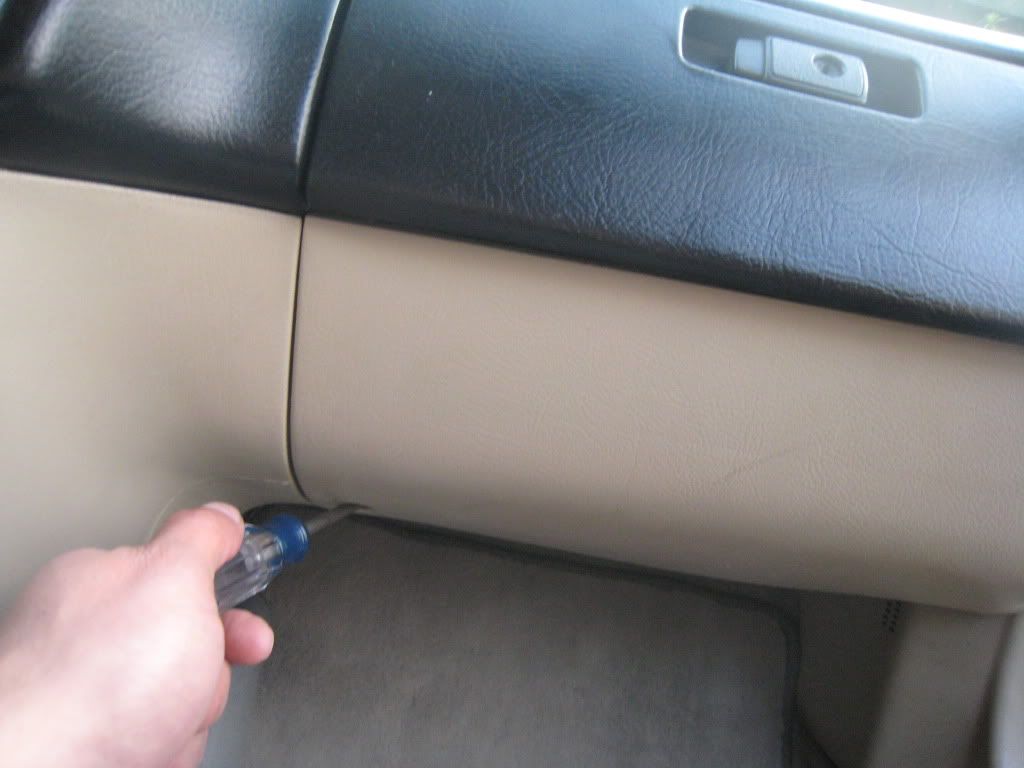
...out from behind the glovebox....
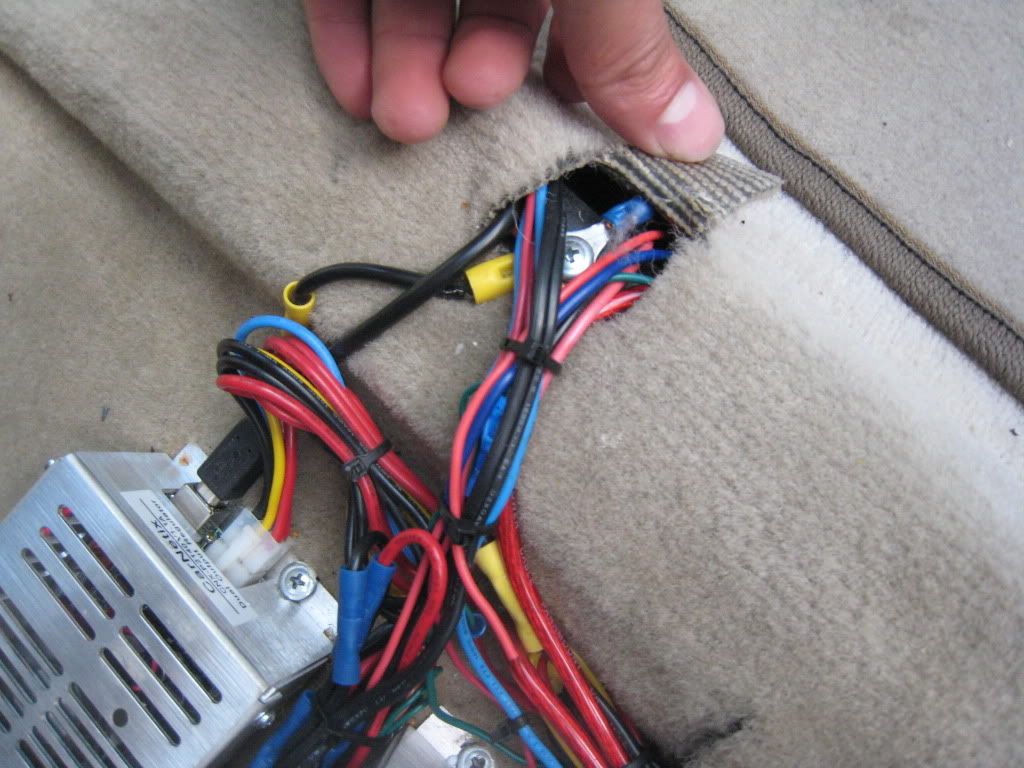
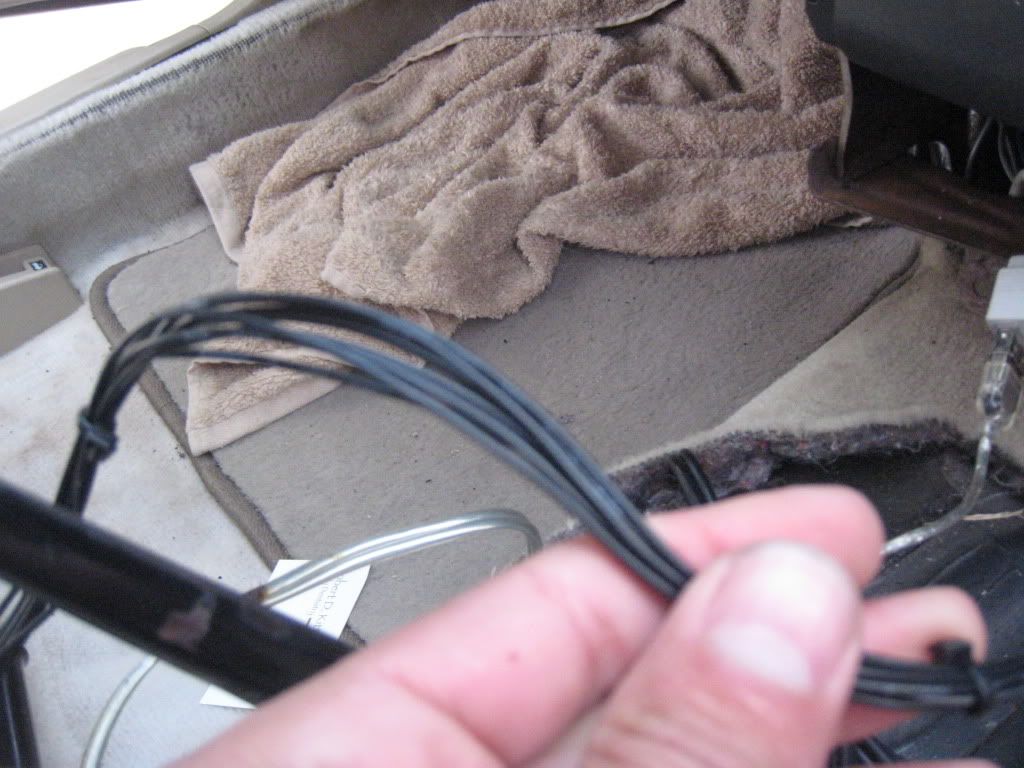
....under the floorboard carpet and out the cable opening under the seat..
Secure your power supply to the floorboard with some self tapping screws. Place it as far forward as possible so that the wire clips still have room to plug in and people sitting in you rear seats won't kick it when their feet go under the seat.
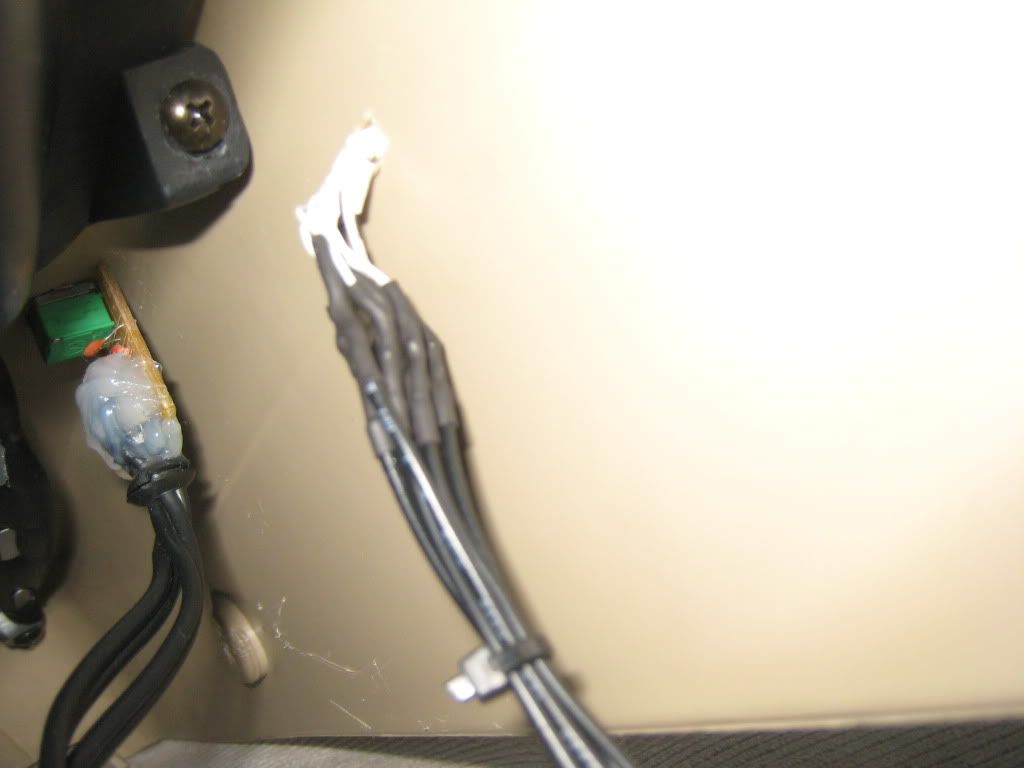
Your power supply will come with a color code for the wiring harness, so you'll be able to figure out what wire is which. Suffice to say, crimp the power cable the right lead on the plug then ground the right lead( I did it on the floor board riser by my thumb)
And bam, you got a funtiong power supply for you computer.
Next step is installing your PC. It can be a little tricky to put it where I did and you may need some power tools, as I did, but here's how I put it behind the glove box.
First step is to take off all the dash paneling. Two side peices first...
...Center console last...
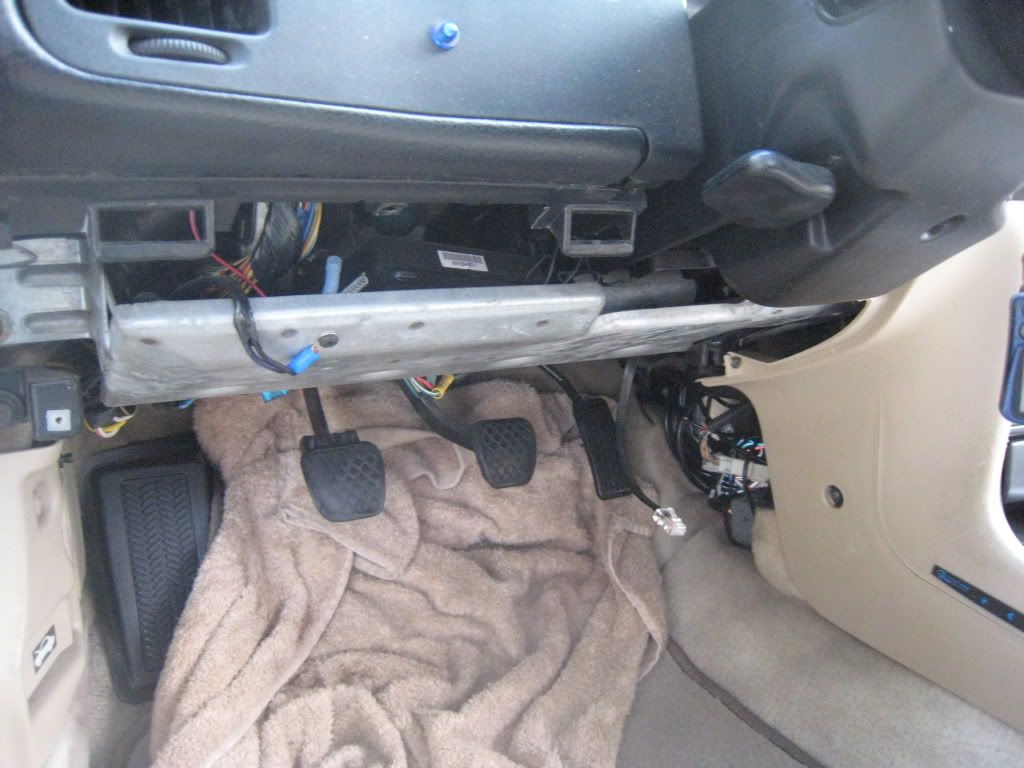
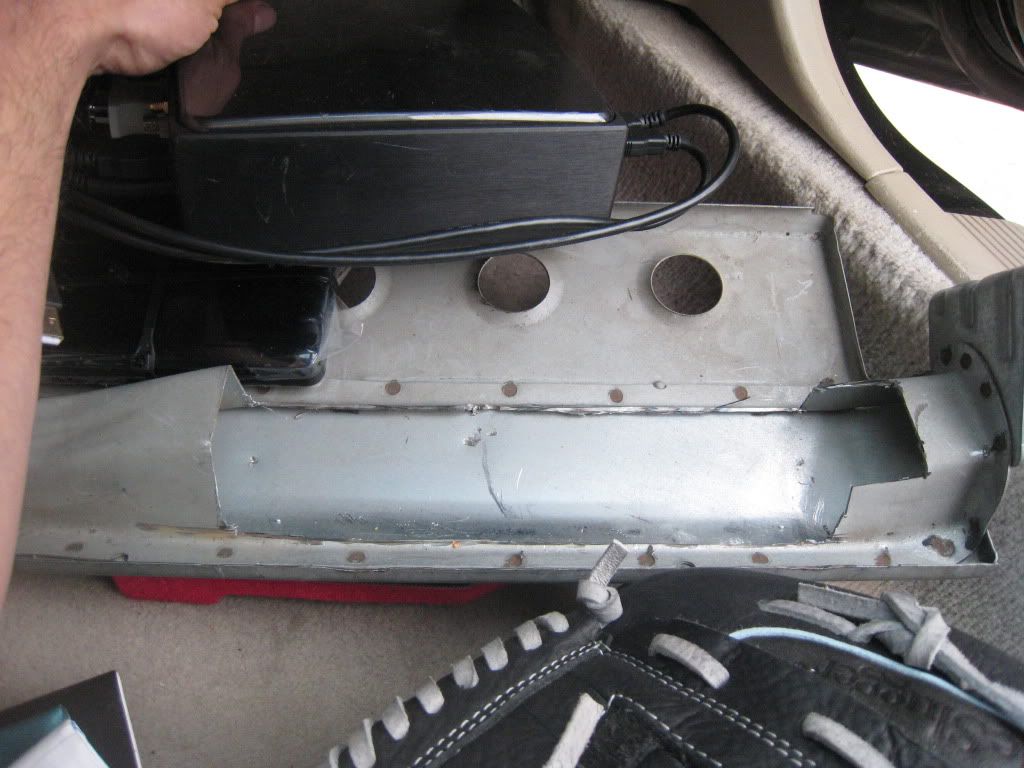
Once that's out of the way, it's time to get to where you're going to mount the PC. There are four bolts holding the metal frame on beneath the glove box. Take those out and remove it, as this is what we're going to mount the PC on to.
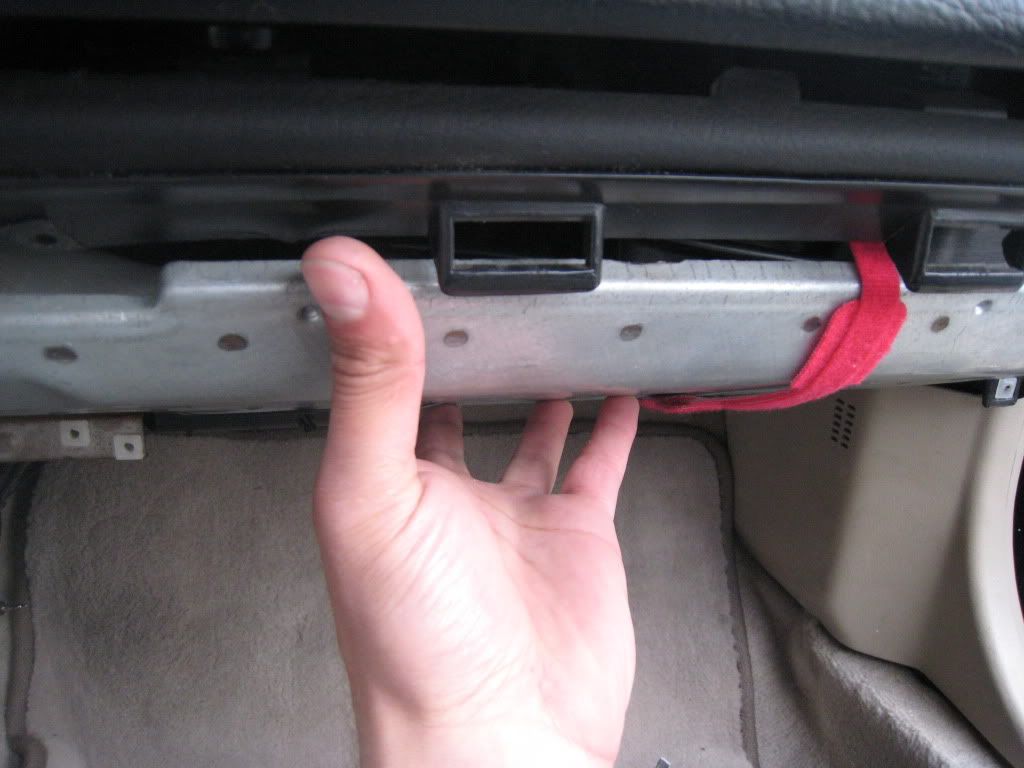
Now that it is off, you are going to have to cut into the frame of the thing to let your PC fit on it. I used one of those disc rotary metal cutting tool and it worked great. This is basically the part that you need to remove here...
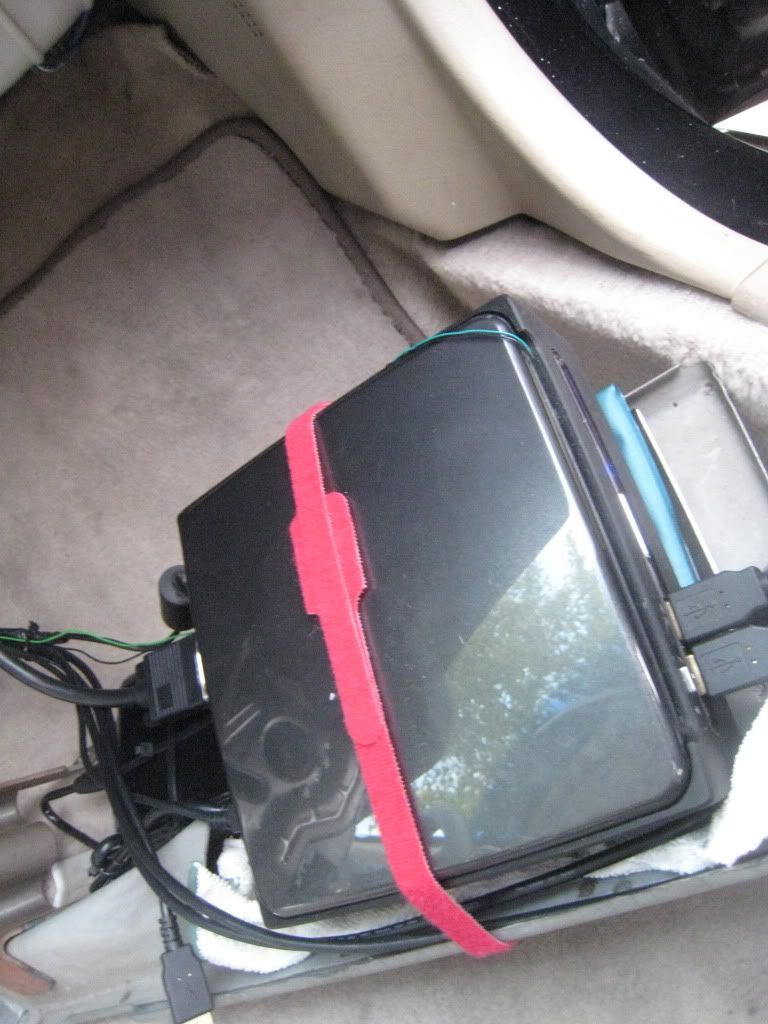
That metal hump used to go all the way across, but it needs to be removed for your PC to fit under there properly. Put your PC in that spot you made for it and secure it there. I used those reusable velcro ties like this...
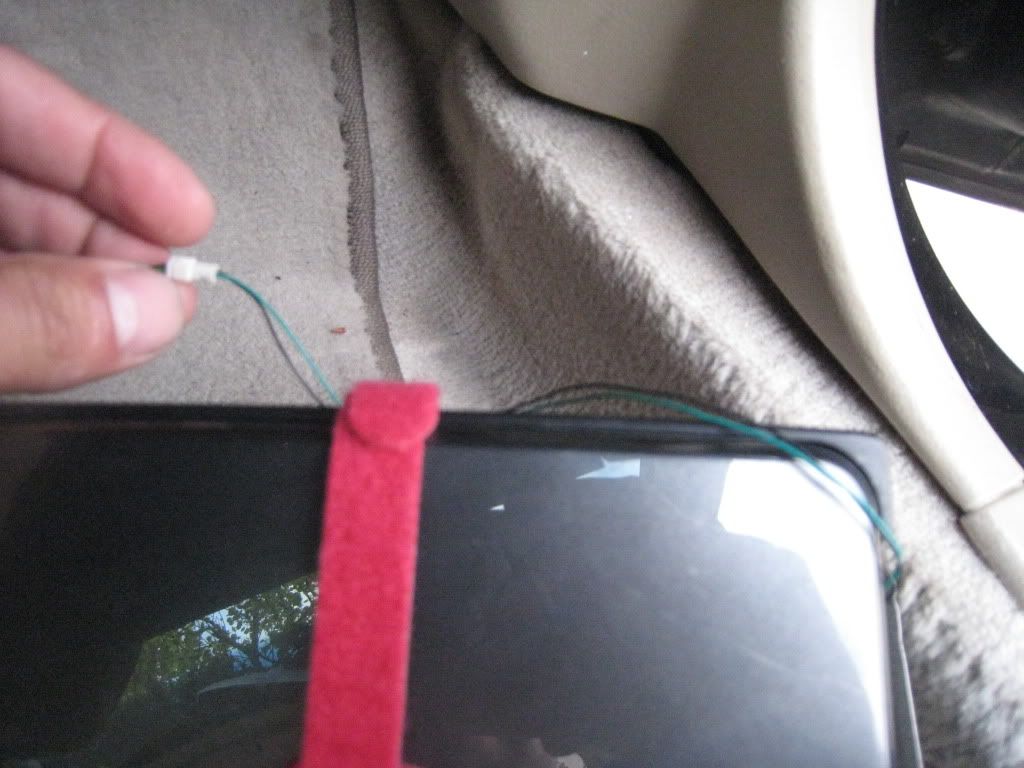
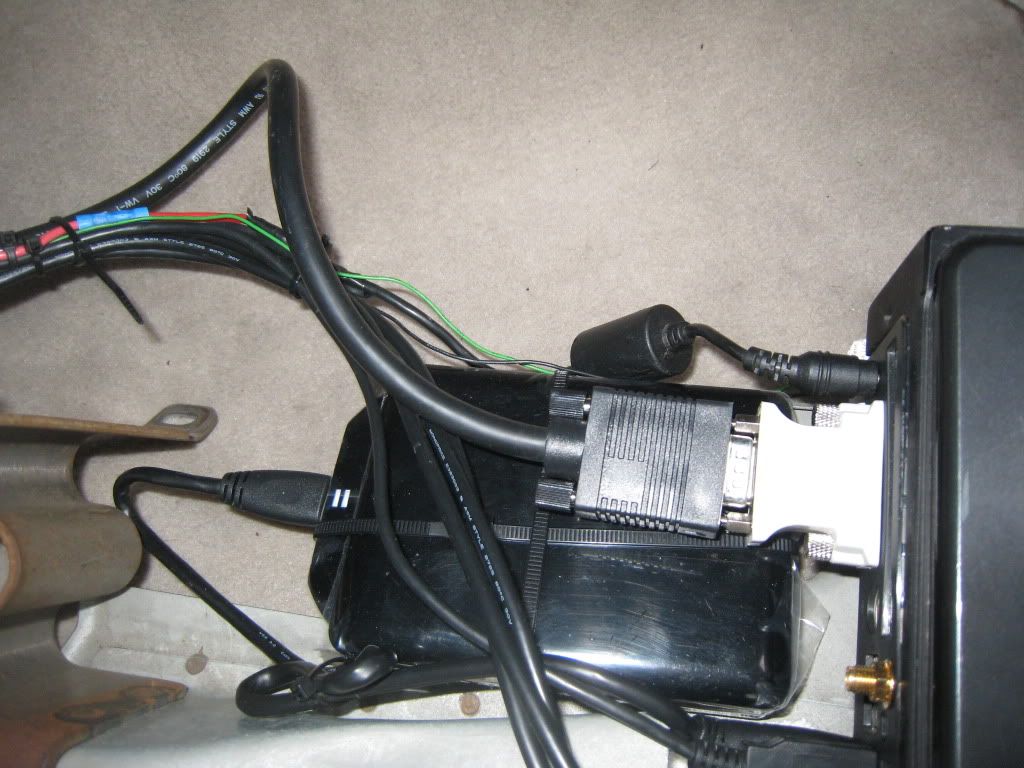
Now that the physical fit is out of the way, it's time to wire it up. There are FOUR key wires that need to be connected for your PC to work in your car. The Primary power and ground from your power supply to your PC, one of two control wires that either hook up to your ignition or your AUX on an alarm system if you have one(This is the way I have it hooked up and is very perferable) and finally a special control harness that goes from the Power supply to the power switch on your PC. The first three wires come standard on all the Carnetix power supplies, but the special harness is specific to what PC you choose and you have to order it specifically. Here's mine.
First thing you should do is install the special control harness into your PC. This harness bypasses the normal power button on your PC and allows your power supply to control how your PC powers on and off automatically, since PC need specific power reqirements and timings when they are powering up and shutting to down to not harm components in them. It's pretty amazing actually. I didn't get a chance to actually open my PC up again and show you how I did it, but the intructions are found on the company's wensite for each specific harness. Here's it already installed.
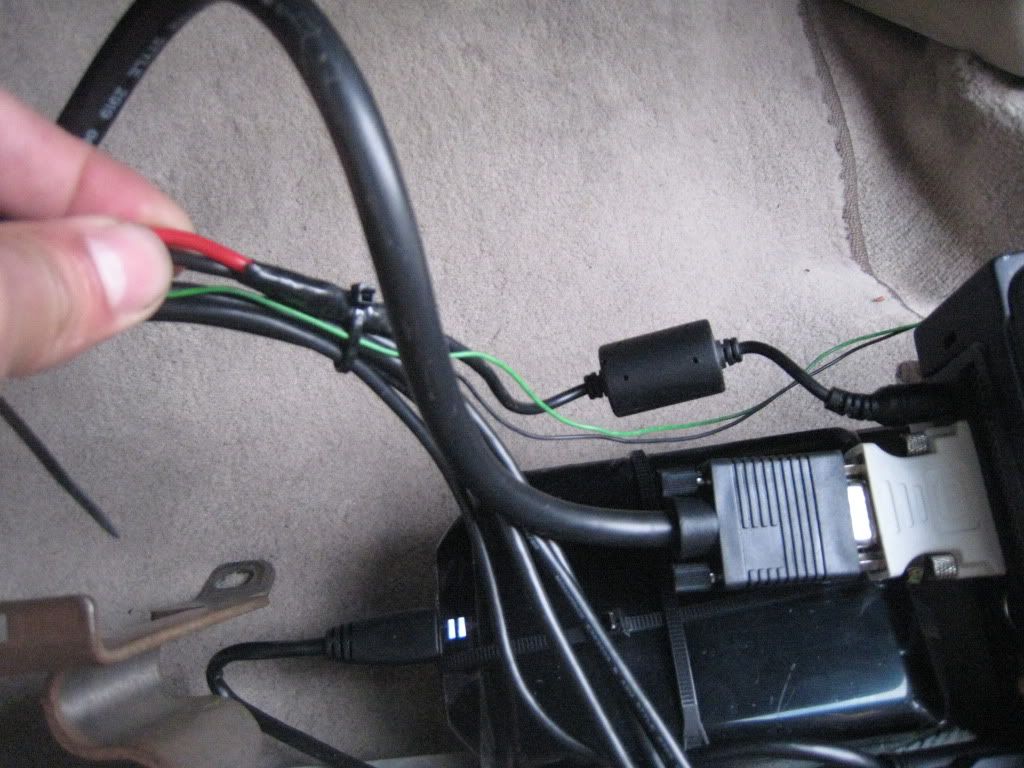
If you look closely, it has a plug that connects to another wire extension that goes to a similar plug on the inside of the power supply. You may need to clip and extend tyhese wires if they aren't long enough and that's where the soldering skills may come into play. BTW, all these wires are going fron under the glovebox dash, to the ceterconsole carpet opening, under thecarpet to the cable opening under the passenger seat. Once you have that installed, the rest of the wiring is pretty straight forward. Use that owner's manual to find the three other wires you need to use, primary power, primary ground and either the Aux wire that connects to an alram system or the ignition wire that connect to your ignition signal out of your standard radio harness. Those last two will decide what signal source powers your entire system up. Once you found them and where they go, extend them to however much length they needt o reach thier destination, run them through that same cable hole in the floorboard...
...and under the carpet where they go and connect them to their destined spot. The only other codideration here is the power to your PC wires. They usually come with an AC adapter. I cut off the end of that to use the plug and just separated, stripped and connected both the power and ground to their respective wires. Electrical tape it up and done like so.
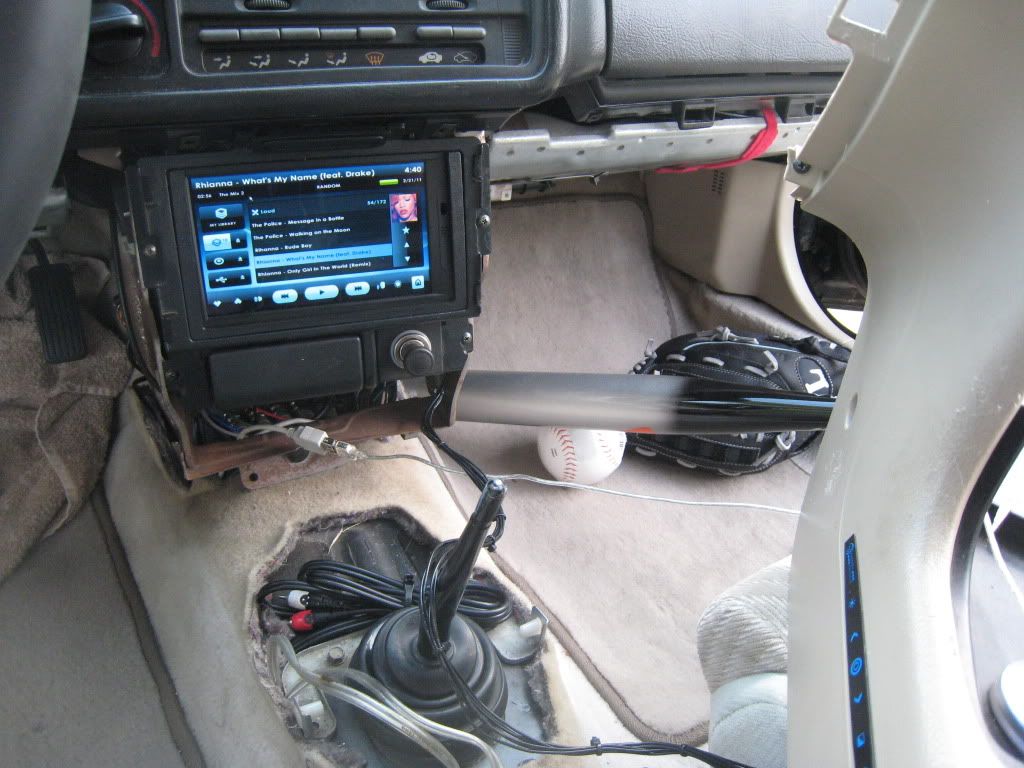
There it is. You now have a functioning, hidden computer system that powers up and down by a key turn or an alarm button press.
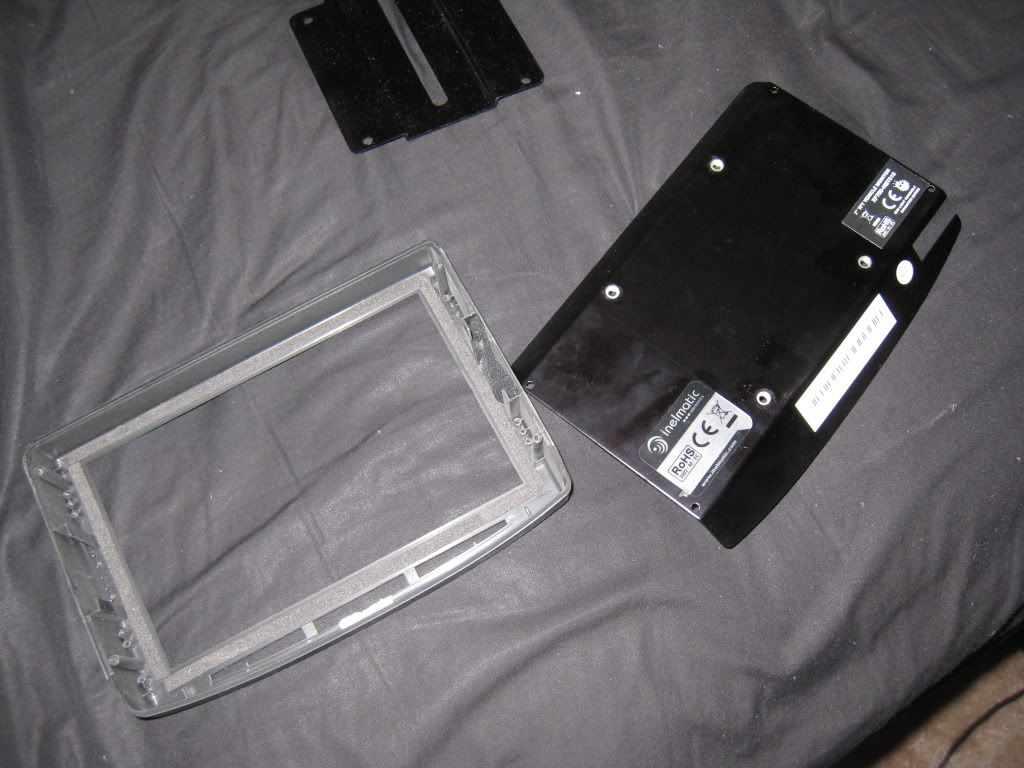
Next is the screen installation. .This is probably the hardest and most bullshit I had to go through in the entire installation, only because every piece of equipment being used is not meant to be put in our cars and is therefor almost all customized. You'll need three things and some hardware for this installation and a bunch of patience and even some creative thinking if you go exactly the route I took with the same screen. Maybe some of you would even have a better solution for this setup, if so please add. Here's the deal though, the three parts you need are the screen of course, but also a customized Double in frame to hold the screen and a double din bezel that fits around your double din opening. The screen I already showed you, but one other part, the frame, can be found on that same website.
The problem with this open frame, and it's the only one they offer, is that it's meant to hold a different type of screen. In fact it was so much trouble, and the screen is so much more expensive, I'd really just recommend you not trying this on your car grabbing one of the Lilliput screens the frame is actually made for. They're cheaper, yes quality wise too, but it's also a perfect custom fit with no headaches. If you choose that you can skip to the next post and go from there. It'll probably be pretty confusing anyways, as I don't have pictures of most of the process, but can only describe it.
First thing that needs to be done is to take the guts of the screen out.
A couple screws inthe back, some mounting screws on the inside and a clip plug to the external menu buttons and it's out. Next is to remove the menu buttons from the frame.
It's that strip along the bottom and it's just held in there by some tacky glue. After both those are out, you don't need the old frame anymore. Next step is to trim the metal brackets where the inside screws were mounted so that the internal frame holding the screen is as close to the size of the screen as possible with no protrusions sticking out.
Next step is to snap off the usb connection on the inside of the plastic frame you ordered from MP3car, as if it's left inside, this screen will not fit in it. Picture of it in this link.
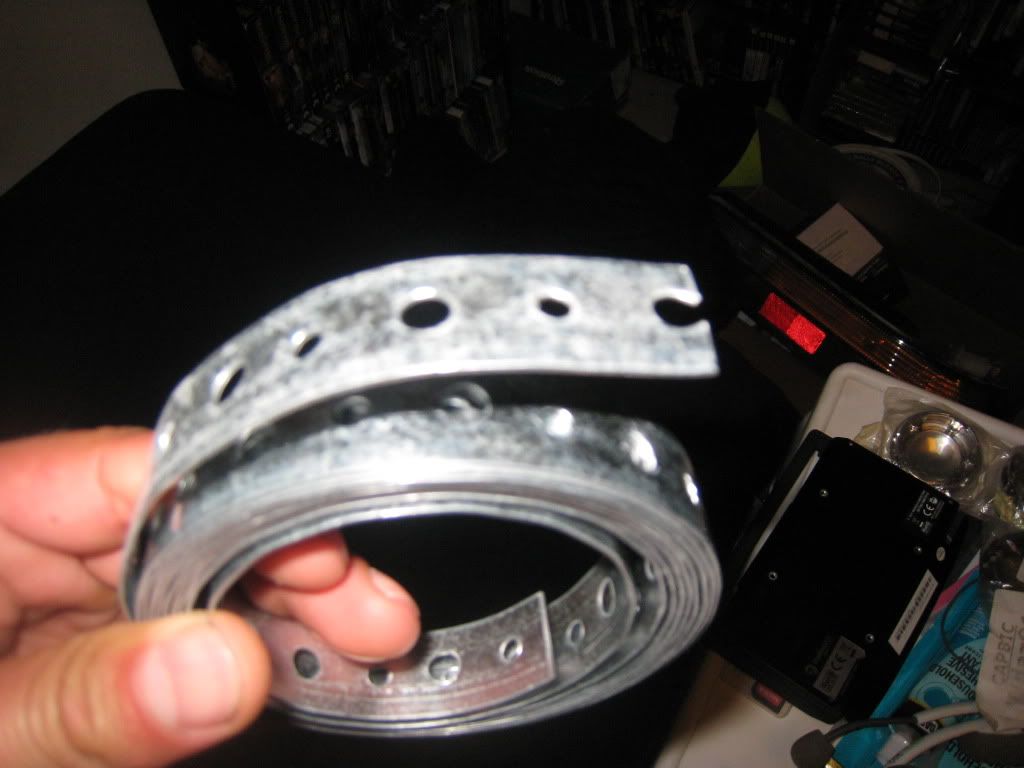
Once you have all that taken care of, you can now safely fit the screen so that it sits flush inside the plastic frame. Only problem now is that you clipped off the metal mounts the screen secures down to so that it'd fit, so there's no way to hold it inside. lol Solution: Buy a roll of this stuff.
You got to make you own mounts. lol Basically what I did was I snipped four pieces of metal off this roll and trimmed them and bent them and shaped them so that one end fit over the screw holes prearranged on the platic frame and the other went sufficiently over the back of the screen so that when I screwed it down it pulled the screen towards it. Once I had them shaped and formed, I drilled little holes in the end that took the screw and secured the screen to the frame. (Of note: one of the metal mounts secures to the back of the screen where there's exposed solder ending, so before I screwed it on, I made sure it had electrical tape wrapped around it so as not to short anything out)
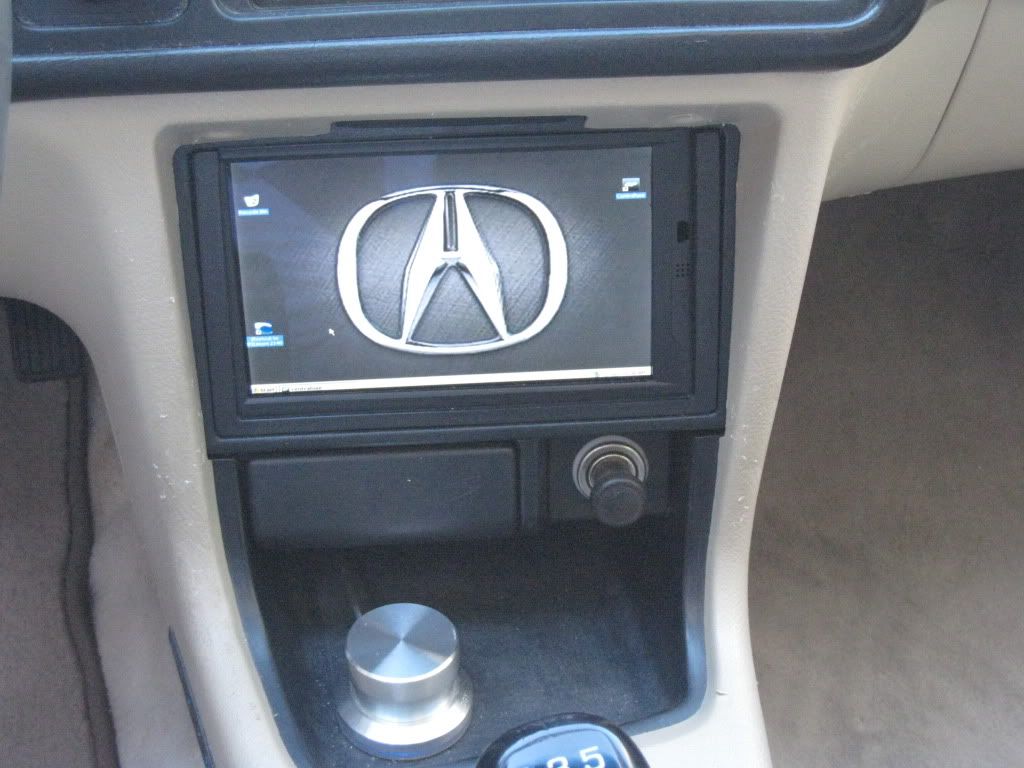
At this point, you have a screen mounted into a plastic double din fram, but there's a problem.
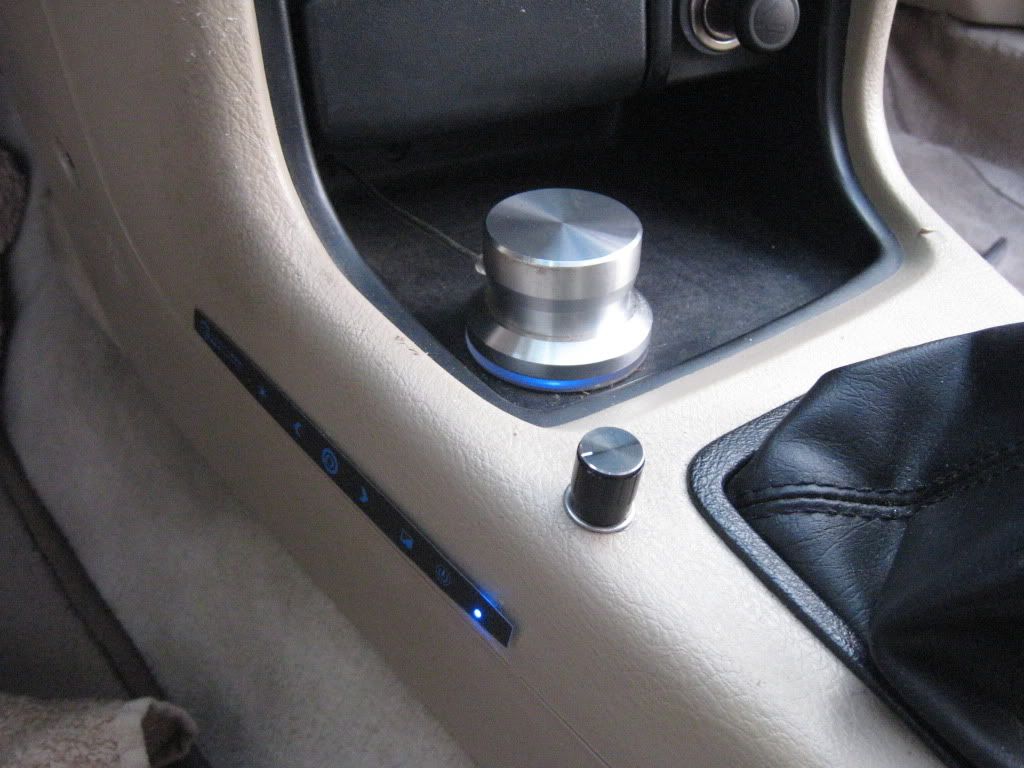
There's nowhere for that menu button strip you pulled of to go. I looked at the place where the screen was going to go and could see it was going to take up the entire real estate there, so the only place I could think to mount it was at the side of the center console.
To put it there, you have to extend an eight wire quick connect that connects to it about three feet, from the back of the screen to the side of the center console. To do this, you have to snip all thewires, throw on some heat shrink, solder one end to the other, insulate it with the heat shrink and repeat x16. Once you have all the wires extended, you need to mount the button strip to the side of the center console. To do this you need to cut a hole in the center console the size of the plug width, about 1 mm x 1 inch. I used an exacto blade, made my outline and just kept digging till it came out. A little patience here. When the hole is big enough to fit the plug through, just glue the strip on the console. I used some emblem glue, but i guess whatever will work. Picture of both the wiring on and behind the center console where the strip is mounted here.
Next is the screen installation. .This is probably the hardest and most bullshit I had to go through in the entire installation, only because every piece of equipment being used is not meant to be put in our cars and is therefor almost all customized. You'll need three things and some hardware for this installation and a bunch of patience and even some creative thinking if you go exactly the route I took with the same screen. Maybe some of you would even have a better solution for this setup, if so please add. Here's the deal though, the three parts you need are the screen of course, but also a customized Double in frame to hold the screen and a double din bezel that fits around your double din opening. The screen I already showed you, but one other part, the frame, can be found on that same website.
The problem with this open frame, and it's the only one they offer, is that it's meant to hold a different type of screen. In fact it was so much trouble, and the screen is so much more expensive, I'd really just recommend you not trying this on your car grabbing one of the Lilliput screens the frame is actually made for. They're cheaper, yes quality wise too, but it's also a perfect custom fit with no headaches. If you choose that you can skip to the next post and go from there. It'll probably be pretty confusing anyways, as I don't have pictures of most of the process, but can only describe it.
First thing that needs to be done is to take the guts of the screen out.
A couple screws inthe back, some mounting screws on the inside and a clip plug to the external menu buttons and it's out. Next is to remove the menu buttons from the frame.
It's that strip along the bottom and it's just held in there by some tacky glue. After both those are out, you don't need the old frame anymore. Next step is to trim the metal brackets where the inside screws were mounted so that the internal frame holding the screen is as close to the size of the screen as possible with no protrusions sticking out.
Next step is to snap off the usb connection on the inside of the plastic frame you ordered from MP3car, as if it's left inside, this screen will not fit in it. Picture of it in this link.
Once you have all that taken care of, you can now safely fit the screen so that it sits flush inside the plastic frame. Only problem now is that you clipped off the metal mounts the screen secures down to so that it'd fit, so there's no way to hold it inside. lol Solution: Buy a roll of this stuff.
You got to make you own mounts. lol Basically what I did was I snipped four pieces of metal off this roll and trimmed them and bent them and shaped them so that one end fit over the screw holes prearranged on the platic frame and the other went sufficiently over the back of the screen so that when I screwed it down it pulled the screen towards it. Once I had them shaped and formed, I drilled little holes in the end that took the screw and secured the screen to the frame. (Of note: one of the metal mounts secures to the back of the screen where there's exposed solder ending, so before I screwed it on, I made sure it had electrical tape wrapped around it so as not to short anything out)
At this point, you have a screen mounted into a plastic double din fram, but there's a problem.
There's nowhere for that menu button strip you pulled of to go. I looked at the place where the screen was going to go and could see it was going to take up the entire real estate there, so the only place I could think to mount it was at the side of the center console.
To put it there, you have to extend an eight wire quick connect that connects to it about three feet, from the back of the screen to the side of the center console. To do this, you have to snip all thewires, throw on some heat shrink, solder one end to the other, insulate it with the heat shrink and repeat x16. Once you have all the wires extended, you need to mount the button strip to the side of the center console. To do this you need to cut a hole in the center console the size of the plug width, about 1 mm x 1 inch. I used an exacto blade, made my outline and just kept digging till it came out. A little patience here. When the hole is big enough to fit the plug through, just glue the strip on the console. I used some emblem glue, but i guess whatever will work. Picture of both the wiring on and behind the center console where the strip is mounted here.
Thanks, but it's not even close to being done yet. lol Needed a break.
And for various reasons. The front ends for computers put into cars are many and they're pretty powerful in terms of searching for things in a vast libaray on the fly and making playlists. They make top of the line double din decks from Pioneer, Sony or whathaveyou that connect to ipods or USB sticks look like jokes.
The other is expandabliity and futureproofness. You can add all kinds of crazy stuff to it and hella cheap once you get the main system taken care of. For example, I've had an external portable USB powered hardrive attached to my computer since the very first time I booted it up to store movies, pictures, music, whatever on. When I first installed my PC, the biggest one available was 500GB, which is a shitton of space for music, but when you start getting into video and such, not so much. Recently they just came out with a 1.5 TB portable hardrive. Bought it for $150 plugged it in and all of a sudden I have room for over 1000 movies in addition to all the lossless music I already have on my system. $150 and five minutes and I have an entire keyboard searchable library of over 30,000 lossless jams and near 400 movies. All on that little rectangle that fits under my glovebox.
And anything in that jungles of media files can be looked up in less than ten seconds. Here's the frontend I use, but the people who make it are already on a future version..
[http://www.youtube.com/watch?v=rYrIqcsYMAQAdd
to that stuff like different computer professional quality sound hardware you can attache to it, GPS attachements and any specialized program you can find on the internet and it will work on it, 3G internet cards, aftermarket ODB shit you can get for it that I haven't even had time to look too closely into yet with tons and tons of programs to go along with it and the possiblities are basically are just whatever you can imagine up. Limitless. Think of all the crazy stuff people do on their PC's at home, I can do thta in my car.
why not? You can run navigation software, have all your music and pictures on your hard drive, watch movies you've backed up. Update your ipod. Charge phone via usb. etc....And cause its neat.
Because for the prices you could buy a laptop and not have to sit in your car to do all that.
I ended up revising that a few seconds later anyways. To each their own I suppose, it's just not for me.
Deleted the first comment so your DIY flows better. I didn't notice you weren't done haha.
Because for the prices you could buy a laptop and not have to sit in your car to do all that.
I ended up revising that a few seconds later anyways. To each their own I suppose, it's just not for me.
It's a vary clean set up, I would like something like that just for my GPS. However I can't see myself using it as my primary music storage or watching movies lol.
It's a vary clean set up, I would like something like that just for my GPS. However I can't see myself using it as my primary music storage or watching movies lol.
I replaced all my mids with 6 1/2 inch infinity kappa component speakers also. Lossless music ran through any premium soundcard you could think of. I love my music. That was enough for me to hook a computer up right there. You can not get that on any other car sound setup, no matter how premium it is. The other limitless conectivity features are just the bonus. lol
Thanks guys. Gonna finish up the screen installation and the USB hub tonight. Maybe a couple of the accessories I have attached to it later too. Would really love to see if anyone tries this and how they do it too. Would be way cool. Feel free to ask me any questions too. :thumbs up