
DIY trunk brace
- Thread starter speedin
- Start date
speedin
The Transporter
Here are the necessary parts from Home Depot for the trunk brace (see figure 1 and figure 2):
1" square x 4' long steel bar ($8.44)
1" square black plastic end caps (4 in a bag @ $0.85)
5/16" x 2.5" long stainless steel screws (2 needed @ $0.69 each)
5/16" ID x 7/8" OD stainless steel washers (2 needed @ $0.07 each)
5/16" ID x 7/8" OD zinc washers (4 needed @ $0.03 each)
5/16" ID x 1.5" OD zinc fender washers (2 needed @ $0.11each)
5/16" ID x 7/8" OD rubber washers (3 in a package @ $0.33)
5/16" nylon lock nuts ( 2 in a package @ $0.97)
Here are the steps for installing the trunk brace:
1.) Cut the 1" square bar stock to 36.25" (same length as Type-R trunk brace).
2.) Drill a 3/8" hole in both ends of the 1" square bar (approx. 0.4375" front the end of the bar) (see figure 3).
3.) Remove the plastic rear trunk liner (see figure 4).
4.) Center the bar equally on both ends and mark the mounting holes on the sheetmetal.
5.) Drill a 5/16" hole in the rear trunk sheetmetal (inner and outer sheetmetal / both mounting holes) (see figure 5).
6.) With a thin paint brush, prime the new mounting holes.
7.) Determine the mounting location on the plastic rear trunk liner and drill 1" hole in the liner (figure 6).
8.) Reinstall the trunk liner.
9.) Install the black plastic end caps on the steel bar (see figure 7).
10.) Place a stainless steel washer on 2.5" long bolt, then insert bolt through the hole in the bar. Repeat on other end of the bar (see figure 8 ).
11.) Place 2 zinc washers on the bolt. Repeat on the other bolt (see figure 8 ).
12.) Insert both bolts into the new mounting holes (see figure 9 and figure 10).
The remaining steps may require an additional person
13.) From underneath the car, insert a rubber washer on the end of the bolt. Then insert a zinc fender washer on the bolt. The rubber washer is used to seal the hole from moisture.
14.) Thread the nylon washer on the bolt and then tighten. Repeat on the other end of the bar. Warning: do not over tighten the nuts.
Figure 1

Figure 2
Figure 3
Figure 4
Figure 5
Figure 6
Figure 7
Figure 8
Figure 9
Figure 10
so, what do u guys think about this??
1" square x 4' long steel bar ($8.44)
1" square black plastic end caps (4 in a bag @ $0.85)
5/16" x 2.5" long stainless steel screws (2 needed @ $0.69 each)
5/16" ID x 7/8" OD stainless steel washers (2 needed @ $0.07 each)
5/16" ID x 7/8" OD zinc washers (4 needed @ $0.03 each)
5/16" ID x 1.5" OD zinc fender washers (2 needed @ $0.11each)
5/16" ID x 7/8" OD rubber washers (3 in a package @ $0.33)
5/16" nylon lock nuts ( 2 in a package @ $0.97)
Here are the steps for installing the trunk brace:
1.) Cut the 1" square bar stock to 36.25" (same length as Type-R trunk brace).
2.) Drill a 3/8" hole in both ends of the 1" square bar (approx. 0.4375" front the end of the bar) (see figure 3).
3.) Remove the plastic rear trunk liner (see figure 4).
4.) Center the bar equally on both ends and mark the mounting holes on the sheetmetal.
5.) Drill a 5/16" hole in the rear trunk sheetmetal (inner and outer sheetmetal / both mounting holes) (see figure 5).
6.) With a thin paint brush, prime the new mounting holes.
7.) Determine the mounting location on the plastic rear trunk liner and drill 1" hole in the liner (figure 6).
8.) Reinstall the trunk liner.
9.) Install the black plastic end caps on the steel bar (see figure 7).
10.) Place a stainless steel washer on 2.5" long bolt, then insert bolt through the hole in the bar. Repeat on other end of the bar (see figure 8 ).
11.) Place 2 zinc washers on the bolt. Repeat on the other bolt (see figure 8 ).
12.) Insert both bolts into the new mounting holes (see figure 9 and figure 10).
The remaining steps may require an additional person
13.) From underneath the car, insert a rubber washer on the end of the bolt. Then insert a zinc fender washer on the bolt. The rubber washer is used to seal the hole from moisture.
14.) Thread the nylon washer on the bolt and then tighten. Repeat on the other end of the bar. Warning: do not over tighten the nuts.
Figure 1

Figure 2

Figure 3

Figure 4

Figure 5

Figure 6

Figure 7

Figure 8

Figure 9

Figure 10

so, what do u guys think about this??
Last edited:
speedin
The Transporter
huh. dont click the link i posted the whole process in my 2nd post.steve98ex said:Sorry, this site is temporarily unavailable!
iNtegra
New Member
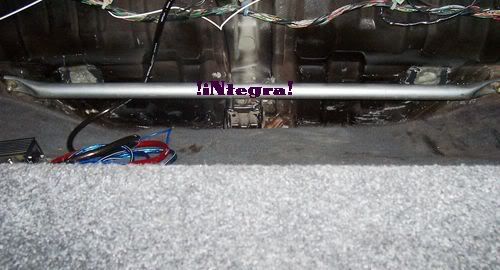
sorry to bring back an old post but heres mine but using a type brace instead. I'm using battle cats method http://battlecat.8m.com/ITR rear trunk strong bar.htm
Last edited:
Ominous G2
┌∩┐(◣_◢)┌∩┐
Put two of them in and you could have a freakin sweet lookin amp rack.
DJNAS
HUSTLING FOR A HUSTLER
you know that not a bad idear ... also you know their is a space on all teg for a type-r trunk brace .. you dotn have to drill into the trunk just have to cut out the plastic circles and get a type-r trunk brace or someing of the same size( you dont have to worry about drilling and you can just screw right into the threded holes ) .. it might be better to do that then to drill out your trunk and bolt it on :twisted:
Last edited:
Ominous G2
┌∩┐(◣_◢)┌∩┐
Just read the how-to part, because I wasnt sure how to get that nut on.
speedin
The Transporter
hum, it looks like its more supportive to (look at pic above). but are u shure they are theaded? and what size are we talking here. i would rather do this than drill new holes. ill just measure the holes and get some square tubing that length. il make my own DIY wright upDJNAS said:you dotn have to drill into the trunk just have to cut out the plastic circles and get a type-r trunk brace or someing of the same size( you dont have to worry about drilling and you can just screw right into the threded holes
DJNAS
HUSTLING FOR A HUSTLER
well they might be more supportive but you have to drill and take off pannels ..yep i am shore they are theaded.. not shore on the size ... i know this because i took off my whole back pannels to change my lights and i was woundering what the hell those holes were for ... then i saw the bar in the back of a type-r .. its for some sort of support dont know how much it will help but hay who cares lol put it on .. let me know how it turns out
.. let me know how it turns outspeedin
The Transporter
hum, im just trying to figure out how to secure that bar in their. u cant get a nut under that little hump (its all sealed). and im pritty shure u cant come from the back because its in a bad spot. so hum? how to secure it. even if that hole is threaded i still want a nut back there to completely secure it.
speedin
The Transporter
HAHAHA! it worked. i did it and will post up some info tommorow. cost it like $10 MAX! and no need to drill! and it uses the REAL type-r locations. and they are clearly much more supportive. it very sexy. ill get pics of install and a complete shoping list. danm im stoked this was so easy and sweet.