91ls5speed
New Member
I have been driving my DA regularly for about 3 months, and just keeping it as a winter beater will not satisfy me since this car deserves to be brought back to its original glory.
I always loved the DA ever since my friend had one back in high school that was lowered with a set of polished Si's, I knew I would eventually have to have one for myself.
Found one that seemed to cheap to be anything decent, but went and looked at it anways...and im sure glad I did.

filthy filthy inside, dirtier than my 1971 impala was when I bought it back in high school...anyways the usual dents and dings, quarter rust was the least I had seen in a car that spent its whole life in massachusetts. So I bought it, and the affair began.
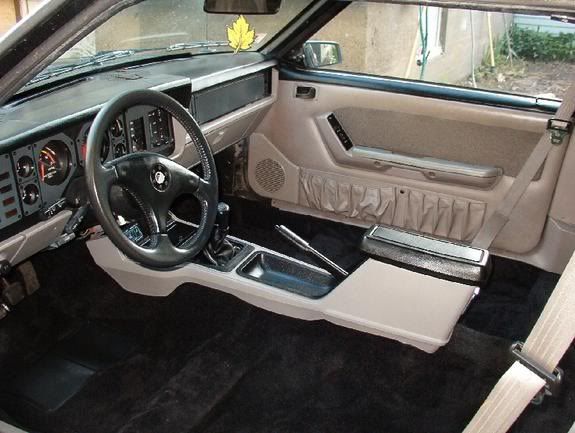
took the interior apart because the heater controls...speed and direction... didnt work at all... soldered the heater circut board back together, and replaced the B.M.Resistor. Also took the panels inside and cleaned them intensively.
The car was idling horribly and leaking coolant from somewhere, and i could tell by the radiator that the p.o had just been topping it off with water. so i cleaned the iac and the fitv and traced the leak the the hoses going to the fitv. replaced the hoses and did a coolant flush
The spark plugs i was sure that they were trashed, low and behold i am correct.
car now leaks no coolant, and stays at a very nice temp at all times once warmed up,(i know because the place I got an inspection from let it idle for a good 25 minutes while they did the inspection. also stays at what I would consider a perfect idle speed.
the frayed and torn seat was driving me crazy, and I cant seem the find the correct seats for this interior and I dont want to change the entire seat design.
so i hemmed the seat and then added in a new piece of fabric that doesnt even come close to matching but its better than 20 year old exposed seat foam
the hatch was beyond repair, the rot had gotten to the insides and the rubber hatch bumpers were pushed in through the rust.
so picked up this hatch off a gs in the salv yard. nooooo rust!!!
its rio red but oh well im getting the DA resprayed in the spring.
I always loved the DA ever since my friend had one back in high school that was lowered with a set of polished Si's, I knew I would eventually have to have one for myself.
Found one that seemed to cheap to be anything decent, but went and looked at it anways...and im sure glad I did.


filthy filthy inside, dirtier than my 1971 impala was when I bought it back in high school...anyways the usual dents and dings, quarter rust was the least I had seen in a car that spent its whole life in massachusetts. So I bought it, and the affair began.
took the interior apart because the heater controls...speed and direction... didnt work at all... soldered the heater circut board back together, and replaced the B.M.Resistor. Also took the panels inside and cleaned them intensively.

The car was idling horribly and leaking coolant from somewhere, and i could tell by the radiator that the p.o had just been topping it off with water. so i cleaned the iac and the fitv and traced the leak the the hoses going to the fitv. replaced the hoses and did a coolant flush

The spark plugs i was sure that they were trashed, low and behold i am correct.

car now leaks no coolant, and stays at a very nice temp at all times once warmed up,(i know because the place I got an inspection from let it idle for a good 25 minutes while they did the inspection. also stays at what I would consider a perfect idle speed.

the frayed and torn seat was driving me crazy, and I cant seem the find the correct seats for this interior and I dont want to change the entire seat design.

so i hemmed the seat and then added in a new piece of fabric that doesnt even come close to matching but its better than 20 year old exposed seat foam


the hatch was beyond repair, the rot had gotten to the insides and the rubber hatch bumpers were pushed in through the rust.

so picked up this hatch off a gs in the salv yard. nooooo rust!!!


its rio red but oh well im getting the DA resprayed in the spring.
Last edited: