Tree's...Roadster?
- Thread starter treeafodo
- Start date
treeafodo
Austin
Buy more parts! Please don't sell the Mustang eitherEvery time I come in here I leave wanting to buy stuff. :lol:
Doesn't help that I've been putting off wheels for ages and now you just bought some.
My bank account hates me. I'll probably have the wheels in 3 weeks if everything goes well.
R13
The other asshole
You guys actually like that thing? :lol:Please don't sell the Mustang either
treeafodo
Austin
I do actually. Silver/grey is perfect on that body style.You guys actually like that thing? :lol:
Sent from my iPhone using Tapatalk
treeafodo
Austin
This beast of a girl car will be getting painted. Still unsure which color, but it will get a full strip, prime and spray. I have some body work to do.I really wish mine was azure blue or mineral grey :drool: That's so much work though, Being only 2 grand in at the moment I would probably be better off just buying one already that color.
You planning on painting this beast while it's stripped down?
Sent from my iPad using Tapatalk
treeafodo
Austin
I ordered more parts today.
From Summit Racing:
ARP 2000 Rod Bolts
From Texas Speed and Performance:
OEM Main bolt/stud kit
OEM LSX Lifter trays
From Jegs:
Freeze plug kit
I am also purchasing a set of OEM GM high performance lifters. Regular price is approximately $650 USD for them. I'm getting them brand new off my engines teacher for $350 Canadian. These were purpose built from GM for their race crate engines which had a high lift cam. They're designed for high RPM usage and won't slouch on the job.
You might be wondering why I went with the OEM main bolt/stud kit rather than ARP studs. Well, everything I've read and heard on the phone while talking to companies says that the stock bottom end is good to 600+ WHP other than the rod bolts which are good for about 450 whp. Even then main failures are very rare even with 700+ hp spray builds. The OEM bolt/stud kit is less than 1/3 the price of the ARP kit and will work for my build. I'm aiming for 450-500whp NA so the OEM mains are more than strong enough to handle what I need without any concern.
Today I removed the pistons and rods out of the engine.
 Pistons and Rods Removed by Austin Rajki, on Flickr
I haven't taken any measurements yet, but there is no doubt in my mind that this engine was well maintained. These are the old rod bearings that have 128k miles on them.
 Old Rod Bearings by Austin Rajki, on Flickr
Almost completely bare block
 Empty Bores by Austin Rajki, on Flickr
Again this engine has 128k miles on it. There is no ring ridge at all in any of the cylinders, and you can still see cross hatch from the hone. PS- that isn't scoring, it is the way the cell phone flash is hitting it.
 Cross Hatched Hone by Austin Rajki, on Flickr
The crank is mint too. Pretty much just going to give it a polish and call it a day. I will measure just to double check.
 Bare Crank by Austin Rajki, on Flickr
From Summit Racing:
ARP 2000 Rod Bolts
From Texas Speed and Performance:
OEM Main bolt/stud kit
OEM LSX Lifter trays
From Jegs:
Freeze plug kit
I am also purchasing a set of OEM GM high performance lifters. Regular price is approximately $650 USD for them. I'm getting them brand new off my engines teacher for $350 Canadian. These were purpose built from GM for their race crate engines which had a high lift cam. They're designed for high RPM usage and won't slouch on the job.
You might be wondering why I went with the OEM main bolt/stud kit rather than ARP studs. Well, everything I've read and heard on the phone while talking to companies says that the stock bottom end is good to 600+ WHP other than the rod bolts which are good for about 450 whp. Even then main failures are very rare even with 700+ hp spray builds. The OEM bolt/stud kit is less than 1/3 the price of the ARP kit and will work for my build. I'm aiming for 450-500whp NA so the OEM mains are more than strong enough to handle what I need without any concern.
Today I removed the pistons and rods out of the engine.
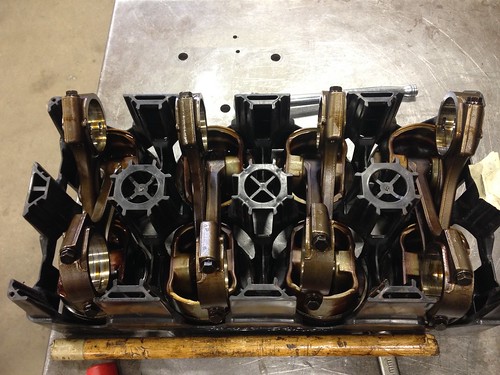 Pistons and Rods Removed by Austin Rajki, on Flickr
I haven't taken any measurements yet, but there is no doubt in my mind that this engine was well maintained. These are the old rod bearings that have 128k miles on them.
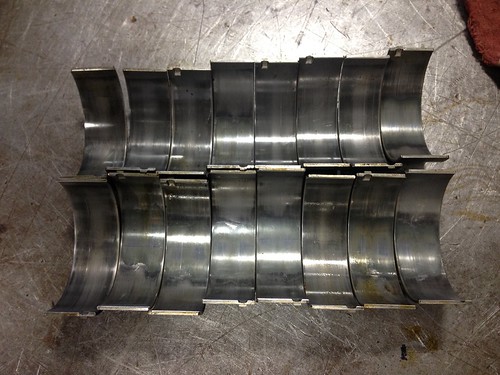 Old Rod Bearings by Austin Rajki, on Flickr
Almost completely bare block
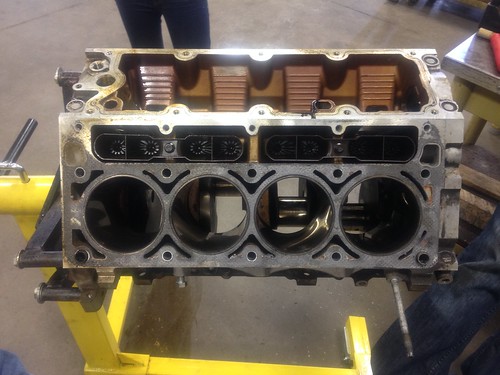 Empty Bores by Austin Rajki, on Flickr
Again this engine has 128k miles on it. There is no ring ridge at all in any of the cylinders, and you can still see cross hatch from the hone. PS- that isn't scoring, it is the way the cell phone flash is hitting it.
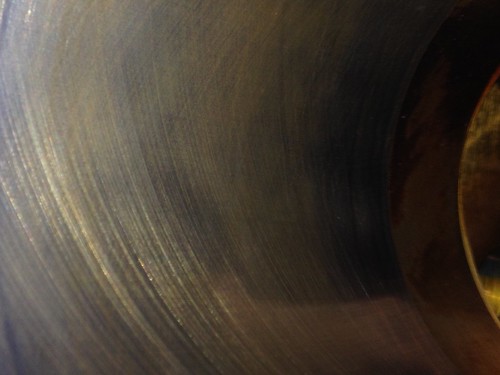 Cross Hatched Hone by Austin Rajki, on Flickr
The crank is mint too. Pretty much just going to give it a polish and call it a day. I will measure just to double check.
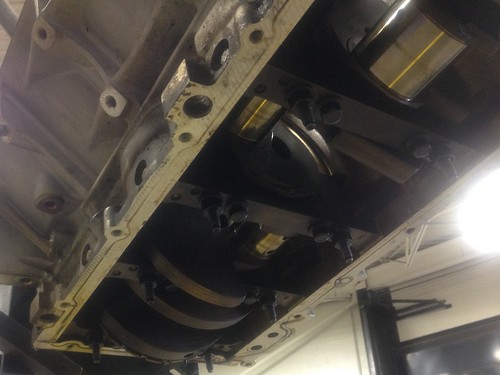 Bare Crank by Austin Rajki, on Flickr
randomhobo
automagic user
This build is sex.
treeafodo
Austin
This build is sex.
Already got word that all the parts I ordered last night have shipped. As long as I get them before engines lab on Wednesday I'm good
Sent from my iPad using Tapatalk
treeafodo
Austin
I went snowboarding again yesterday. On my way back I picked up some parts that arrived at my american address.
The one from Jegs is on the left, Summit Racing is on the right.
 Packages by Austin Rajki, on Flickr
Candy <3 Thanks Jegs!
 Contents by Austin Rajki, on Flickr
ARP 2000 Rod Bolts
 ARP 2000 Rod Bolts by Austin Rajki, on Flickr
The chocolate covered gummy bears sound weird, but weren't too bad actually. The package tells you which color is what flavour, but they all look the same...
 Chocolate Covered Gummy Bears by Austin Rajki, on Flickr
Between my engines lecture and my Fuels lecture my engines teacher was in the lab, so I was able to get some work done. I paid him the $350 for the lifters and I got to work. The main seal cover was a bit of a pain to remove because of the way the stand is, but I managed.
Main Caps Removed
 Main Caps Removed by Austin Rajki, on Flickr
 Main Caps Removed by Austin Rajki, on Flickr
The main bearings weren't bad, but will be replaced. The thrust bearing had a few marks, but the crank was good.
 Main Bearings by Austin Rajki, on Flickr
The old lifters and lifter trays are out as well. Unless things fall through, I have a buyer set up for them.
 Lifters and Trays by Austin Rajki, on Flickr
Then after removing the timing assembly I was able to remove the crank and camshaft. For those of you who don't know, when storing a crankshaft for a long period to time it should be stored standing up to prevent warping. I bolted the flexplate onto it to prevent the chance of it falling over.
I pretty much worked my small lunch break away so I had to rush to class after that.
 Table Top by Austin Rajki, on Flickr
The one from Jegs is on the left, Summit Racing is on the right.
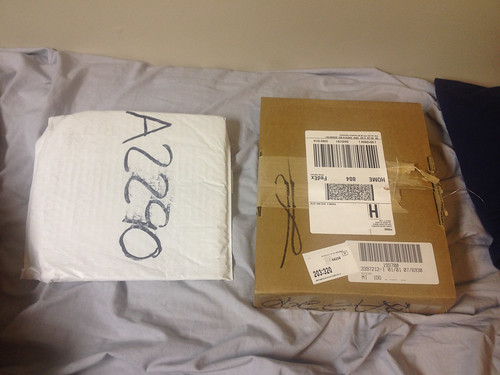 Packages by Austin Rajki, on Flickr
Candy <3 Thanks Jegs!
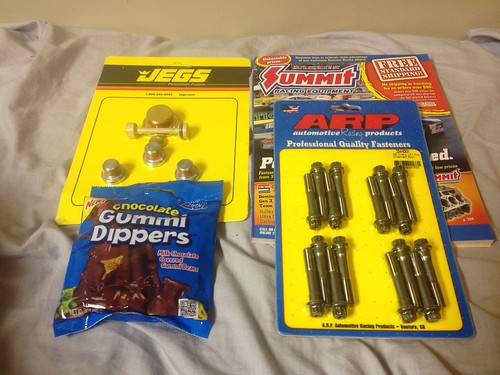 Contents by Austin Rajki, on Flickr
ARP 2000 Rod Bolts
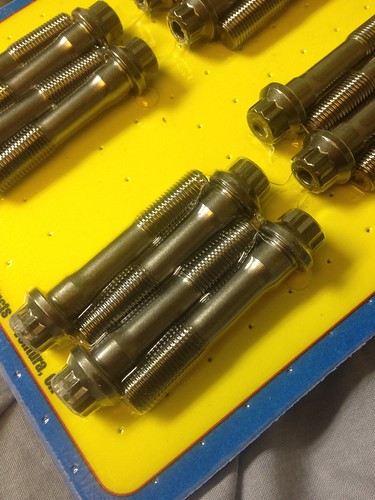 ARP 2000 Rod Bolts by Austin Rajki, on Flickr
The chocolate covered gummy bears sound weird, but weren't too bad actually. The package tells you which color is what flavour, but they all look the same...
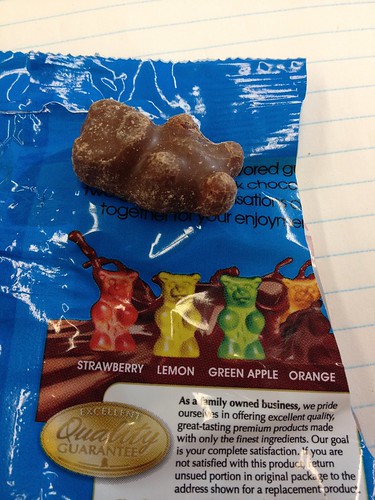 Chocolate Covered Gummy Bears by Austin Rajki, on Flickr
Between my engines lecture and my Fuels lecture my engines teacher was in the lab, so I was able to get some work done. I paid him the $350 for the lifters and I got to work. The main seal cover was a bit of a pain to remove because of the way the stand is, but I managed.
Main Caps Removed
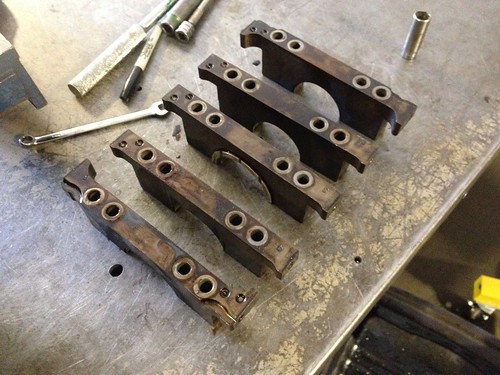 Main Caps Removed by Austin Rajki, on Flickr
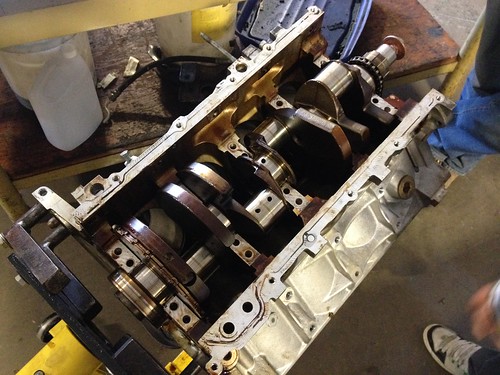 Main Caps Removed by Austin Rajki, on Flickr
The main bearings weren't bad, but will be replaced. The thrust bearing had a few marks, but the crank was good.
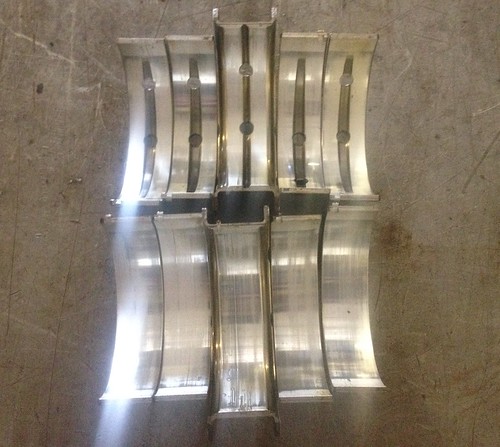 Main Bearings by Austin Rajki, on Flickr
The old lifters and lifter trays are out as well. Unless things fall through, I have a buyer set up for them.
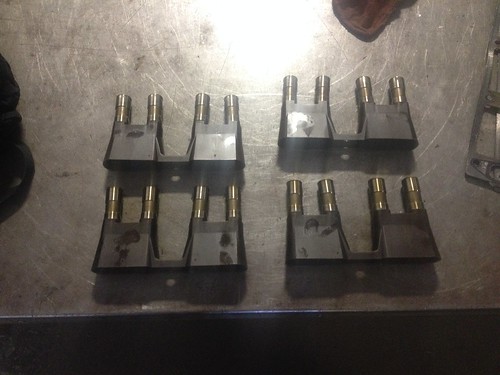 Lifters and Trays by Austin Rajki, on Flickr
Then after removing the timing assembly I was able to remove the crank and camshaft. For those of you who don't know, when storing a crankshaft for a long period to time it should be stored standing up to prevent warping. I bolted the flexplate onto it to prevent the chance of it falling over.
I pretty much worked my small lunch break away so I had to rush to class after that.
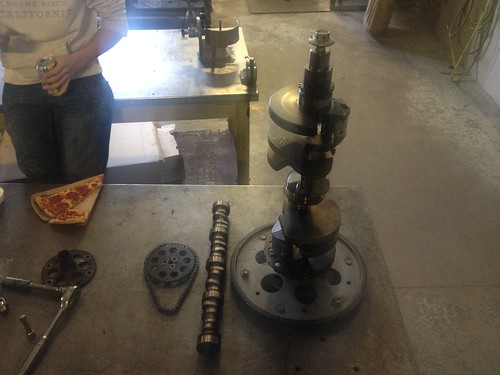 Table Top by Austin Rajki, on Flickr
treeafodo
Austin
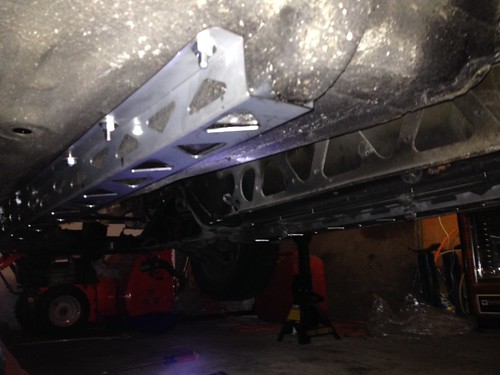
I installed the driver side frame rail this evening. That finishes off my frame rail install. Overall it was very straight forward and should make a big difference in the car.
Poopy cell phone pic.
Finished Frame Rails by Austin Rajki, on Flickr
Then this happened...
Uh oh... by Austin Rajki, on Flickr
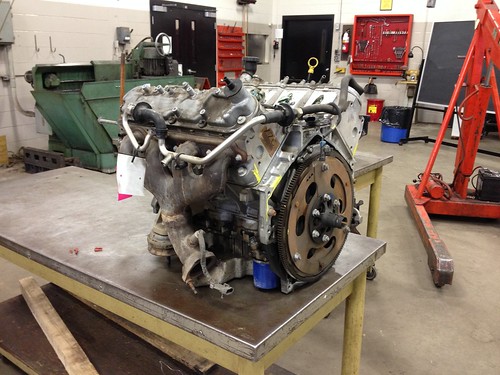
I left the house fairly early this morning to make the trip into the US to buy this LS1 longblock which I scored on eBay. I drove through the scariest neighbourhood in the world to get there. Every single building was abandoned with no windows or doors. I did not see a single occupied building driving through there. Any ways, the workers at the warehouse helped me load it into the back of my Integra for the trip home. It was a tight fit, but it worked well.The car drove like a dump truck. :lol:
By the time we got it into the car and I made the drive back it was almost time for class. I drove directly to school and unloaded the engine using the cherry picker. There were no free engine stands so it is just sitting on one of the workbenches for the time being.
LS1 Longblock by Austin Rajki, on Flickr
LS1 Longblock by Austin Rajki, on Flickr
LS1 Longblock by Austin Rajki, on Flickr
I have the engine stand I purchased earlier in my car and ready to bring to school tomorrow. I'm not entirely sure what the condition of the engine is in or even what is included with it. No word of a lie, I essentially got it for next to nothing. It came out of a '98 Corvette which was T-boned in the driver's rear quarter panel. The car had 128k miles on it. I saw pictures of the car it came out of and the engine bay was completely untouched.
I know for sure that it needs the intake manifold, fuel rail and injectors which would all have been upgraded anyways. It's definitely a little more complete than your average longblock.
I also picked up some new tools. I got a torque wrench, breaker bar and angle grinder. I purchased the angle grinder so I can remove all the surface rust on the car. The rust removal will have to wait until spring since it's way too cold for paint to stick properly.
It's a flex plate. Came from an automatic Corvette. The post I quoted shows all the pictures. Quoted the whole post since it's weird trimming a post on a small phone.Flywheel, not flexplate. Flexplates are for automatics. Liking this so far
This. It was probably an older guys weekend car. It was taken care of that's for sure.It's a flexplate, Note the holes, Not enough area for a friction plate to contact.
That engine likely came from an auto since 99% of vettes are auto, He probably mentioned that a few posts back but idk.
Sent from my iPhone using Tapatalk


