Tree's...Roadster?

treeafodo

Austin
Thanks for the suggestion, Kurt! I'll definitely keep that in mind if they do oxidize.

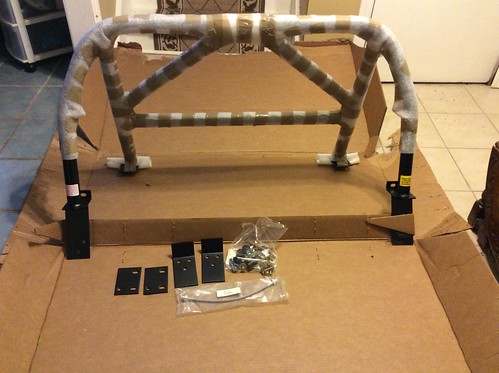
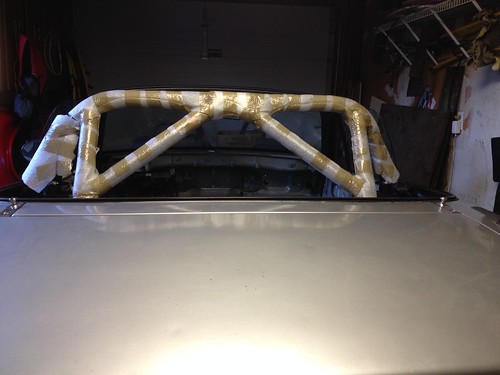
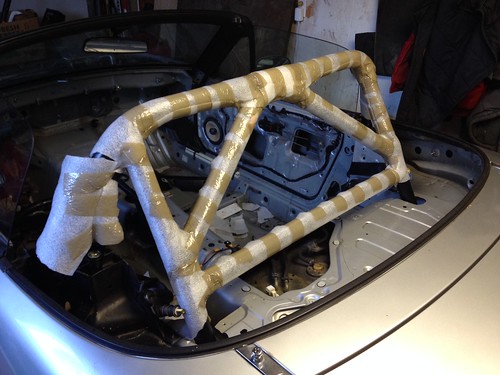
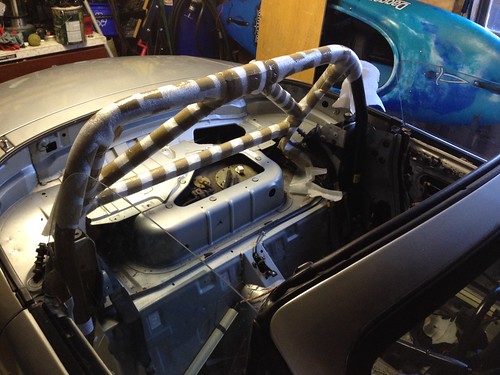
I'm not a huge fan of the shape of the EGR bar. The only other bar I'd run would be a Blackbird Fabworx one, but even then I'm not 100% on the gussets.

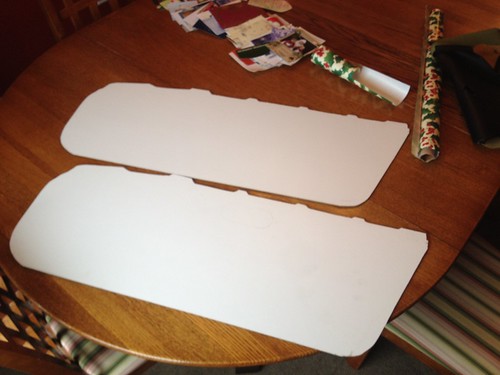
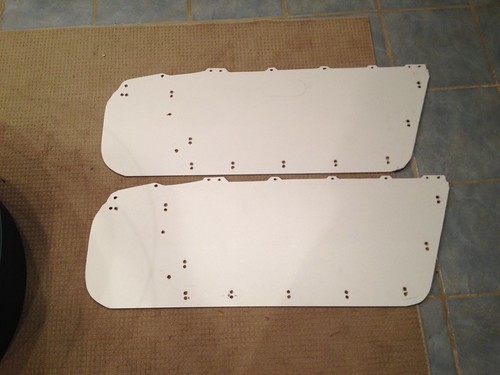
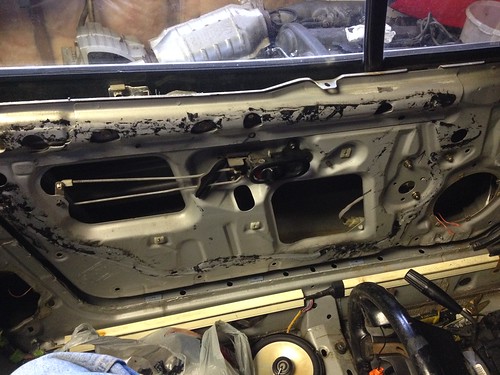
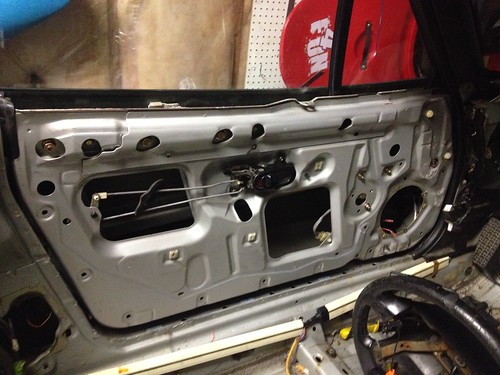
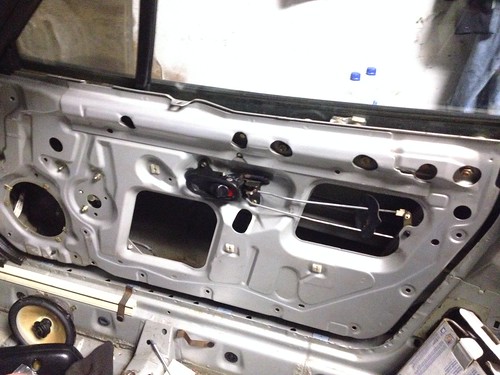
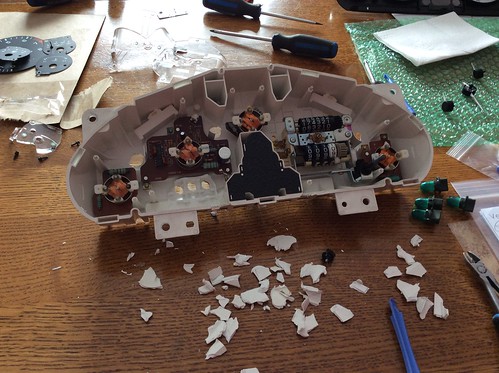
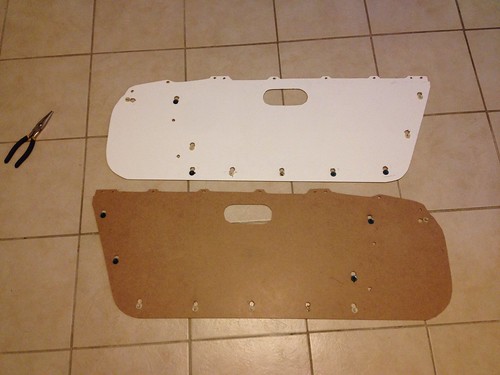
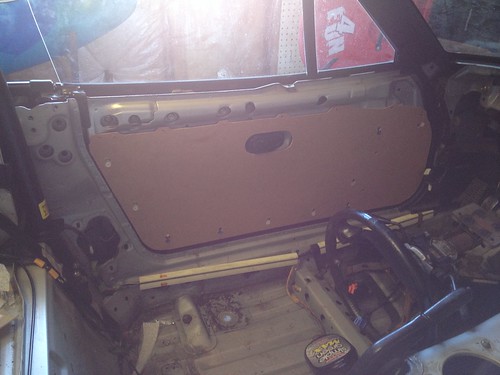
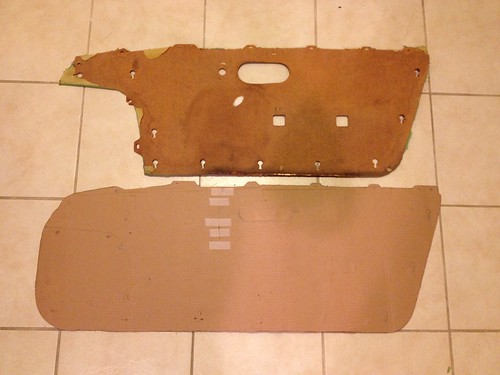
I put a little bit of work into the door panels today. I brought a big piece of cardboard home from work and made a template for my new ones. They'll be exactly like the OEM ones, but I am eliminating the speaker cover so I extended it. It will be using all the same mounting points as the OEM ones as well.
Stripped and Copied by Austin Rajki, on Flickr

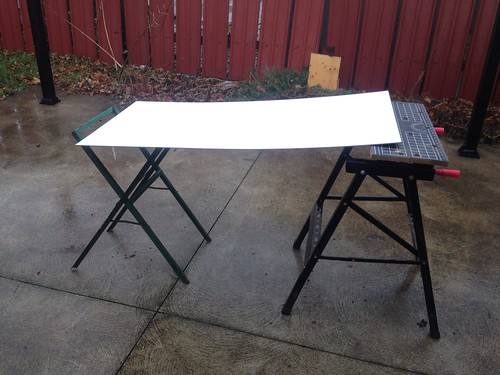
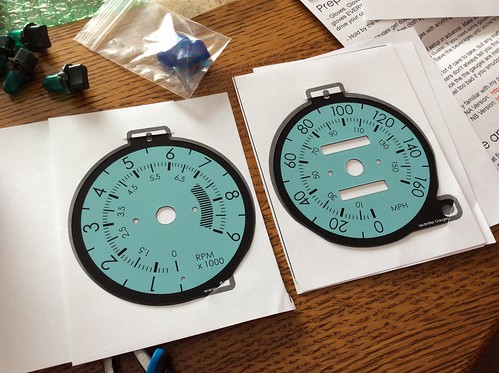
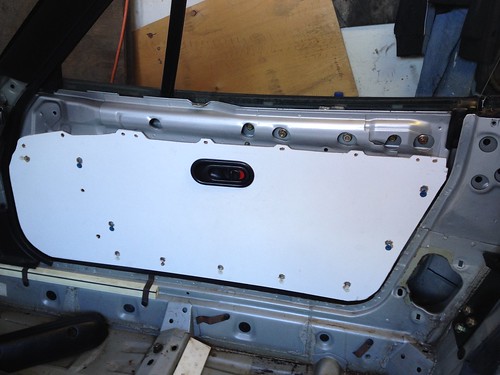
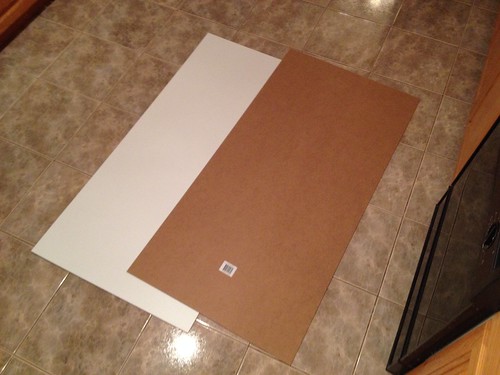
Then I went to Home Depot for some material. Originally I was going to use 6mm lexan, but the price for enough material to cover 2 panels isn't worth it. It was $119... I spent some time looking around for different options. I was considering 5mm plywood, but figured that would be too heavy. After wandering around the aisles carrying my doorcard like a fool I stumbled across the perfect material. It's called white hard board. 1/8'' thick and comes in 24''x 48'' sheets for less than $5 each. It's really close to the OEM material- a little bit more sturdy, and smoother which is nice since I won't be using a foam backing with the new fabric.
Material by Austin Rajki, on Flickr

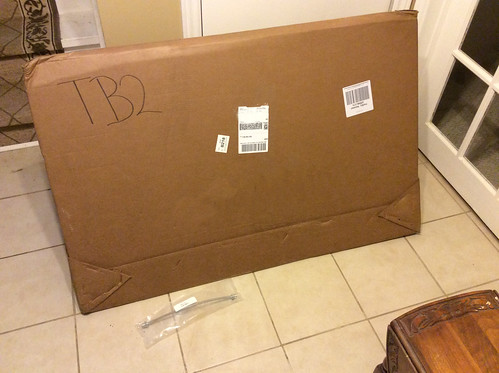
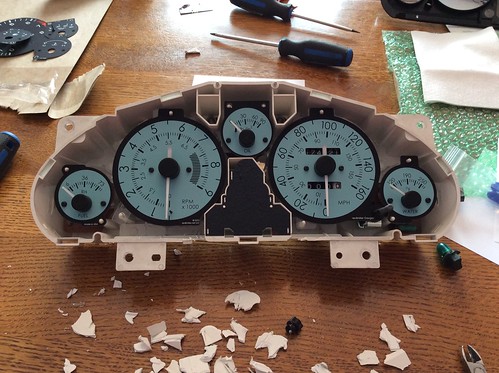
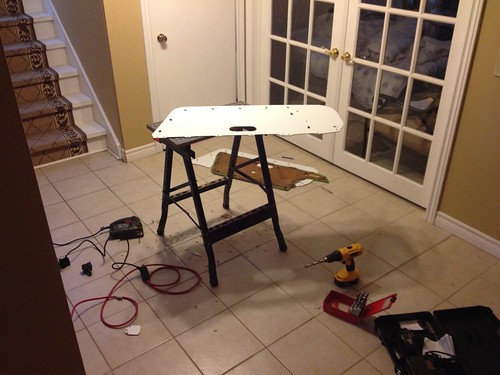
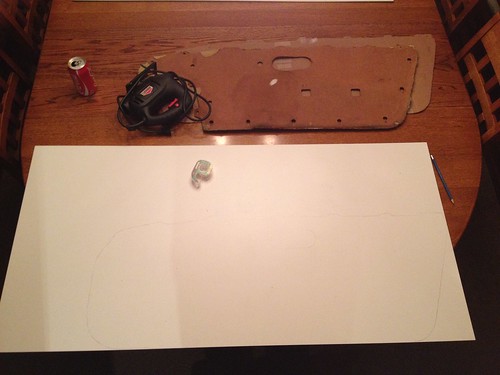
I traced my template onto the new material and dug out our jigsaw. Unfortunately the garage is pretty cramped and my parents would kill me if I cut it in the house. I hope tomorrow is nice outside so I can cut them. That's all for now.
Ready to Cut by Austin Rajki, on Flickr
 

treeafodo

Austin
I got an email saying that the rollbar arrived at the package place today! :D I'll be picking it up after Christmas. Maybe Sunday, we'll have to see. Hopefully people don't try to mug me this time. :lol:

I did some more work on the door cards today. I took the sheet of hard board outside and cut them to size with the jig saw. Once they were smaller I got rid of the terribly unlevel table and used just the taller one.
Nice and Level by Austin Rajki, on Flickr
Cut by Austin Rajki, on Flickr

Once the shape was cut I moved into the garage to do the next step. After spending some time with the drill I ended up with this:
Almost Ready by Austin Rajki, on Flickr

Everything looks to match up perfectly compared to the OEM card. When mocked up to the door everything looks good. I'm really pleased with the results.
The only thing I have left to do is buy a larger drill bit to finish the larger holes where the OEM clips will be inserted.
I'm currently trying to gather a few supplies for the door pulls before I cut any other holes and order the fabric.
 

Samurai_Blue

Yolo Whippin'
blackbird has shit welds. what did you like about the egr bar? Its the octogonal shape on top fills out the space inbetween the top and the bar that other bars will leave, so basically you have the biggest roll bar possible


treeafodo

Austin
im ready for you to be doing things to my car. :)
What did you have in mind? Lol

blackbird has shit welds. what did you like about the egr bar? Its the octogonal shape on top fills out the space inbetween the top and the bar that other bars will leave, so basically you have the biggest roll bar possible
It's the octagonal shape that I don't like. It wouldn't be a problem if you were hardtop only, but it looks so weird top down. For me to clear my hard dog bar I'll be ordering a Garage Star seat rail from you and get a really low seat. I'll basically be sitting on the floor.
 

treeafodo

Austin
Yesterday afternoon my Dad and I went to Detroit to pick more parts up from the package place. The border patrol officer asked what I was picking up. When I told him it was for the Miata he asked about what motor I am putting into it. When I told him the build plans he told me he would love to see it sometime and got talking about cars and work and stuff. Super cool guy.
This is what I picked up
Big Box! by Austin Rajki, on Flickr

When we crossed back into Canada the officer on that side asked the usual questions and asked what was in the box, and how much it was worth. I told him the value and he replied "Usually we'd charge you customs on this, but I'll let it slide. Merry Christmas"
SWEET! :D
Inside the box was my Harddog M1 Hardcore Hardtop Double Diagonal bar with built in harness bar which I ordered from Moss. There was also a smaller package separate from the bar which was my Technafit SS clutch line that Moss included as my free gift. Just wanted to give a shout out to Chris at Moss for her assistance. The service and shipping was top notch! I'll be ordering from them again.
Rollbar by Austin Rajki, on Flickr

I got to work installing it right away. I marked out the area to be cut.
To Be Cut by Austin Rajki, on Flickr

Then I cut both sides and placed the bar in the car. These are cut to the sizes that Harddog calls for. I wish I would have done my own measurements for it to be a little tighter to the bar. Oh well, it's easy enough to fix should I want to. It's not nearly as large as it looks in this picture.
Cuts Made by Austin Rajki, on Flickr

After reading about the fitment issues that most bars have where at least 1 hole that doesn't line up, I am happy to report that all 4 lined up perfectly to where they should be. Unfortunately it wasn't without a hitch. The spacer that goes on the seat belt towers wasn't perfect. One of them fit perfectly, the other was too large.
Does Not Fit by Austin Rajki, on Flickr

I ended up shaving 3/16'' off of it. After that minor set back it fit perfectly and all the bolts threaded as well. My car is dusty.
All Fixed by Austin Rajki, on Flickr

Next up was drilling all the holes for the mounts and bolting the feet down to the chassis, and the install was done!
Installed by Austin Rajki, on Flickr

All that is left on the bar is to bolt the seat belt guide to it. I'm feeling pretty productive.

Oh! I also got the proper size drill bit to finish up on the new door panels. :)
 

treeafodo

Austin
I ordered a set of Flyin Miata frame rails earlier. Here's to building a better car for 2015. Happy New Years everyone!


treeafodo

Austin
I spent the day today doing a lot of cleaning on the car. All cell phone pictures today. I started off by reinstalling the parcel shelf covers that I painted in the fall.
Cover Reinstalled by Austin Rajki, on Flickr

Then I removed the OEM mirrors and cleaned the area.
Mirrors Removed by Austin Rajki, on Flickr
Cleaner by Austin Rajki, on Flickr

Next up was removing the universal mounts that are included with the APR mirrors and replacing them with the Slick Auto mounts.
Old and New by Austin Rajki, on Flickr

I installed the mirrors on the car for a few pictures before I removed them and put them back in the box where they're safe. They're beautiful. <3
APR GT3 Mirrors by Austin Rajki, on Flickr

Once the mirrors were put away I started to clean the doors up to make progress towards my door cards.
Remember how I said the previous owner was a hack and used duct tape everywhere? He duct taped the wires to the speakers....:suicide:
More Duct Tape... by Austin Rajki, on Flickr

Once the speakers were out I started removing the vapour barrier and the messy tar that it's held on with.
I pulled as much off as possible by hand which left me with this.
Door Tar by Austin Rajki, on Flickr

Most people would probably leave it at that since most of it was removed. My OCD of car cleanliness kicked in and I took it a step further.
This is what I started with.
Hack Fix by Austin Rajki, on Flickr

These are the doors now. :mrgreen:
Clean Door by Austin Rajki, on Flickr

Not a spec of tar is left. There's a little bit of duct tape residue left over, I'll be removing that next time I spend time on the car, but I've had enough for today.
 

treeafodo

Austin
:D

I've been wanting to get work done on the car for a while, but my garage is super cold and the motivation just isn't quite there. I had the itch to get something done on it, so I decided to install the gauges that I won through Adam's Sharksgiving sale.
Today's Project by Austin Rajki, on Flickr
Revlimiter Gauges by Austin Rajki, on Flickr

First things first. I put the included gloves on to keep everything finger print free and cracked the cluster open. The candy that was included was a nice (and delicious) touch. :)
Opened Up by Austin Rajki, on Flickr

After the cluster was opened up I used the included tools to remove the needles and then removed the OEM faces from the cluster.
OEM Gauges Removed by Austin Rajki, on Flickr

Now the messy cutting of the warning light surrounds.
Cut Apart by Austin Rajki, on Flickr

Now the moment I have been waiting for. This was my very first glance at the gauges. I requested a set of Warbird gauges in Tiffany Blue with Black lettering.
Custom Revlimiter Gauges by Austin Rajki, on Flickr

I installed the gauges faces into the cluster being very careful to avoid any dust and/or finger prints despite wearing the gloves. Once the gauge faces were in place I reinstalled the needles. I do realize that I will need to reset the needles once the car is running again so I just zeroed them all.
Revlimiter Gauges Placed In by Austin Rajki, on Flickr

Once the needles were in place I reassembled the cluster. The last finishing touch was to remove the OEM Green light bulb "condoms" and install the Blue ones that Adam Included.
New Lighting by Austin Rajki, on Flickr

This image is from Adam's site showing what they'll look like illuminated. Adam, if you'd prefer I can remove your picture from this post.


One thing I didn't notice until this morning while reading Oregonmon's build was that the OEM gauge faces have a green tint to them.
OEM Green Tint by Austin Rajki, on Flickr
OEM Gauge Faces by Austin Rajki, on Flickr

And the finished product. The pictures do a decent job at capturing the true color of them. They are stunning and look perfect in the cluster. I was having my doubts if all 5 gauge faces in blue would be too bright, but I'm VERY happy with the end result.
Completed by Austin Rajki, on Flickr


I have nothing but great things to say about these gauges. I got these essentially for free due to the contest, but I would have been more than happy to pay the price Adam asks for these. The quality, customer service and communication are top notch as well as the instructions.
Adam, if you're reading this PM me your mailing address. I would like to send you a small gift.
 

treeafodo

Austin
I was able to get in contact with Flyin Miata and sort out my frame rail order. I ordered them New Year's Eve during their holiday shut down. They were busy playing catch up with all their orders placed over the holidays. When they got to mine they weren't able to process the order because of my credit card's billing address not matching my address. I ship parts to the US to save money on shipping so my billing address is different than my shipping address. I've never had an issue with that on any other sites before, but I was able to sort it out. They took the money from my account today and will be shipping them out shortly.

I started my last semester of college yesterday. My new school schedule is awesome. I can work full time hours while in school and still have time at home. Tuesday is my day off school and I don't work until later tonight so I did a little bit of work on the car.
I brought everything downstairs and finished the door cards.
Last Finishing Touches by Austin Rajki, on Flickr

All OEM clips are in place other than the 1 missing clip on each side. I will be addressing that shortly.
Done - Clips In Place by Austin Rajki, on Flickr

And then placed them in the car. Fitment is PERFECT! :mrgreen:
Door Panel Installed by Austin Rajki, on Flickr

I made a run out to Fabric Land to see if they had the material I wanted, but they didn't. :( I'll have to order that online.

Then came some more weight reduction of things I will no longer need.
Weight Reduction by Austin Rajki, on Flickr

Not much progress, but small bits of progress will eventually add up.
 
Top