
Tree's...Roadster?
- Thread starter treeafodo
- Start date
Accel.speed
basically, i like fast!
Why did you cut out the whole rear end?
treeafodo
Austin
For the style if cage I want plus a fuel cell. Most guys throw a fuel cell in the trunk, but with it being outside of the wheelbase I've read it throws off the handling of the car. The fuel cell will be mounted where the original gas tank was so I had to cut that out.Why did you cut out the whole rear end?
Sent from my iPhone using Tapatalk
treeafodo
Austin
We're going to be discussing a lot of things come the weekend.
The bike has been tons of fun! One of the guys at my new job has a Cr450f so we go out riding together almost every weekend. I've found tons of cool trails and paths tucked away. Surprisingly I haven't gotten any trespassing tickets yet. :lol:
Sent from my iPad using Tapatalk
The bike has been tons of fun! One of the guys at my new job has a Cr450f so we go out riding together almost every weekend. I've found tons of cool trails and paths tucked away. Surprisingly I haven't gotten any trespassing tickets yet. :lol:
Sent from my iPad using Tapatalk
treeafodo
Austin
Well since I'm still waiting for my fabricator I decided to work up some motivation to get me excited about this car again.
Since my last post I did purchase a 2015 Wr250r and threw some mods on that. I put Zero-G sidepanels on it, FMF Megabomb header and powercore 4 exhuast and a 12 o'clock labs tidy tail taillight and license plate bracket on it.
 Dirtbike by Austin Rajki, on Flickr
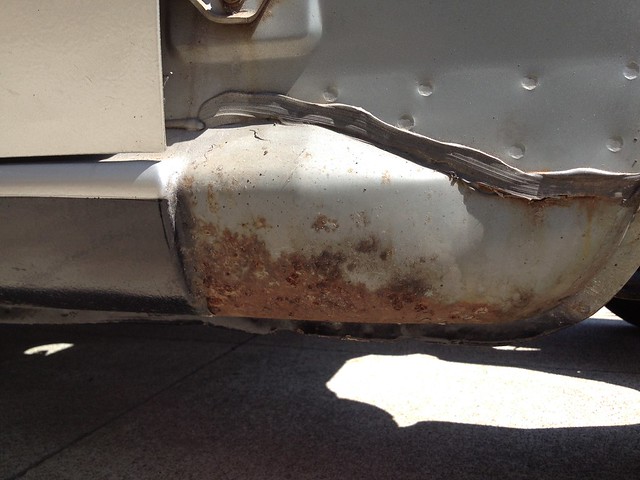
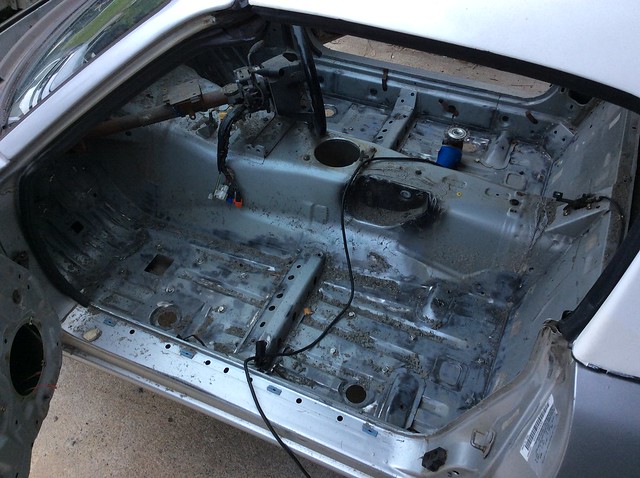
I decided to get some cleaning done on the miata to help slow the rust down between now and body work time.
IMG_1077 by Austin Rajki, on Flickr
IMG_1078 by Austin Rajki, on Flickr
Little Surface rust spots that were removed
IMG_1079 by Austin Rajki, on Flickr
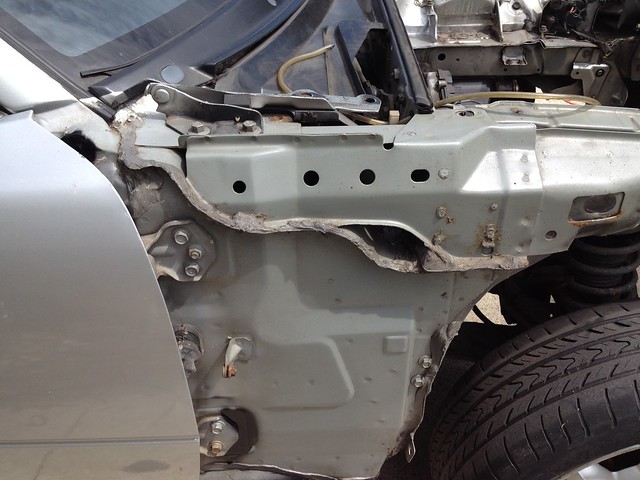
Then I just covered everything up with rust paint for the time being. I'm not worried about looks at this point. :lol:
IMG_1080 by Austin Rajki, on Flickr
I did the same thing to the other side. Then I rolled down the windows in the most ghetto fashion.
IMG_1083 by Austin Rajki, on Flickr
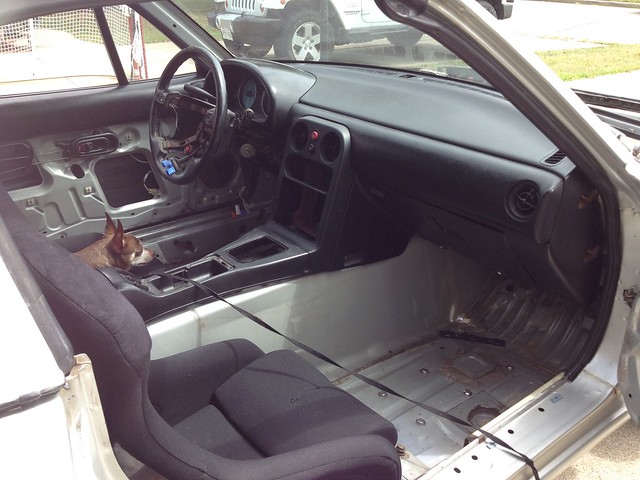
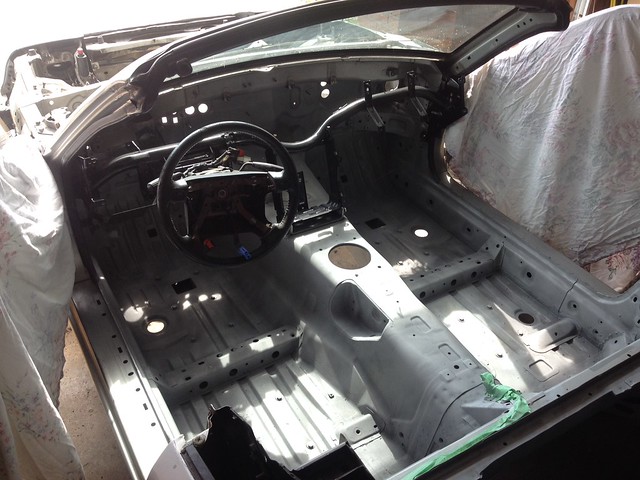
I put the interior together a bit. Mostly because I don't want my mint dashboard to warp sitting on the floor with no support to it at all.
IMG_1088 by Austin Rajki, on Flickr
IMG_1089 by Austin Rajki, on Flickr
IMG_1091 by Austin Rajki, on Flickr
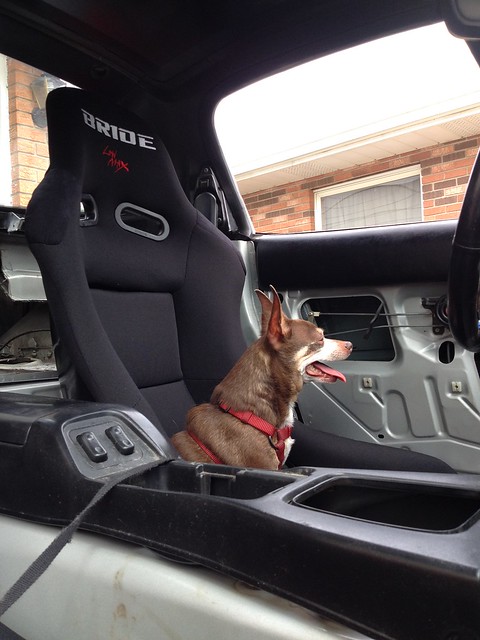
My dog absolutely loves car rides. He thinks he's going for a drive. Now there's dog hair all over my fresh seats. haha
Driver by Austin Rajki, on Flickr
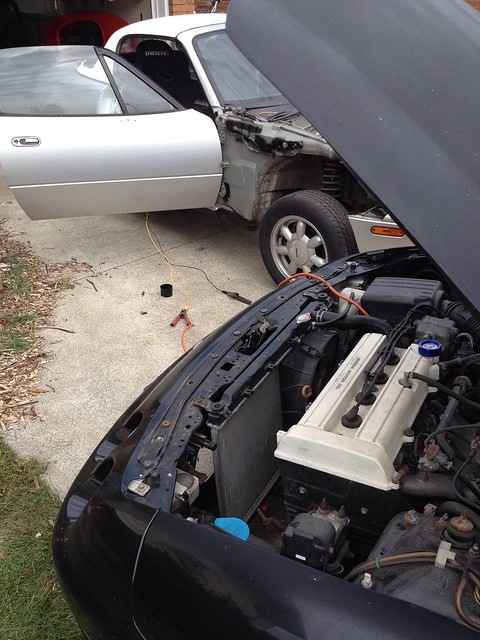
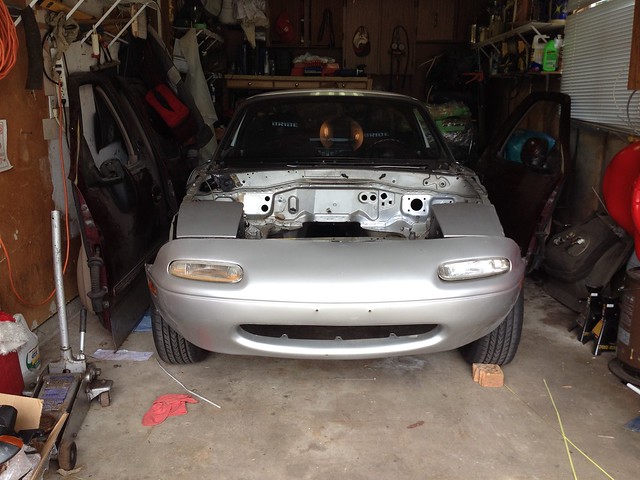
I also threw the front bumper on to give me some space in my room. It kind of resembles a car now.
IMG_1093 by Austin Rajki, on Flickr
Updates will be a lot more regular now. I will still have quite a few cleaning updates, but new parts will be on the way shortly!
Since my last post I did purchase a 2015 Wr250r and threw some mods on that. I put Zero-G sidepanels on it, FMF Megabomb header and powercore 4 exhuast and a 12 o'clock labs tidy tail taillight and license plate bracket on it.
 Dirtbike by Austin Rajki, on Flickr
I decided to get some cleaning done on the miata to help slow the rust down between now and body work time.
 IMG_1077 by Austin Rajki, on Flickr
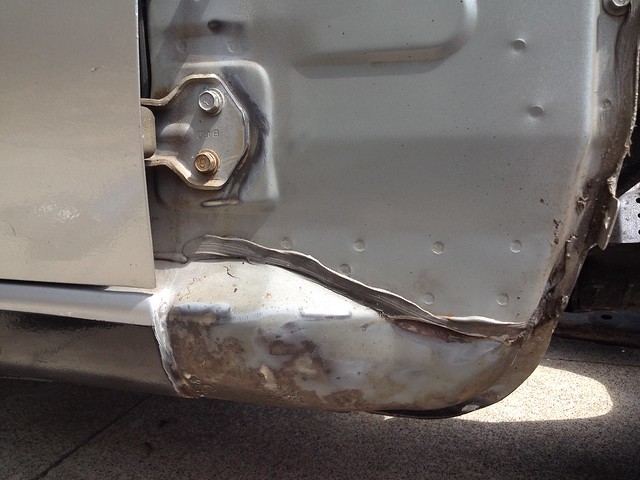 IMG_1078 by Austin Rajki, on Flickr
Little Surface rust spots that were removed
 IMG_1079 by Austin Rajki, on Flickr
Then I just covered everything up with rust paint for the time being. I'm not worried about looks at this point. :lol:
 IMG_1080 by Austin Rajki, on Flickr
I did the same thing to the other side. Then I rolled down the windows in the most ghetto fashion.
 IMG_1083 by Austin Rajki, on Flickr
I put the interior together a bit. Mostly because I don't want my mint dashboard to warp sitting on the floor with no support to it at all.
 IMG_1088 by Austin Rajki, on Flickr
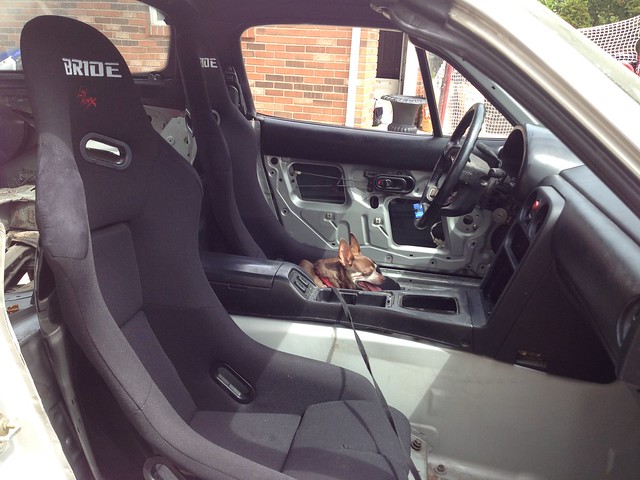 IMG_1089 by Austin Rajki, on Flickr
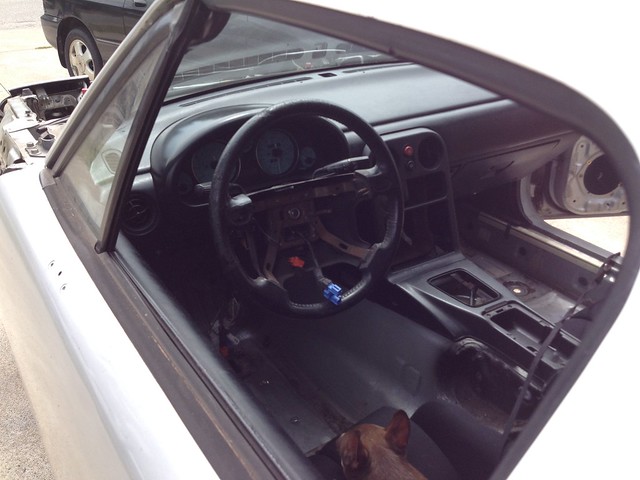 IMG_1091 by Austin Rajki, on Flickr
My dog absolutely loves car rides. He thinks he's going for a drive. Now there's dog hair all over my fresh seats. haha
 Driver by Austin Rajki, on Flickr
I also threw the front bumper on to give me some space in my room. It kind of resembles a car now.
 IMG_1093 by Austin Rajki, on Flickr
Updates will be a lot more regular now. I will still have quite a few cleaning updates, but new parts will be on the way shortly!
JustinMcGee1
I like Hondas
great work as always. Can't wait to see this thing finished.
treeafodo
Austin
That'll be a long ways away unfortunatelygreat work as always. Can't wait to see this thing finished.
. I just want to see the cage and tube front welded in. Sent from my iPad using Tapatalk
treeafodo
Austin
This isn't the huge update I was planning, but progress is progress, I guess.
I did order a pair of GarageStar seat rails, but haven't had the chance to pick them up yet. That will come soon.
I've kind of taken cleaning up the chassis to another level. This interior was pretty clean before, couple blemish spots of surface rust here and there
IMG_2766 by Austin Rajki, on Flickr
IMG_5256 by Austin Rajki, on Flickr
IMG_5254 by Austin Rajki, on Flickr
IMG_5255 by Austin Rajki, on Flickr
But that wasn't quite good enough, so out came the grinder...again.
IMG_2767 by Austin Rajki, on Flickr
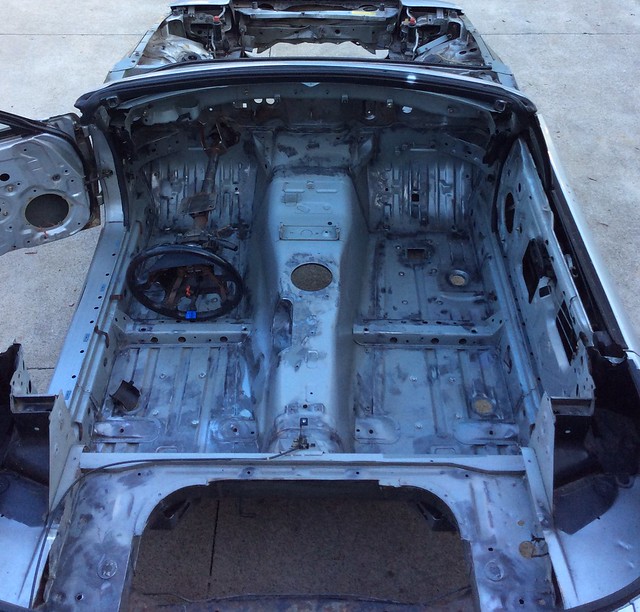
A little while later all the seam sealer was removed and any blemishes were gone.
FullSizeRender by Austin Rajki, on Flickr
Stripped by Austin Rajki, on Flickr
Stripped1 by Austin Rajki, on Flickr
Stripped2 by Austin Rajki, on Flickr
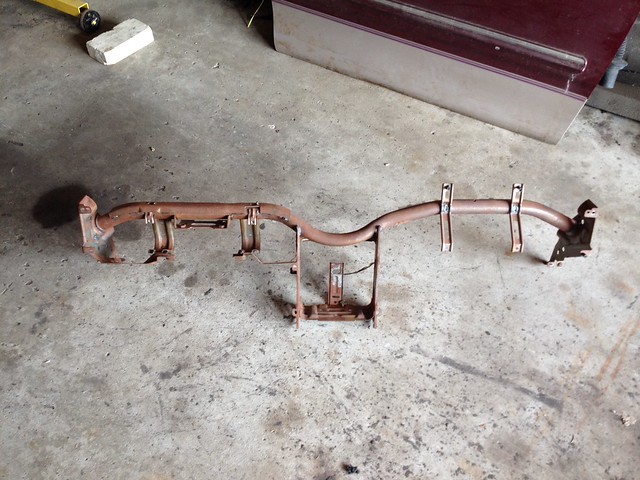
I also cleaned the rust off the dash bar and steering column and gave them a touch of paint.
IMG_5250 by Austin Rajki, on Flickr
Dash Bar by Austin Rajki, on Flickr
I will be picking up weld through primer then coating the interior with that. This prep work is going to save me a ton of money when the car goes out to get the cage and tube front. Stitch welding was also arranged to be done.
I did order a pair of GarageStar seat rails, but haven't had the chance to pick them up yet. That will come soon.
I've kind of taken cleaning up the chassis to another level. This interior was pretty clean before, couple blemish spots of surface rust here and there
 IMG_2766 by Austin Rajki, on Flickr
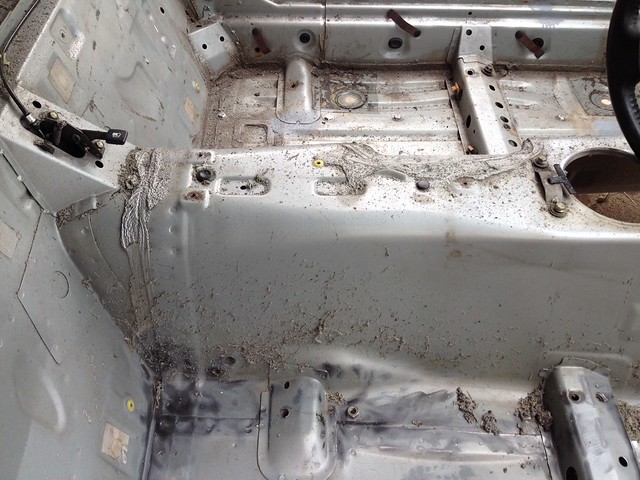 IMG_5256 by Austin Rajki, on Flickr
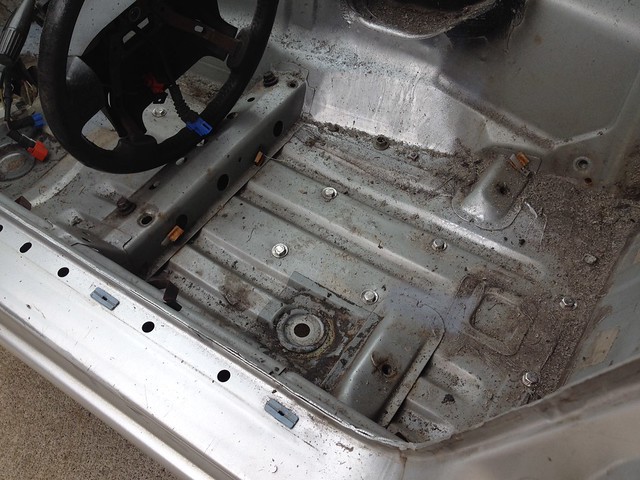 IMG_5254 by Austin Rajki, on Flickr
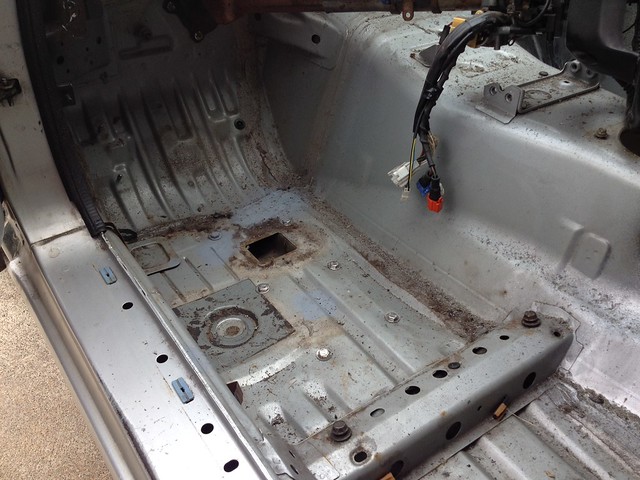 IMG_5255 by Austin Rajki, on Flickr
But that wasn't quite good enough, so out came the grinder...again.
 IMG_2767 by Austin Rajki, on Flickr
A little while later all the seam sealer was removed and any blemishes were gone.
 FullSizeRender by Austin Rajki, on Flickr
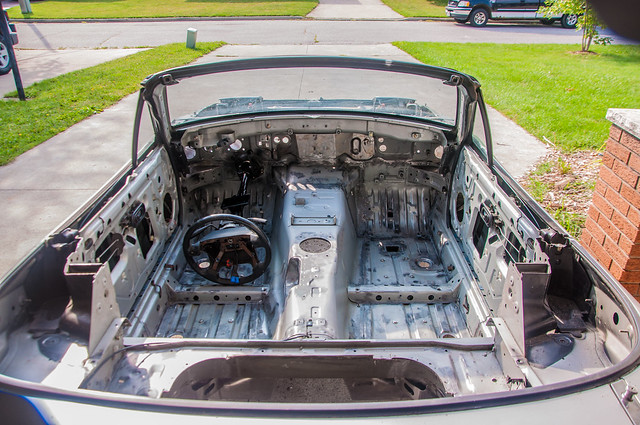 Stripped by Austin Rajki, on Flickr
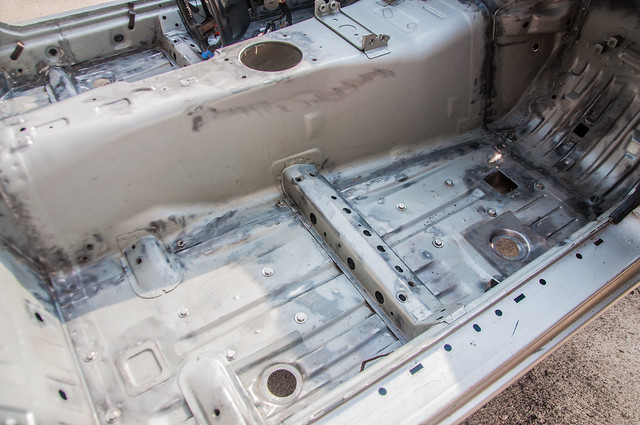 Stripped1 by Austin Rajki, on Flickr
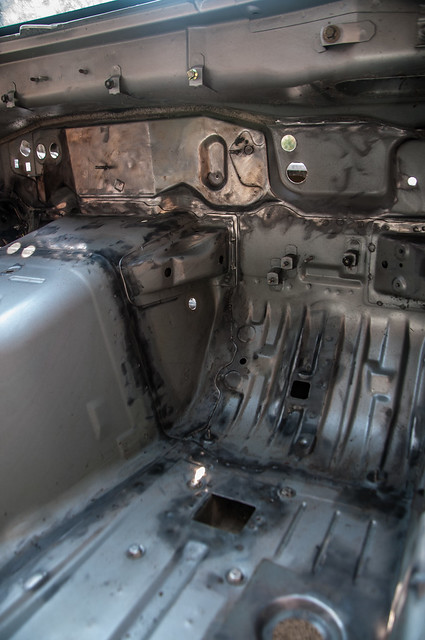 Stripped2 by Austin Rajki, on Flickr
I also cleaned the rust off the dash bar and steering column and gave them a touch of paint.
 IMG_5250 by Austin Rajki, on Flickr
 Dash Bar by Austin Rajki, on Flickr
I will be picking up weld through primer then coating the interior with that. This prep work is going to save me a ton of money when the car goes out to get the cage and tube front. Stitch welding was also arranged to be done.
Last edited:
treeafodo
Austin
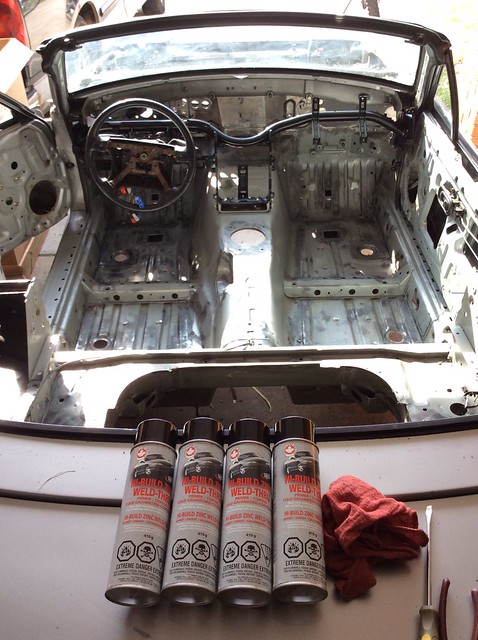
It's the weekend, which means updates!
I picked up the weld thru primer. My cost through work was still costly. $65 for 4 cans.
IMG_3063 by Austin Rajki, on Flickr
I cleaned up the interior a little more then primed the interior.
IMG_3075 by Austin Rajki, on Flickr
IMG_3074 by Austin Rajki, on Flickr
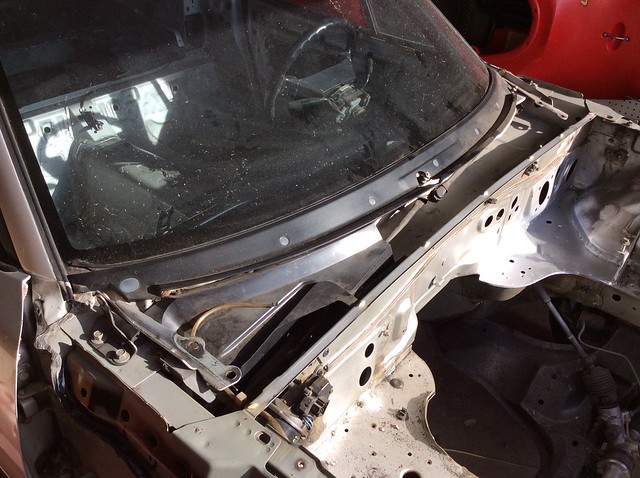
In between the first and second coat I removed the cowl trim and cleaned it up. Very happy to find no rust.
IMG_3060 by Austin Rajki, on Flickr
IMG_3061 by Austin Rajki, on Flickr
IMG_3124 by Austin Rajki, on Flickr
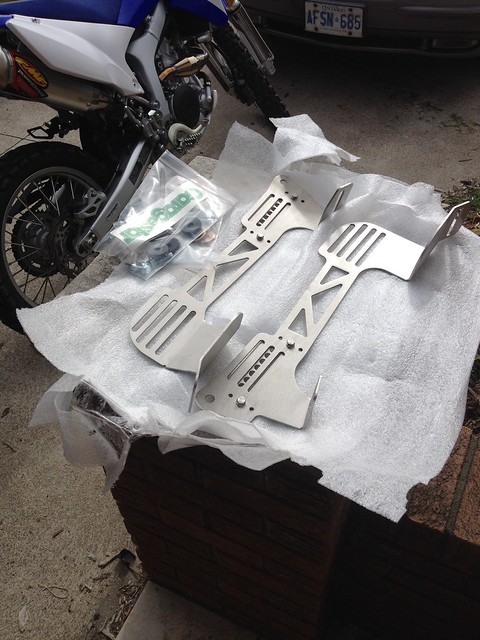
After I sprayed the second coat I made a run to Detroit to pick up my Garagestar seat rails. I thought I ordered a pair, but I guess it was only 1 side. I didn't really read the ad, kind of assumed "rails" meant both sides. lol I just know I've wanted these since Garagestar first announced it.
IMG_3125 by Austin Rajki, on Flickr
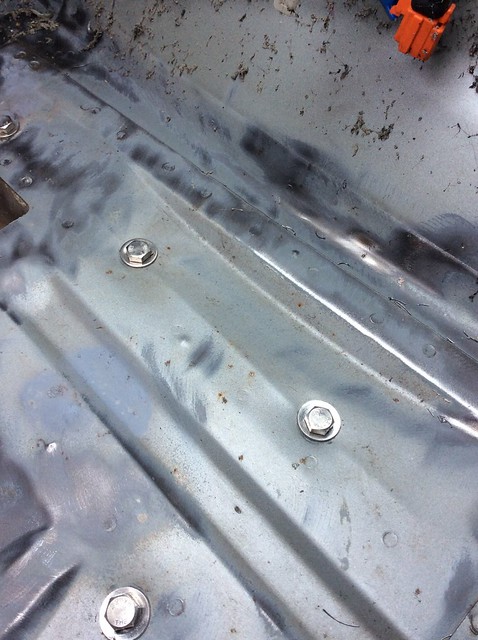
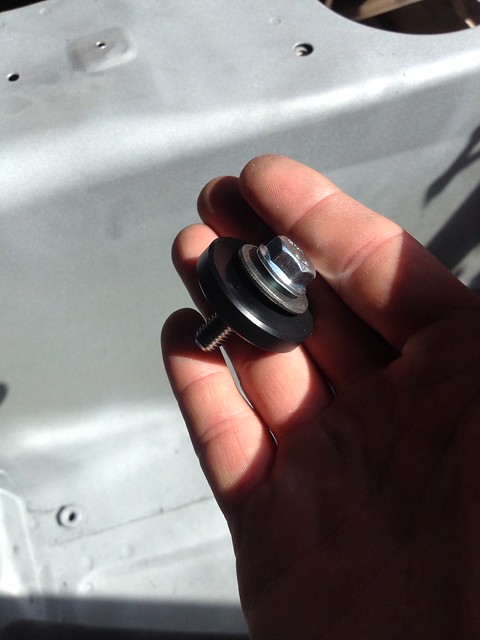
The rail was pricey, especially for one, but everything is top notch, even the hardware. It was nice that they included new floor mount bolts as well.
IMG_3138 by Austin Rajki, on Flickr
Installation was a little tricky at first. I originally tried bolting the rails into the car and then bolting the seat on first, but getting everything lined up didn't really work. I removed the rails from the car, bolted it to the seats and then bolted it in the car. I set the seat as low as possible, so getting the back bolts in was a hassle, but I eventually managed.
The entire assembly- seat, bolts, rails is 18.8 lbs
IMG_3143 by Austin Rajki, on Flickr
IMG_3144 by Austin Rajki, on Flickr
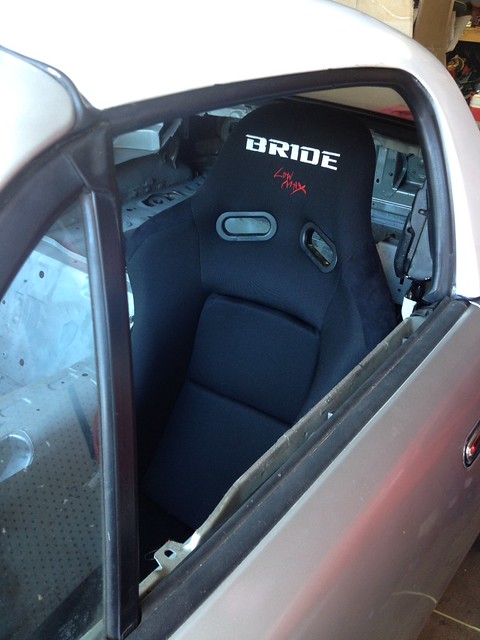
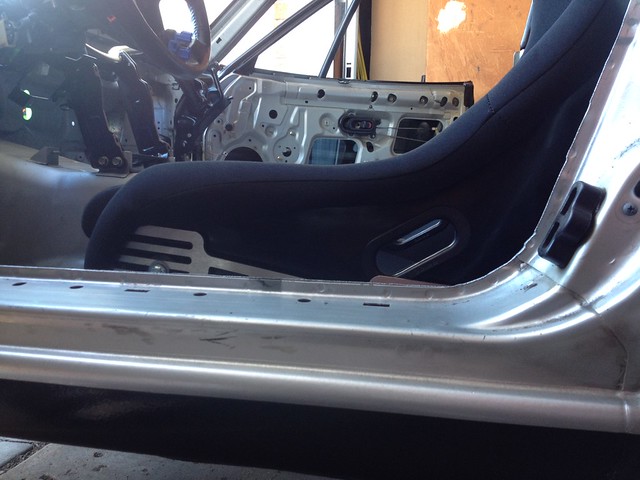
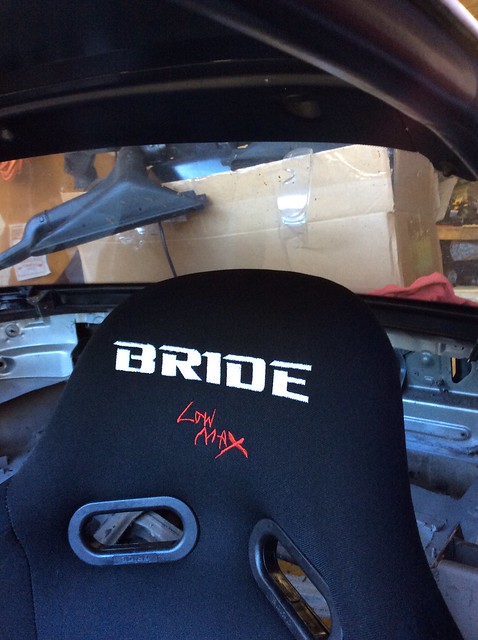
And then the finished product. :hello kitty: The cage will fit so tightly to this seat with my seating position. Not really easy when you're 6'2
IMG_3148 by Austin Rajki, on Flickr
It's very close, but it's not touching.
IMG_3149 by Austin Rajki, on Flickr
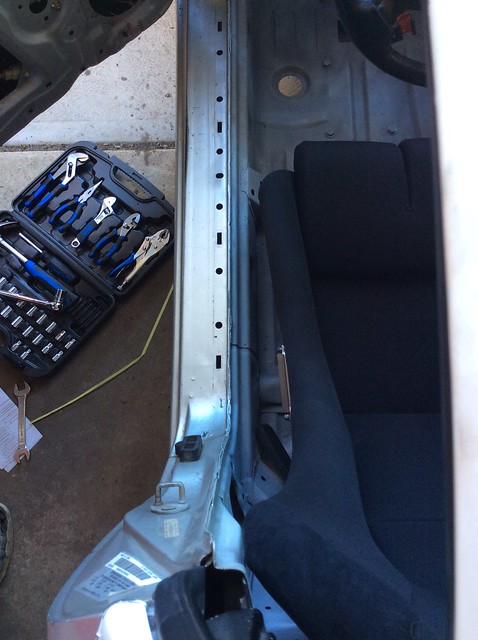
I got the seat lined up with the wheel without any beating to the tranny tunnel.
IMG_3152 by Austin Rajki, on Flickr
Good luck to my fabricator. It's not going to be easy fitting a cage around this thing. lol
IMG_3158 by Austin Rajki, on Flickr
IMG_3155 by Austin Rajki, on Flickr
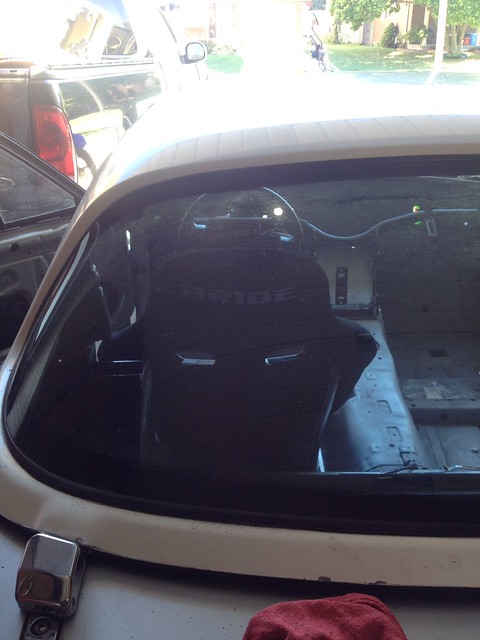
I got this thing sitting low. Very, very low.
IMG_3151 by Austin Rajki, on Flickr
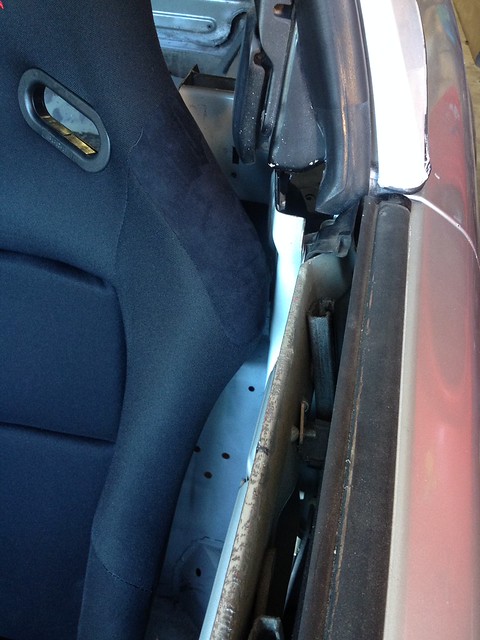
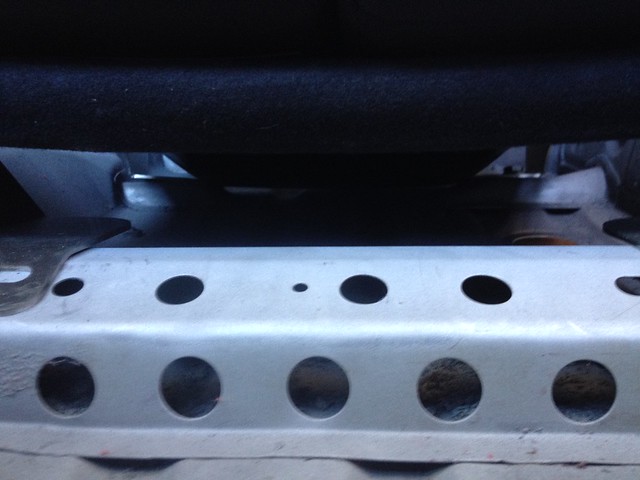
I gave it a little bit of recline to help my head clear the rollbar, even then the seat is low in the front. The gap in the front is my index finger, the gap in the rear is pretty much non existent. There is a light shining through from the other side yet you see nothing.
IMG_3157 by Austin Rajki, on Flickr
I picked up the weld thru primer. My cost through work was still costly. $65 for 4 cans.
 IMG_3063 by Austin Rajki, on Flickr
I cleaned up the interior a little more then primed the interior.
 IMG_3075 by Austin Rajki, on Flickr
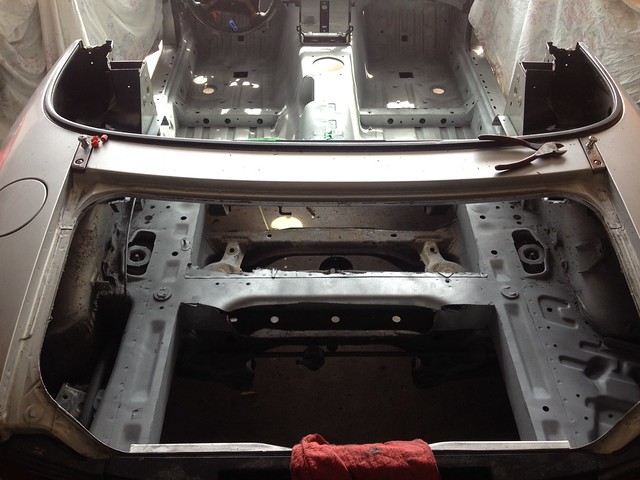 IMG_3074 by Austin Rajki, on Flickr
In between the first and second coat I removed the cowl trim and cleaned it up. Very happy to find no rust.
 IMG_3060 by Austin Rajki, on Flickr
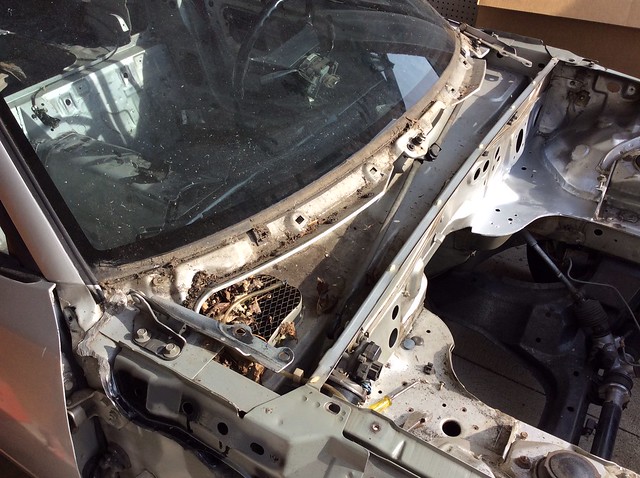 IMG_3061 by Austin Rajki, on Flickr
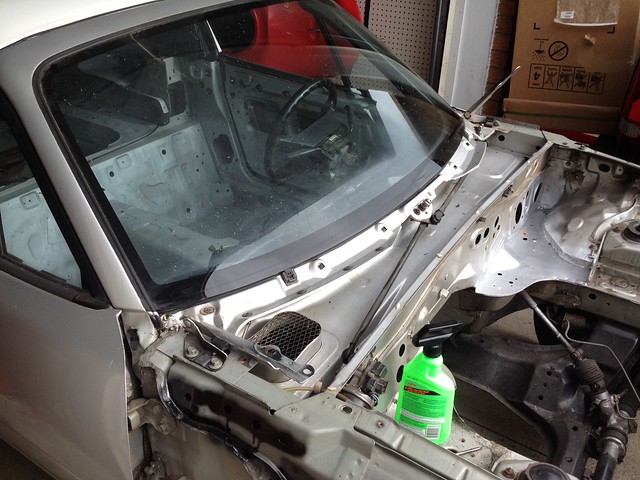 IMG_3124 by Austin Rajki, on Flickr
After I sprayed the second coat I made a run to Detroit to pick up my Garagestar seat rails. I thought I ordered a pair, but I guess it was only 1 side. I didn't really read the ad, kind of assumed "rails" meant both sides. lol I just know I've wanted these since Garagestar first announced it.
 IMG_3125 by Austin Rajki, on Flickr
The rail was pricey, especially for one, but everything is top notch, even the hardware. It was nice that they included new floor mount bolts as well.
 IMG_3138 by Austin Rajki, on Flickr
Installation was a little tricky at first. I originally tried bolting the rails into the car and then bolting the seat on first, but getting everything lined up didn't really work. I removed the rails from the car, bolted it to the seats and then bolted it in the car. I set the seat as low as possible, so getting the back bolts in was a hassle, but I eventually managed.
The entire assembly- seat, bolts, rails is 18.8 lbs
 IMG_3143 by Austin Rajki, on Flickr
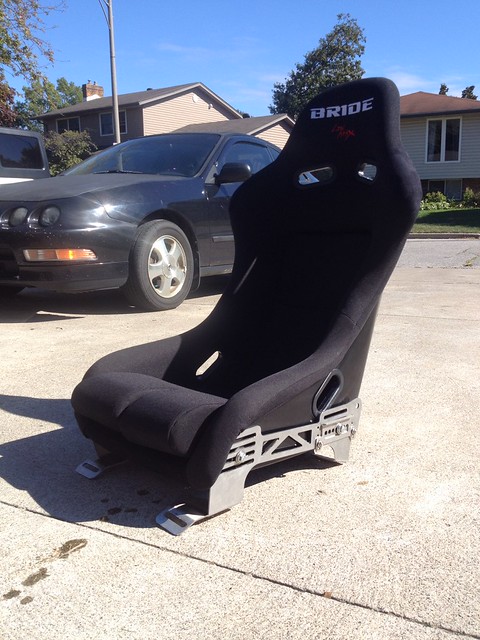 IMG_3144 by Austin Rajki, on Flickr
And then the finished product. :hello kitty: The cage will fit so tightly to this seat with my seating position. Not really easy when you're 6'2
 IMG_3148 by Austin Rajki, on Flickr
It's very close, but it's not touching.
 IMG_3149 by Austin Rajki, on Flickr
I got the seat lined up with the wheel without any beating to the tranny tunnel.
 IMG_3152 by Austin Rajki, on Flickr
Good luck to my fabricator. It's not going to be easy fitting a cage around this thing. lol
 IMG_3158 by Austin Rajki, on Flickr
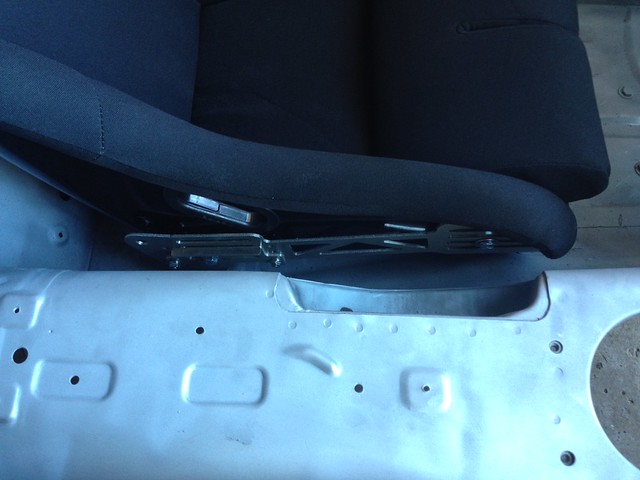 IMG_3155 by Austin Rajki, on Flickr
I got this thing sitting low. Very, very low.
 IMG_3151 by Austin Rajki, on Flickr
I gave it a little bit of recline to help my head clear the rollbar, even then the seat is low in the front. The gap in the front is my index finger, the gap in the rear is pretty much non existent. There is a light shining through from the other side yet you see nothing.
 IMG_3157 by Austin Rajki, on Flickr
treeafodo
Austin
Another post since I hit the image cap on the last one.
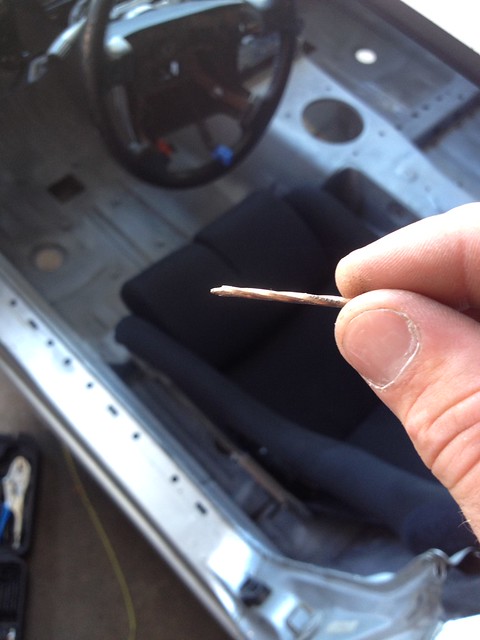
I literally cannot fit this nail under the back of the seat and the floor.
IMG_3161 by Austin Rajki, on Flickr
Head room is a good thing.
IMG_3162 by Austin Rajki, on Flickr
Very pleased with this product. All I wanted was a seat rail that I could set the seat right on the floor since I'm pretty tall, and I got what I wanted with this product. Installation, once I figured out the order, was straight forward. Dialling it in was a bit tedious.
I will be purchasing another one for the other side, but my next purchase will probably be my fuel cell.
I literally cannot fit this nail under the back of the seat and the floor.
 IMG_3161 by Austin Rajki, on Flickr
Head room is a good thing.
 IMG_3162 by Austin Rajki, on Flickr
Very pleased with this product. All I wanted was a seat rail that I could set the seat right on the floor since I'm pretty tall, and I got what I wanted with this product. Installation, once I figured out the order, was straight forward. Dialling it in was a bit tedious.
I will be purchasing another one for the other side, but my next purchase will probably be my fuel cell.