guy_from_nerks 4dr build thread...the quest for 10's

DaddyBuiltRacing

Resident Asshole
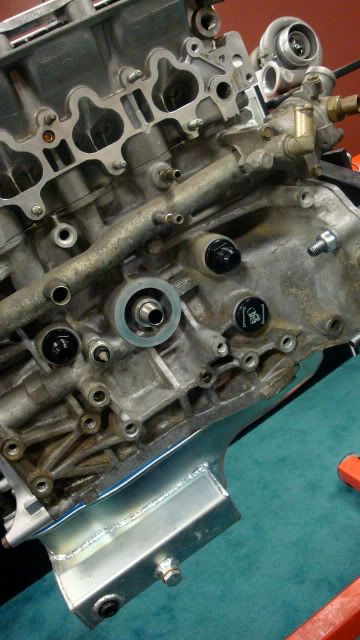
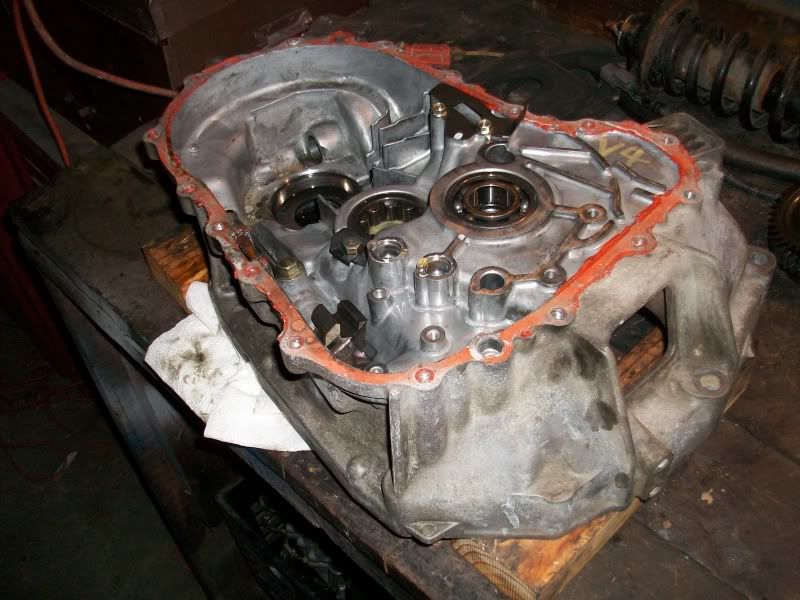
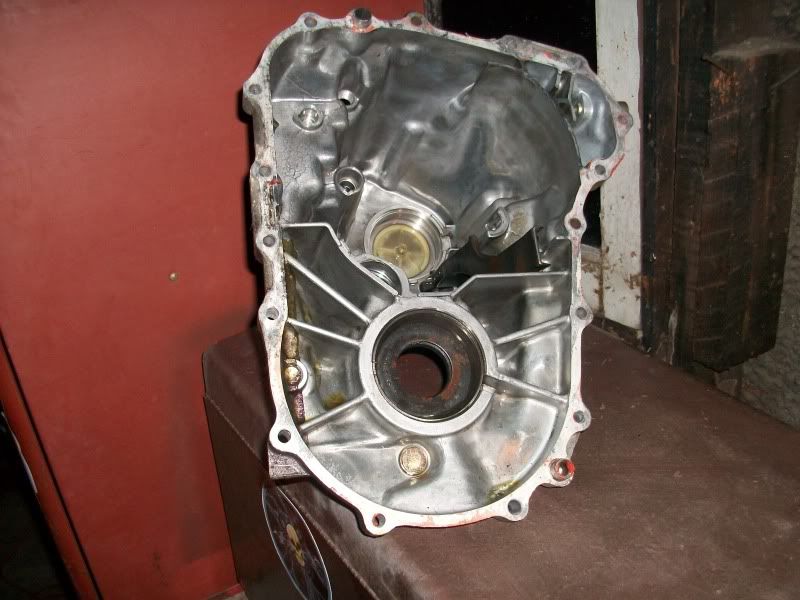
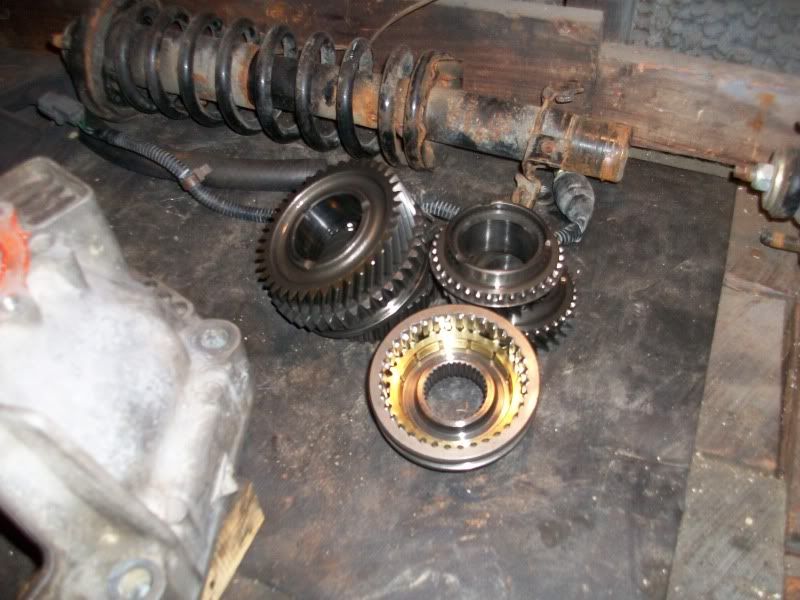
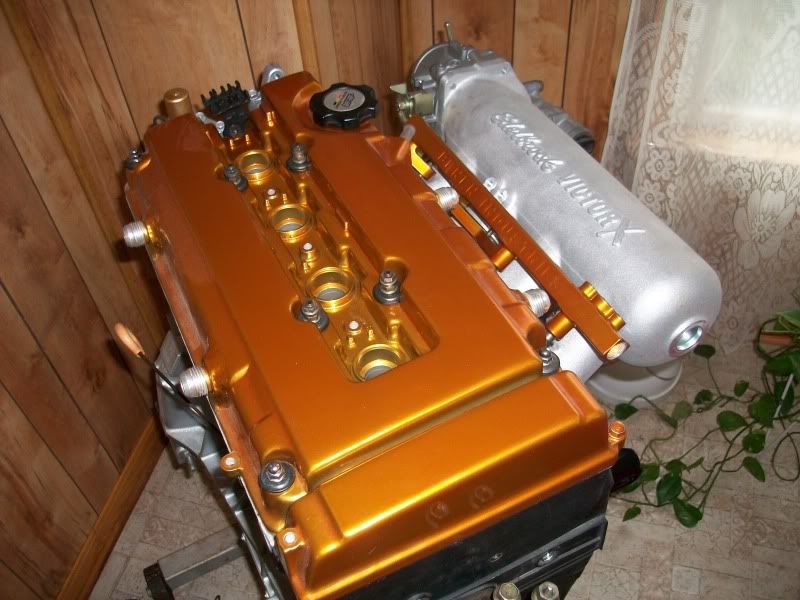
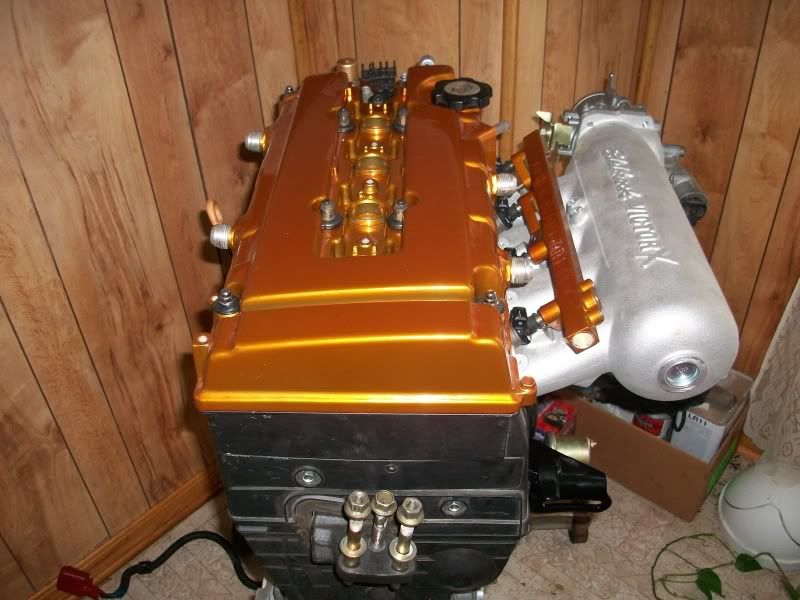
b]2/17/10:[/B] Some parts came back from the powder coater today. Everything looks good except my fuel rail, its just too light compared to my valve cover. So it will be taken back tomorrow to be fixed. Other then that its all good. I had the following things done this time:

Upper Alternator Bracket
(2) Transmission Braces
(2) Transmission Brackets


Pics:


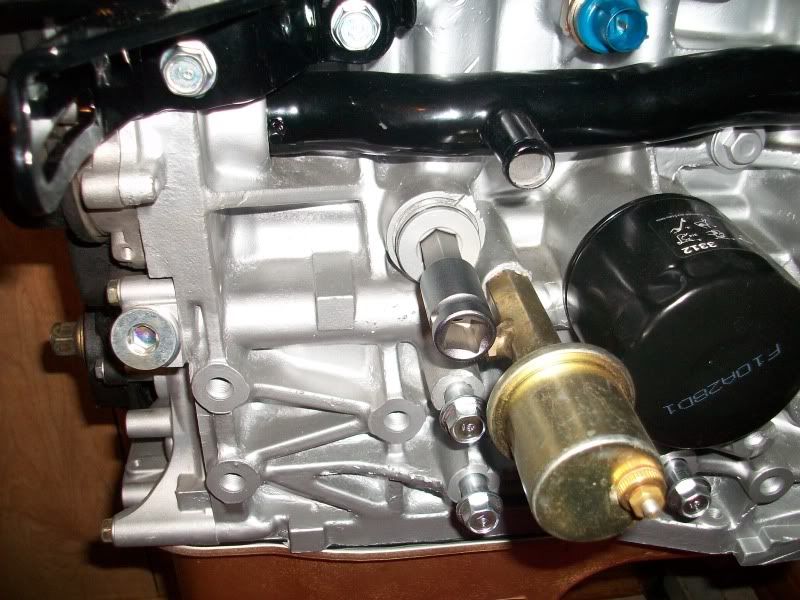
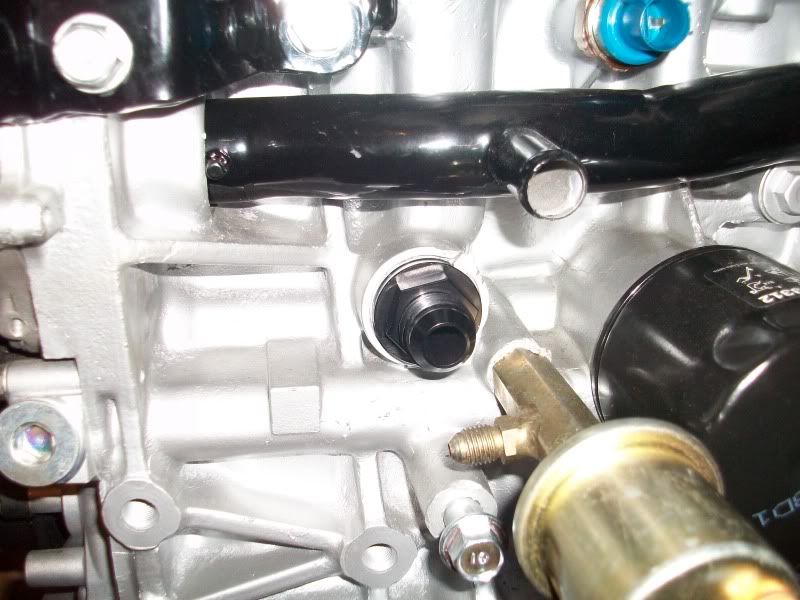
2/22/10: Trying to widdle the list of "things to buy" down a bit, I started to order a few of the smaller things on my list. First I called up Speed Theory for one of their block fitting kits. I got it in black, but they do offer them in anodized purple. If you haven't seen these kits I highly reccomend you check them out here: http://www.hondamarketplace.com/showthread.php?p=41659779#post41659779. They should be here by Thursday!!

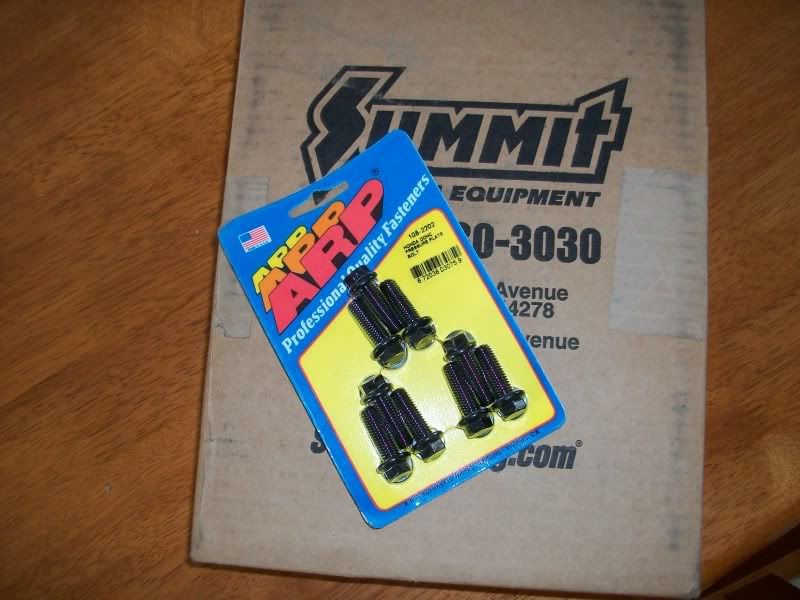
Next I placed an order with SummitRacing for a set of ARP pressure plate bolts. I love everything ARP has to offer and don't think there is a better quality bolt on the market. I chose summit because they are local to me and should be here in a day or so.

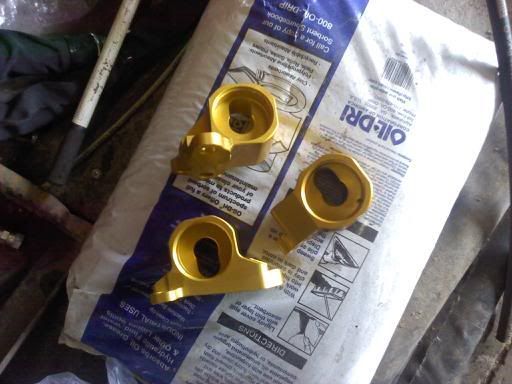
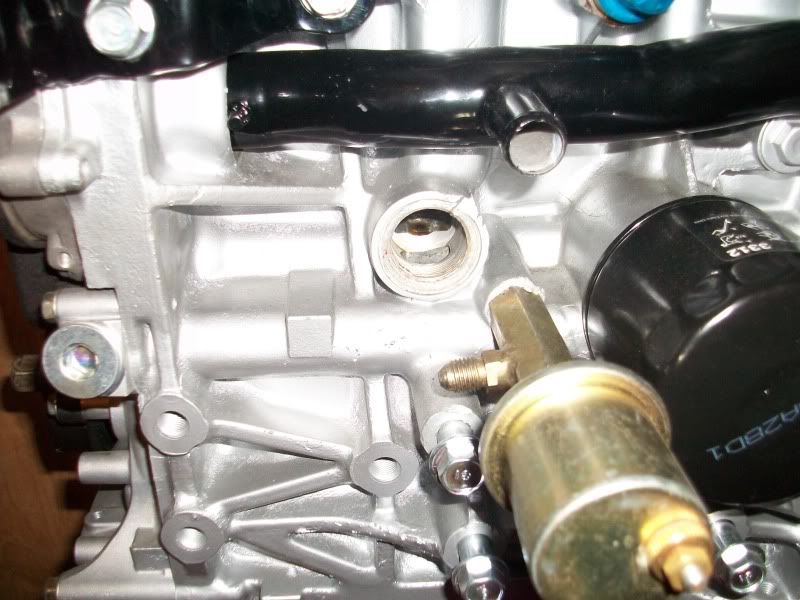
Heres a picture of what the block fittings look like:


DaddyBuiltRacing

Resident Asshole
2/23/10: The order for ARP Pressure Plate Bolts placed with Summit yesterday arrived today.


2/24/10: Package from Jegs arrives. Nothing major, just the remote battery terminals I had ordered 2 days ago.


DaddyBuiltRacing

Resident Asshole
2/24/10: Package from Jegs arrives. Nothing major, just the remote battery terminals I had ordered 2 days ago.


3/1/10: Gotta start the month of right lol, tonight I placed my order with Gearspeed aka Synchrotech Inc. What did I order you might ask, well let me tell you what I got:

1-5 synchros 1st/2nd brass 3/4/5 Carbon coated
1-5 synchro springs
Counter shaft bearing clip
Top and bottom bearings for both shafts
Dust Boot
Seals

http://shop.synchrotech-transmissions.com/BSK-SYN101-Type-R-GSR-B16-Bearing-Seal-and-Carbon-Synchro-KIt-BSK-SYN101.htm
 

DaddyBuiltRacing

Resident Asshole
3/4/10: Synchrotech FTMFW!!! The order I placed a few days ago arrived today. Everything was packaged nicely and securely, and they even tossed in a T-Shirt lol. I highly recomend using this company!! Anyways heres the pics:


DaddyBuiltRacing

Resident Asshole
3/9/10: I arrived home from Georgia to parts. MFactory magnetic drain plugs and t-shirt had arrived while I was out of town. lts not a major thing, but its one less thing needed now


1 more update coming later today!!


3/9/10: Well I said another update would be coming today and here it is. Headed to Slowmotion today to pick up the wifes clutch, while there decided to just go ahead and order mine. I went with the Competition Clutch Stage 5 w/Upgraded Pressure Plate. It should hold up well for my power levels this year. Since I ordered parts I got a free t-shirt, my collection of car related t-shirts is growing, this make 3 in 10days lol


DaddyBuiltRacing

Resident Asshole
3/11/10: I had the day off today and the weather here was absolutely perfect to work on cars, so thats what I did. I started by removing the fusebox from under the hood, stock fuel filter and evap canister from the engine bay as well. After that me and my dad installed the twin walbros. Let me tell you, those things are a whore to get in the stock tank. We had to remove each bracket, drop the arm and pump down in 1 at a time, move the hose around to get it from twisting the bracket. After some muscle, grunting and a few choice words that pumps are in. Also for those of you that plan to go with the full blown setup, twist the 2 red wires together and connect them to the yellow wire on stock harness, the 2 blacks twist together and connect to black wire on stock harness. Pretty simple but might save someone time down the road.

I plan on making a thread for wire tucking as well or atleast group everything together in this build thread once I start doing the whole tuck. But for now i'll show you some of the progress:

Here is the fuse box installed in the car from the get go. Start by removing the 3 screws that hold it into place. There is 2 in the front and 1 up on the firewall attatched to a mounting bracket:


After you get the box unbolted lift it up and flip it over. The box is actually 2 pieces and the wires simply de-teach at that point:


After removing the harness pull the box out and thre ya have it. You are now ready to relocate it inside the car:


Like I said I also removed the Evap canister and stock fuel filter while I was under the hood:


Now for the fun part, the fuel pumps.
1.I started by removing the back seat, there is a 10mm bolt damn near in the middle between the top and bottom piece of the rear seat (helms manual does not show you how to remove lower half of seat fyi).
2.After removing the 10mm bolt, lift up on the bottom half of the seat, then slide the seat belt buckles down through their slots.
3. After doing that lift forward to get the clips that hold the seat in place to pry out.
4. Once you have done that remove the 3 phillip head screws that hold the cover over the stock pump.
5. Disconect the stock relay to the oem fuel pump and the remove the 6 10mm nuts that hold the pump into place.
6. Once you have done that take a 17mm wrench or socket and remove the stock fuel line and pliars to remove the other line.
7. With the lines disconnected pull up on the pump to remove it from the tank, it may take a little wiggling but it comes out pretty easily.:


Installing the Full Blown setup proved to be quite a task. The first thing you will notice is that there is no way in hell 2 Walbros are going to drop down in a stock tank assembled on this hanger. The solution to getting it to fit is to:

1. Remove the 2 allen head screws from both the left and right side brackets that the pumps are attatched to on the hanger.
2. Loosen the clamps that hold the rubber line from pump to hanger head (barbed nipple fittings on the head)
3. Rotate the clamps to allow more clearance
4. Retighten clamps
5. Drop 1 pump in at a time with it not connected to the hanger head
6. Once you have the first pump in there drop the 2nd one down next to it
7. Lower the hanger head down towards the brackets
8. One bracket at a time force the bracket onto the hanger head and reinstall the 2 allen head screws
9. Repeat step on on other side
10. With the 2 brackets installed on hanger drop it down and put the 6 10mm nuts on
11. Take the stock relay plug and cut it off
12. Strip the Yellow and Black wires
13. Take the 2 Red wires, twist them together and connect them to the Yellow wire, this is your power
14. Take the 2 Black wires and twist together then connect them to the Black wire, this is your ground
15. The pumps are in!!


DaddyBuiltRacing

Resident Asshole
3/12/10: Another day off work meant another day of doing stuff to the Integra. It wasn't a whole lot, but every little bit helps in the end. I took my Innovative Mounts up to my dads friends shop and pressed the bushings out. After that I headed straight to the powder coater to drop them off so they can be color matched to my valve cover.


After that I came home and put the most important and badass mod on the Integra. Yes folks the Baby On Board sign lol:


3/12/10: I went and visted a friend today that I hadn't seen in a few weeks. While at his garage I started looking around to see what random parts he had haha. Laying on the floor was a manual rack, a little whealing and dealing later and I came home with it, he got 1 of my Aeromotive Fuel Filters in exchange. I was originally planning to just loop the power steering line and keep the power rack, but for what it cost me its well worth just putting the manual one in there instead.


DaddyBuiltRacing

Resident Asshole
3/15/10: Good news came today!! After a few emails back and forth with Mike from quad-pod.com about a couple of his products, I landed a sponsorship deal. Can't really disclose the terms of this agreement, but needless to say I am a very happy man!! I will be proudly rocking 1 of his Clock pods and 1 of his Dual gauge cluster pods. I am going with the carbon fiber face on the clock pod just to help break the tan up a tad bit.

Be sure to check him out, they make cluster pods for DC and EK's. They come with your choice of 1-4 Gauge pods built in. Its a direct bolt in with no modification needed. Also for the clock pods they come in Black and Tan!!

www.quad-pod.com

Here is some pictures of the products I will be getting from quad-pod (the clock pod shown does not have carbon fiber facia)


DaddyBuiltRacing

Resident Asshole
3/16/10: This afternoon I was bored and felt like wrenching on the teg. I started by removing the worn out stock torque mounts. By worn out I mean trashed torque mounts lol.


Next I took out the ABS components. Heres a couple pictures to show you what bolts you need to remove in order to get it out:


DaddyBuiltRacing

Resident Asshole
3/17/10: Trying to get this wire tuck knocked out so I unhooked the corner lights today to free up the harness from engine bay then removed the dash.


3/17/10: Trying to get this wire tuck knocked out so I unhooked the corner lights today to free up the harness from engine bay then removed the dash.


DaddyBuiltRacing

Resident Asshole
3/21/10: Bone Strikes!! The Unicorn (mythical beast that is often heard of but rarely seen) as I just started calling him aka Mista Bone came up today to tear my trans apart and prepare it for build. I was told that the trans had a bad 3rd gear, the original owner of the trans failed to mention 1st, 2nd and 4th being bad as well. We also came to the conclusion that this trans had been torn apart before due to the ammount of red sealant gunk that was found upon opening.

So now I will have to get ahold of Synchrotech and see how much this is going to cost me..hopefully its not very painful being ass raped!!

Anyways lets get to some pics since everyone loves pictures lol

All the guts torn out of trans:


The inside of the case gutted:


All the junk parts (1-4th gears, sliders and hubs):
 

DaddyBuiltRacing

Resident Asshole
3/22/10: Got a phone call from David @ Davids Powdercoating to let me know that some of my parts were done. Went down there and picked up my Fuel Rail, Rear Trans Bracket and Lower Alt Bracket. My mounts were done but he wasn't happy with the quality so he is going to do them agani for me (I thought they looked good personally).


After that went to Autozone and picked up a 14mm Hex Head to take the oem block fittings out. Came home and took those out.

Heres how ya do it for those that don't know, its pretty easy, just gotta use some muscle to get the stock fittings out.

14mm Hex head and ratchet:


Put the headhead fitting inside the stock block fitting and then loosen it (this is where the muscle part comes in):


This is what the block should look like once the stock fitting is out:


Then simply install the Speed-Theory block fitting:


This is what it looks like with both installed:


I also installed my new MFactory magnetic oil drain plug. Let me tell you this sucker is strong as hell lol, so strong that it took me a min or 2 to actually get it to go in the hole and screw into place.


DaddyBuiltRacing

Resident Asshole
3/23/10: After shipping some parts out I headed to Honda. Once there I went ahead and placed an order for some random things that I need. I got the following:

Lower Alt Bracket Bolts
Bolts that hold transmission and block together
Clutch Fork
Clutch Fork Spring and Bolt


3/24/10: Parts came in today that I had ordered yesterday from Honda. After picking those up me and the wife headed to Jegs to pick up some gauges and fittings for the back of my head. After getting home I realized that my dumbass bought the wrong size fittings so I'll be going back to Jegs tomorrow to exchange it.

Alt Bracket Bolts, Shift Fork, Shift Fork Dust Boot,Shift Fork Spring/Bolt, Transmission to Engine Bolts:


Autometer Mechanical Oil Pressure Gauge, Jegs (Carbon Fiber) Liquid Filled Fuel Pressure Gauge, Plug Fitting


Some might be wondering what the plug fittings are for, well my head came off a LS/Vtec so they had the oil line running to back of the head externally. Since I put it back on a GSR block I now have to plug that fitting since I am not going to run an external line.

Also came home and installed my lower alt bracket. I noticed that 1 of the bolts from Honda is gold, wtf?! Lol oh well


DaddyBuiltRacing

Resident Asshole
^^^ Lol we havent even gotten to the good stuff yet, stay with me though, im trying to update all this as fast as I can


3/24/10: Parts came in today that I had ordered yesterday from Honda. After picking those up me and the wife headed to Jegs to pick up some gauges and fittings for the back of my head. After getting home I realized that my dumbass bought the wrong size fittings so I'll be going back to Jegs tomorrow to exchange it.

Alt Bracket Bolts, Shift Fork, Shift Fork Dust Boot,Shift Fork Spring/Bolt, Transmission to Engine Bolts:


Autometer Mechanical Oil Pressure Gauge, Jegs (Carbon Fiber) Liquid Filled Fuel Pressure Gauge, Plug Fitting


Some might be wondering what the plug fittings are for, well my head came off a LS/Vtec so they had the oil line running to back of the head externally. Since I put it back on a GSR block I now have to plug that fitting since I am not going to run an external line.

Also came home and installed my lower alt bracket. I noticed that 1 of the bolts from Honda is gold, wtf?! Lol oh well

 
Top