guy_from_nerks 4dr build thread...the quest for 10's

DaddyBuiltRacing

Resident Asshole
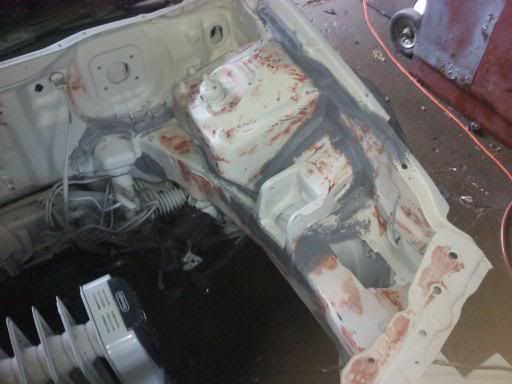
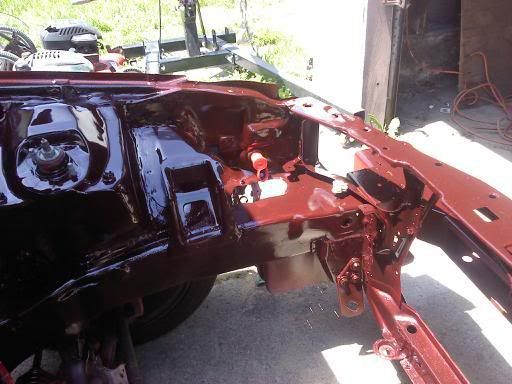
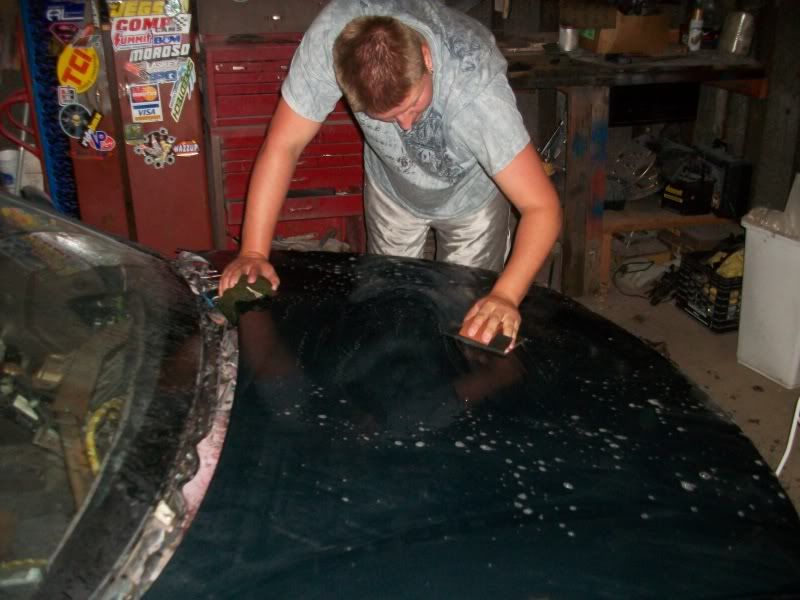
5/16/10: I was on a mission to get shit done today, and I think I did pretty well given I started working on this thing at almost 2pm. I got the engine bay sanded, spot puttied, primered. Tomorrow I am going to run seam sealer and do a little touching up with putty to fix some blimishes.

Heres some pics:

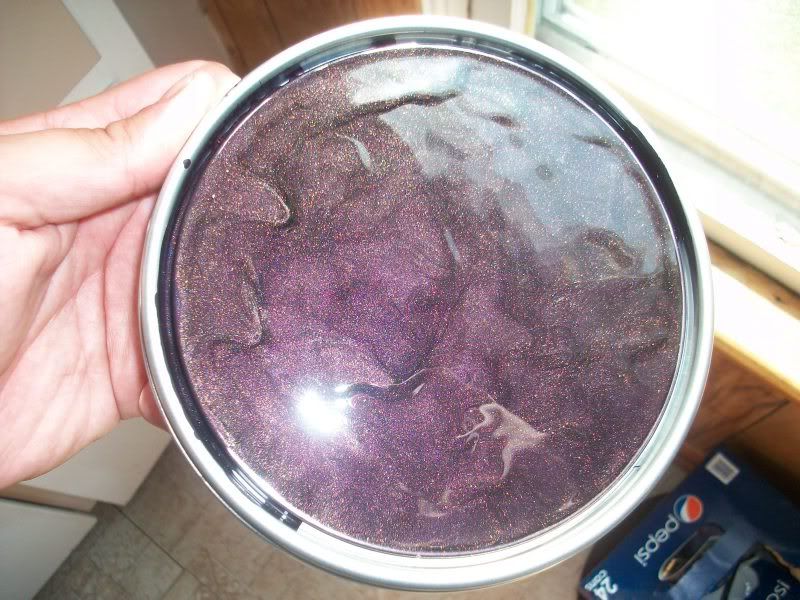
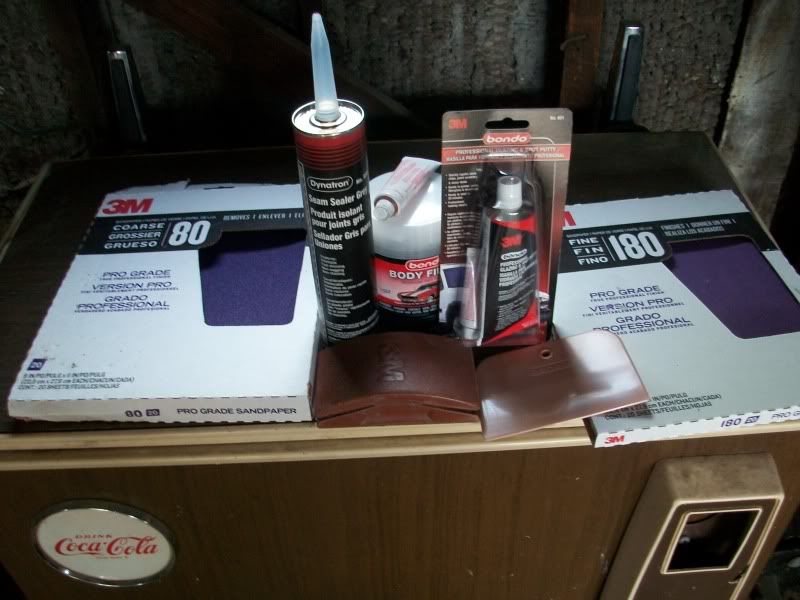
Supplies included 80grit, 180grit sandpaper, seam sealer, bondo


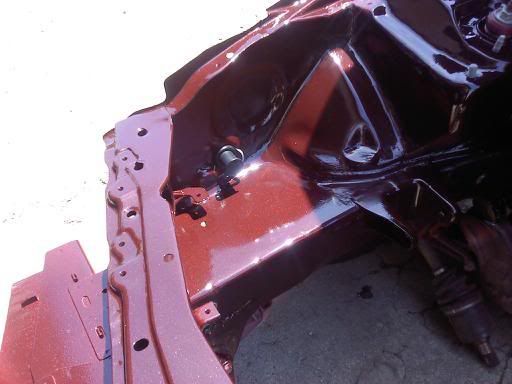
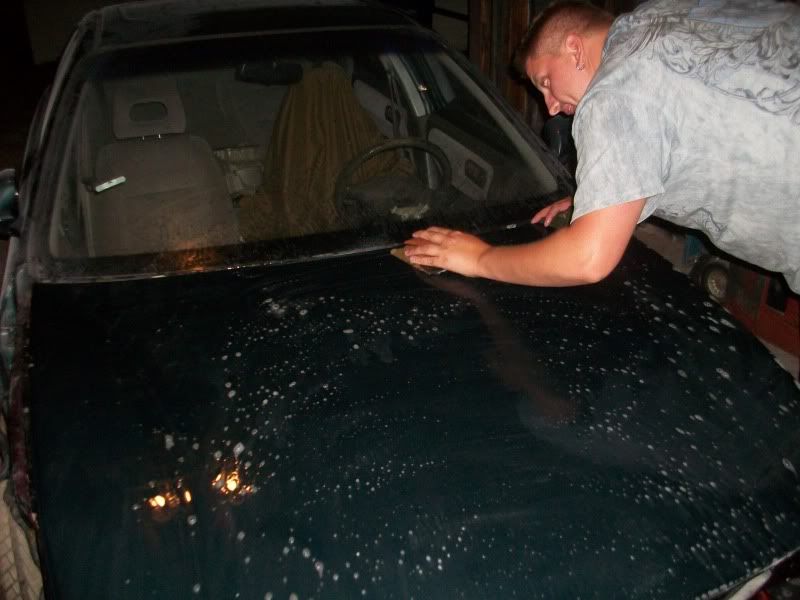
After getting the body filler sanded I did some spot puttying


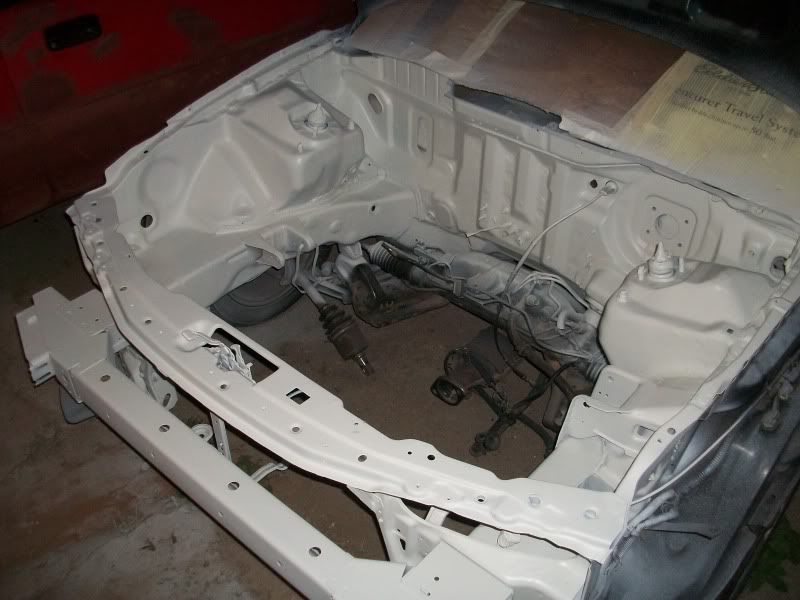
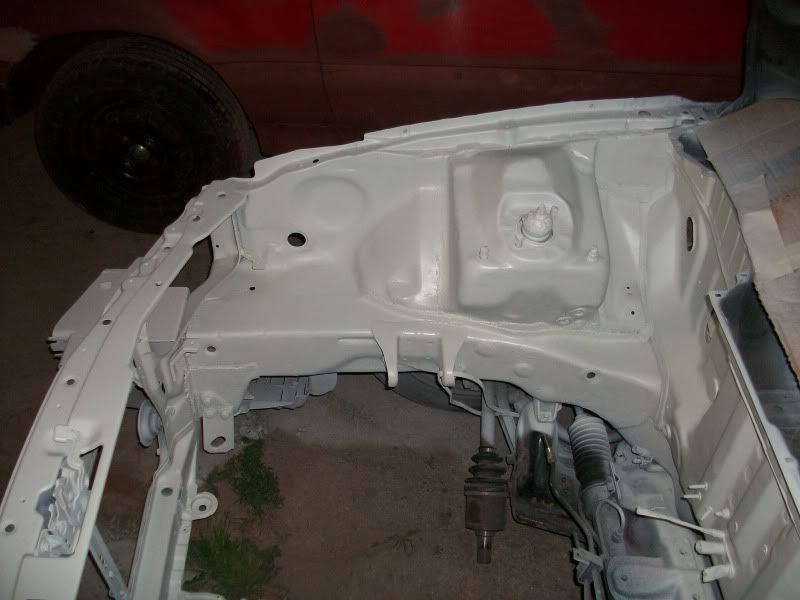
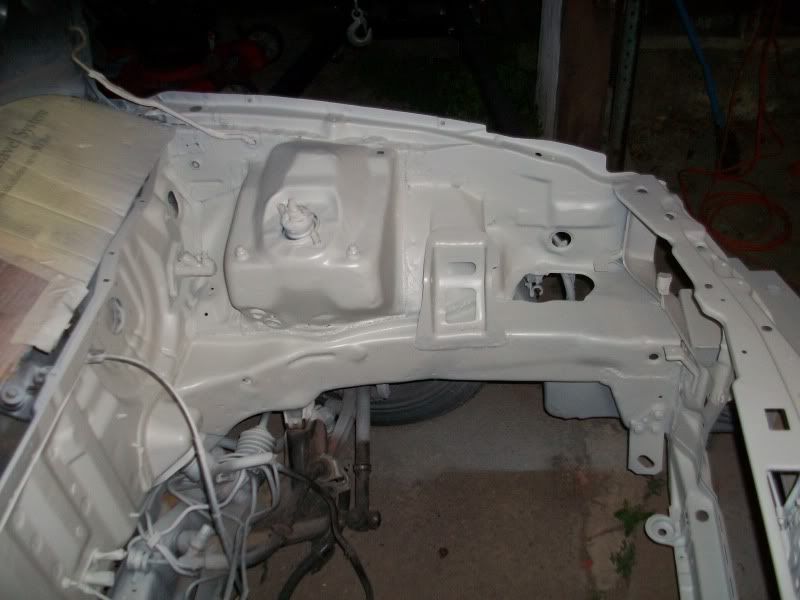
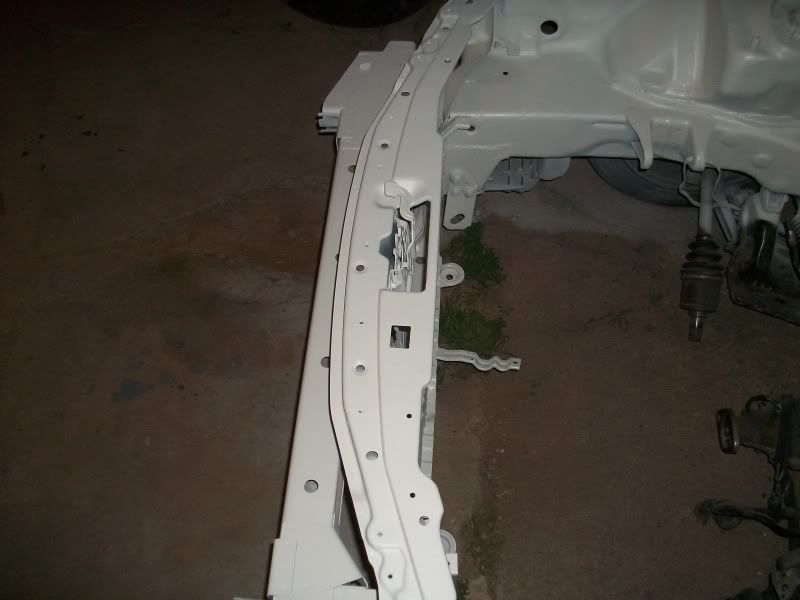
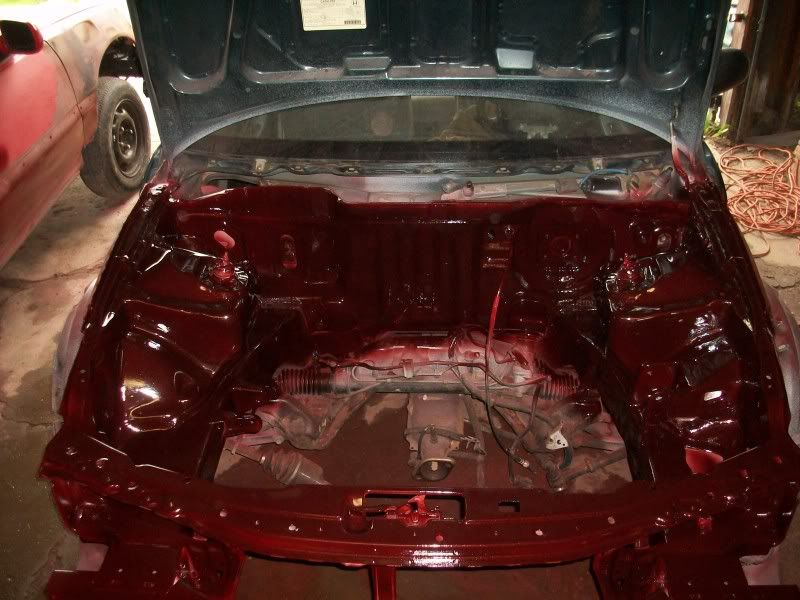
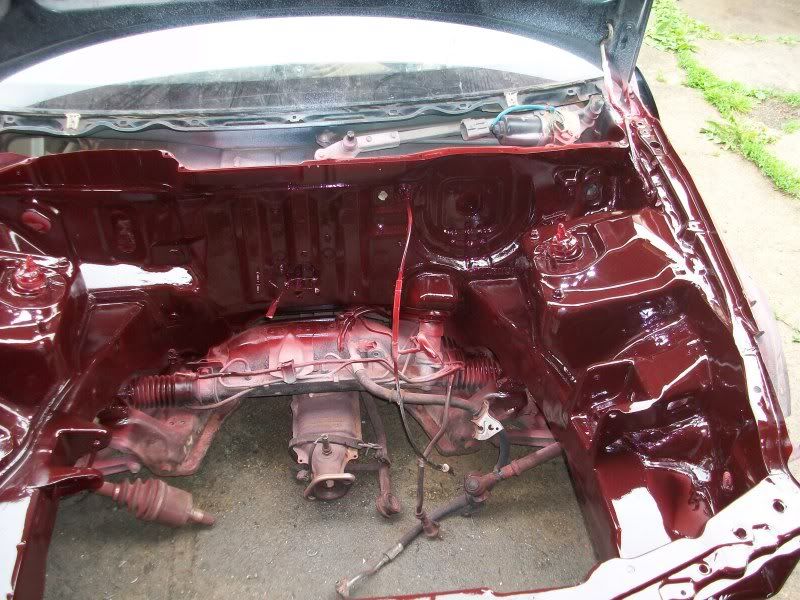
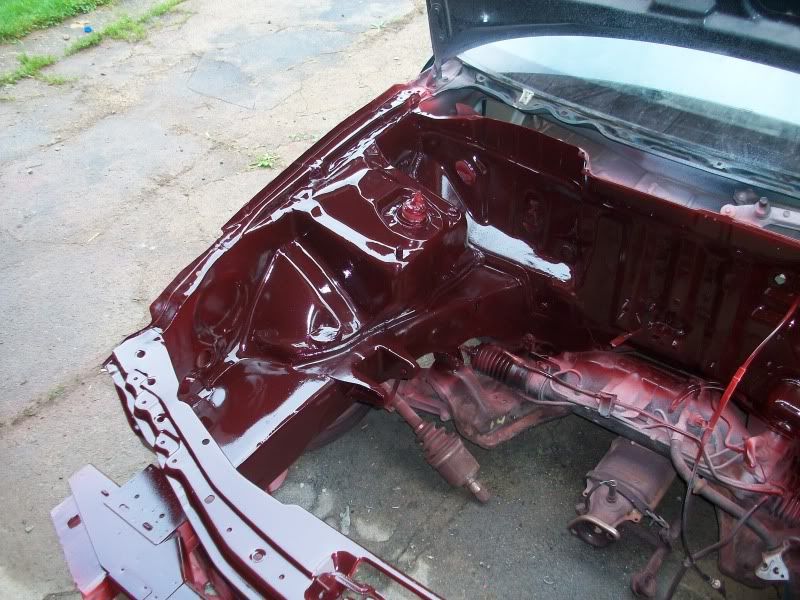
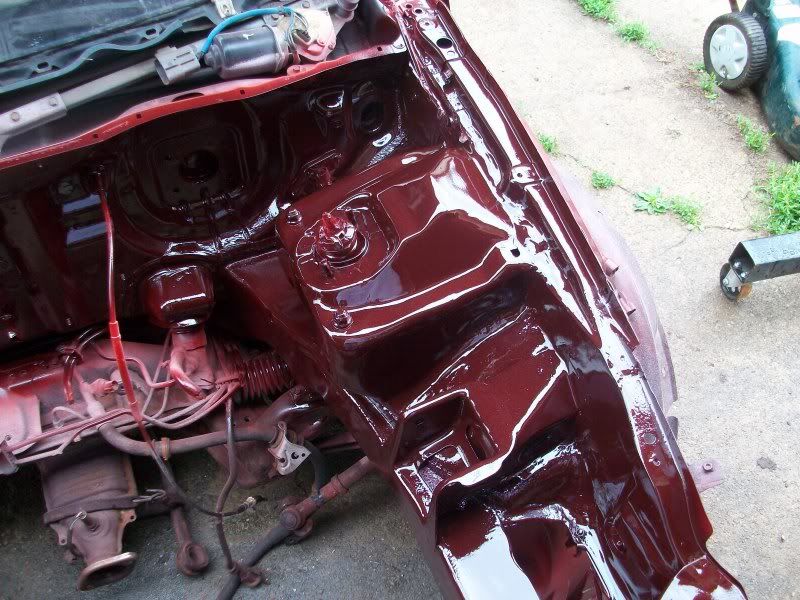
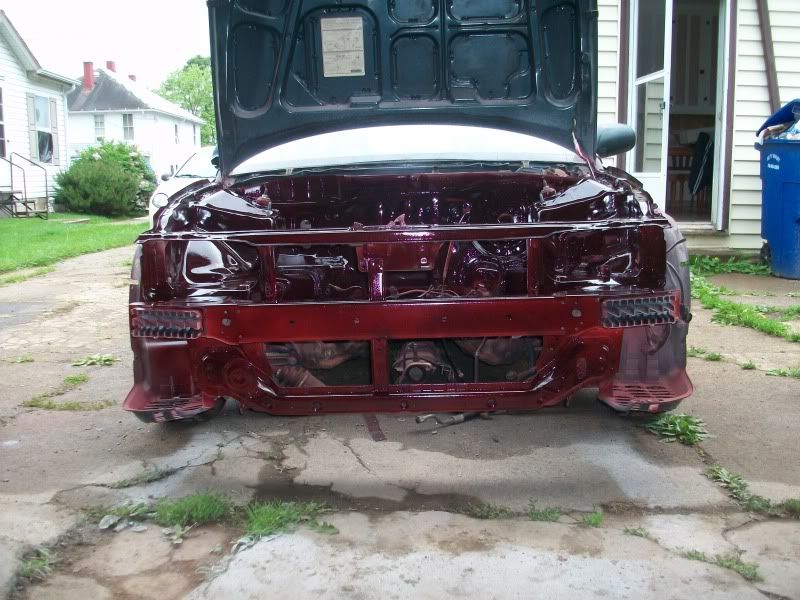
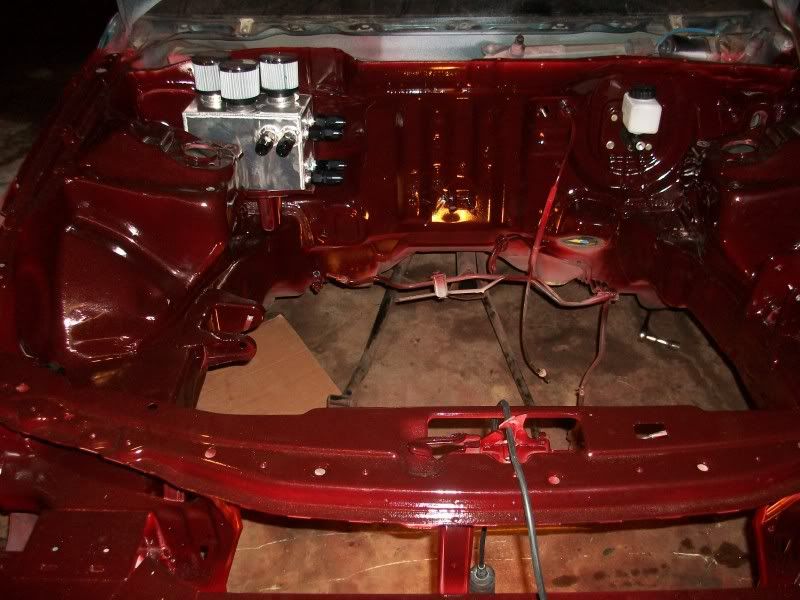
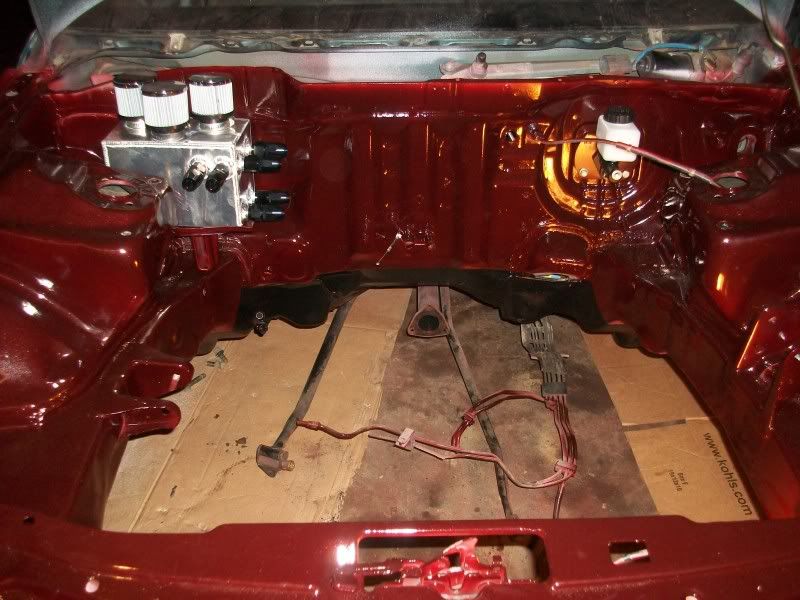
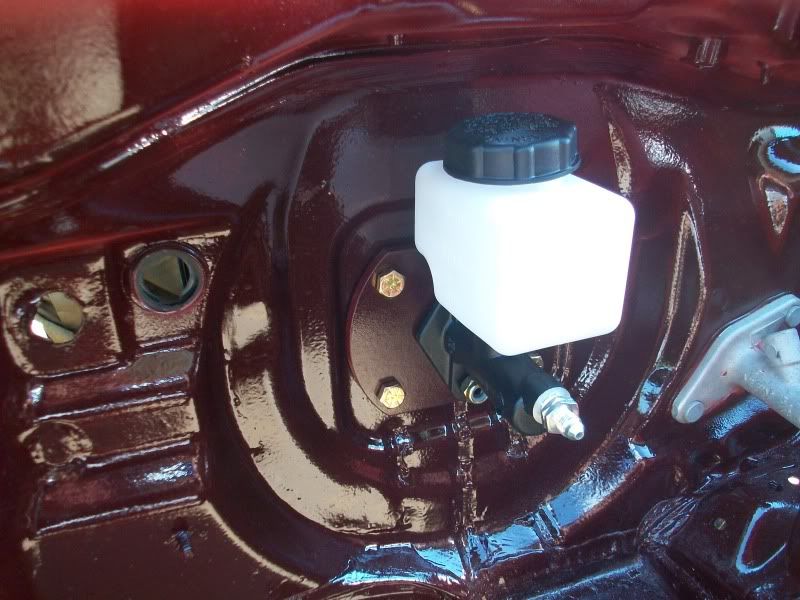
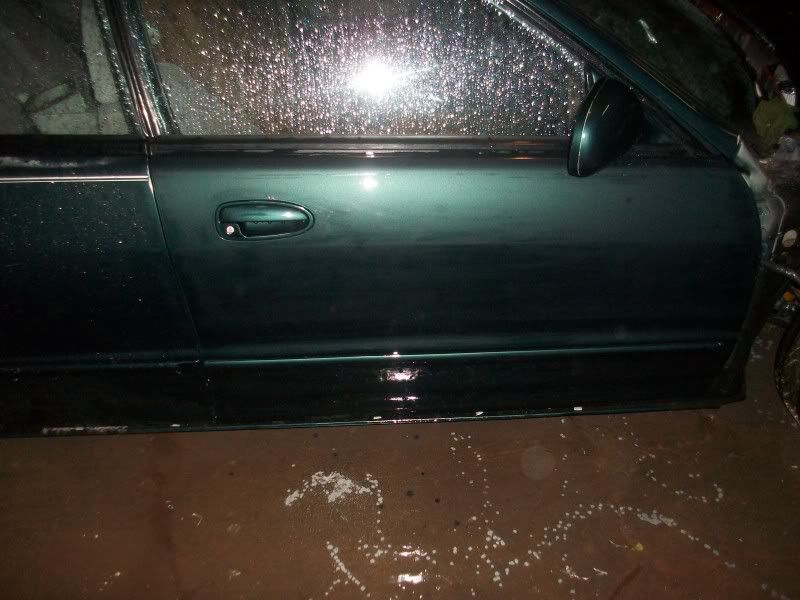
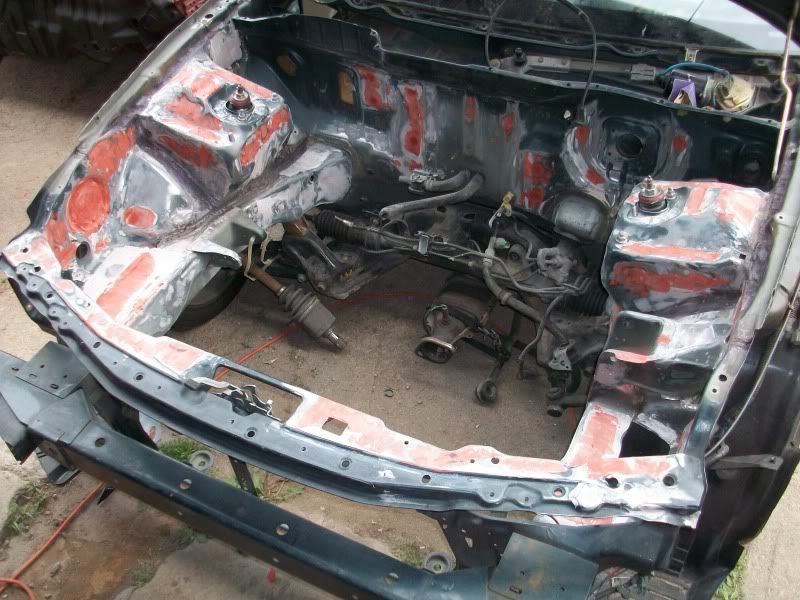
Once every thing was spotted in and sanded I mixed up some primer and went to town, 2 coats later this is what you get:


DaddyBuiltRacing

Resident Asshole
Here i'll give you a teaser pic while I wait on seam sealer to dry


5/18/10: I started working on this before heading to the dr's office and finding out we was being induced to have our baby. After getting the gf all settled in at the hospital and her mom showing up I headed home to grab a few things to take back with me and figured might as well spray the bay lol. So 5 coats later this is what it came out looking like, I still have to apply polishing compound but I am going to let it sit a few days and cure out.

(be prepared I took a lot of pics, and dont worry about the over sprayed parts, they are all getting replaced anyways lol.)


DaddyBuiltRacing

Resident Asshole
5/20/10: Well I had to run home and let our dog out, figured while hes doing his business I might as well do work as well lol. Installed my booster delete plate and master cylinder, the Go Autoworks catch can, and my jegs remote batter terminals.

The catch can fits pretty good, only issue is one of the holes that holds the can onto the battery tray didnt line up exact so I had to do a little finaggling.


After I got that all installed I decided to throw my booster delete plate on as well as teh wilwood master cylinder


Then I was looking at the bay and realized that my battery terminals were not going to fit on the firewall due to the catch can. So it was time to figure out where to mount these bad boys. I decided on the 2 little holes that sit on opposite sides of the bay. Just by chance they are the exact size needed to fit the terminals into.


DaddyBuiltRacing

Resident Asshole
5/21/10: Well we finally got to come home from the hospital today!! It was a little rainy and we had a full house so I figured I would sneak out in the garage and do some work on the Integra with my dad. We got the old subframe and rack out along with all the front suspension and also got the powder coated subframe with manual rack installed.

Here is the entire front end completely removed from chassis. Ill be spending tomorrow cleaning/painting suspension parts. I have an extra set of GSR knuckles/hubs coming as well that will be sent out for powder coating.:


Heres the bay with subframe/rack removed:


I noticed that the paint was a little light where the subframe goes, out of paint and wanting to get this done I sprayed some under coating on the "tunnel". I actually think it makes the subframe stand out more:"


Then it was time to re-install the freshly powder coated subframe, it looks more yellow in these pics then what it really is. In person its the same color as my valve cover which is golden. If you look at these pics compared to what it was just a week ago you'll notice its about 100% cleaner looking:


DaddyBuiltRacing

Resident Asshole
5/22/10: Well today I woke up and got to work on the car. Started by applying some undercoating to the inner wheel wells. After that I got all the suspension tore apart, cleaned up, primered and painted. I also got the rack bushing cut down to size so it now fits properly, got all the suspension back on the car and even found time to mount my fuel filter.


Under Coating Applied:


Suspension All Tore Off:


Suspension Painted and Re-Installed:


Busing Cut to Size and Fuel Filter Installed:


DaddyBuiltRacing

Resident Asshole
5/27/10: What a hot ass day outside!! Decided to clean up my transmission in hopes of having it in the car by this weekend. Also going to order my Torco RTF trans fluid, oil for break in and oil to run after the initial breakin, anti-freeze and some brake fluid.

Transmission Before:


And after 2 coats of high temp aluminum paint:


5/28/10: Finding Torco fluids was more of a challenge then I had originally thought. I tried finding it locally to no avail, found 1 place here in Ohio that had it but ultimately decided to order it through PWJDM. Bought 4 liters of break in oil and 3 liters of the RTF trans fluid. Gonna go here later and get my starter tested to make sure its still good, paint it so its fresh and clean, buy my antifreeze and regular oil as well as another oil filter. Hopefully the powder coater calls me later today and says that my parts are done, if they are I will be putting the motor in the car this evening, so keep your fingers crossed!!!


5/28/10: Well the sun went down and so did the heat, it was time to work on the Integra. With the help of my dad we knocked out the brake tuck. I don't have all the pics uploaded so you'll have to wait til tomorrow for finished pics. I did get some loaded though to hold you over. Now before anyone says anything about not running a flare union through the firewall theres a reason for that. We drilled the hole to run the line through and discovered that its right behind the gas pedal, so space is already limited that a flare union wouldnt work for me. I will be putting a grommet in though to hide the hole and to keep the line from rubbing and eventually splitting open.

Started by giving the 4040 a fresh coat of aluminum paint to clean it up, even though no one sees it I figured why not lol. Same with the metal bar that goes in front of the AC and Heat boxes.


Here is the T that was needed in order to have front and rear brakes. The willwood MC that I am running only has 1 fitting running off it unlike the stock Honda MC's that run front and rear


Got the 4040 positioned in the cabin and the T mounted to the line running off the Master Cylinder


Speaking of line off the master cylinder, here is the first line we bent up and ran. I am pretty happy with how it came out honestly


Oh and a little more attention to detail...gold bolts to hold the booster delete in place


DaddyBuiltRacing

Resident Asshole
6/6/10: Engine bay is repainted and I am 100x's happier!!! The color is exactly what I wanted, I will post better quality pics up tomorrow but for now here ya go


Other pics will come back soon as photobucket stops being dumb lol


6/7/10: Fluids arrived today, Torco RTF and Torco break in oil that I ordered from pwjdm. I am shooting for having the motor in the car wednesday!!
 

DaddyBuiltRacing

Resident Asshole
6/14/10: I had finally had enough of the motor sitting on the engine stand. So with today off of work, I decided to do something about it. The fun started around 530pm, had to put the flywheel and clutch on, the transmission to the block, and make 1 last min run to autopart store for of all things...sockets lol.

Anyways pretty excited to finally see it down in the bay so excuse all the pics lol

Motor and trans bolted together and ready to go:


After that it was time for her to go in (my dad lending a hand):


A little sweating, grunting and pushing (no not having a baby or sex) and she was in the car!!!:


Huge thanks goes to the following for lending a hand:
My Dad
Nick Oman
Nick Bailey
Matt Pound
Jordan Noblick
Max and Manny (hey someone had to supervise)
 

DaddyBuiltRacing

Resident Asshole
6/17/10: With a hookup from a buddy who works at a local parts store I was able to get a brand new Starter and Alternator. I also got all the lines for my catch can ran (AN fittings and line from Jegs suck to work with), but I got em figured out lol. Just took a little cussing and a few thrown tools, but they are done. I also started blocking out the car to get it ready for body work and paint. I'll post pics up tomorrow


Im feeling generous so heres some pics from today/tonight:

AN Fittings and Hose ran for catch can:


Body work time!!

Started by wetsanding the hood down:


Hood wetsanded and hosed down:


Then went to the doors and started removing the hideous pin stripes that once laid on them (yes I am working in my garage barefooted lol):


Gonna wake up in the am and get back on wetsanding, hopefully it dries out by the afternoon so I can start body filling in the dents and dings. More pics to come tomorrow
 

DaddyBuiltRacing

Resident Asshole
6/22/10 Spent more money today than I planned, but sometimes thats just how it goes lol. Started out by ordering my starter and alternator bolts from Honda so I can get those 2 parts on the motor and hopefully start it up this weekend. After that I went to paint store and picked up materials needed to paint the car, this is where the more money then I hoped part came into play lol. I forgot just how expensive my paint was per qt, was hoping to spend about $350, ended up spending damn near $200 more then that.

In that $530 spent I got:
1 Gallon Primer
2qt Base
1 Gallon Clear
2qt Reducer
1qt Hardner
Mixing Cup
6 Sheets of Sandpaper

So next time your bitching about someone wanting $1500 bucks to paint your car, think about the price of materials!

FYI the color is not purple, it has a shit ton of metallic in it and was not shaken up before I took these pics. Its brown in person lol


DaddyBuiltRacing

Resident Asshole
6/23/10: Nothing major but I did get a couple key things knocked out. Went to Honda and picked up my starter and alt bolts, after that went to advance auto to return sockets I didn't need. Exchanged those for an alternator belt, came home and put starter and alt on with help from my buddy Nick. Had to bang on the alt to get it to slide in the lower bracket, damn powder coating lol. Attempted to get my throttle cable and bracket on but now I am having all sorts of fits with that. The bracket/cable sits way too close to my fuel rail and rubs and the cable wants to fall off the butterfly on tb if you goto give it gas. Hopefully I get that figured out in the next couple days. I did a little more body work today as well and still got more to go tomorrow


6/24/10 Forgot to add this...Emailed Gred at Go-Autoworks to see if he could help me get this damn thing done. The last part I needed in order to have it in running mode was a clutch line. Couple hours after emailling him I get a reply that he is going to help me out by giving me a generous discount on one of his braided clutch line kits. So big ups to Greg at Go-Autoworks!!
 

DaddyBuiltRacing

Resident Asshole
6/26/10 Clutch line arrived today which is a huge relief. That was the final part I was waiting for in order to fire this thing up. I do have to go pick up my axles this week so it won't be running til midweek. Also got the body work done so tomorrow I am going to wake up, hose her down, let it sit in the sun to dry and then start taping it off so I can get it in primer. After that gonna block it out 1 more time just to make sure nothing was missed and then rework any areas that need attention. Hoping to have it running, tuned and in paint by next Sunday

Will have pics up tomorrow
 

DaddyBuiltRacing

Resident Asshole
6/27/10: What a hot ass day, the heat index was 105 degrees and I didn't feel like doing jack shit to the car. Not to mention we had random rain showers all day long which put a dampen in the entire day. Well about 9 oclock it got cool outside and the rain stopped so I decided to get to work. Earlier in the day I had wetsanded the car and let it sit out to dry. With that already done I started masking windows off. You never know what good ads are until you use them as masking paper lol. BTW Krogers was having a pretty good sale. After that I gave the car a good wipe down with some thinner once over, let that dry and then hit it with a tac cloth just to make sure no loose particles were on the surface.

The 1/4 panel on passenger side had a big ass dent that ran down the wheel well by door, it is no longer there!! There was also a scratch from a pole on the passenger side, apparently someone during this cars life did not know how to drive lol. Alright less typing and more pic showing lol:


*Note* The red area in some of these pics is not body filler, it is actually primer, just so no one gets it confused with spot putty


Hoping to have the car running this week so I can take it to me and my dad's newly aquired spray booth to apply the base and clear. Might do the door jambs in my garage though. It just depends on how bored I get really lol
 

DaddyBuiltRacing

Resident Asshole
6/29/10: Painted the trim around the windows with some 3m spray can trim paint. It looks shiny in these pics because its still wet lol, it'll dry out and look like it did from the factory


6/29/10: More paint work was done today. I got all my door jams, gas lid jam, trunk jam and underside of trunk lid all finished up. Even had enough time to put my door panels back on lol. Oh and in a couple pics it looks purple, but I got a pic for you just to show you how the metallic in sunlight changes the color drastically. Heres pics

Driver Side Rear Door/Jam:


Passenger Side:


Gas Door Area:


Trunk Jam/Trunk Lid:


Oh and that picture I was telling you about:

Looks purple here:


And brown after only 2 coats (car will have 4-5 base coats and 4-5 clear)
 
Top